Set Up a Peered Network for Data Hub Service - AWS
Before you begin
You need:
About this task
Procedure
- In the Network Configuration page, click .

-
In the Configure Network page, update the network settings.
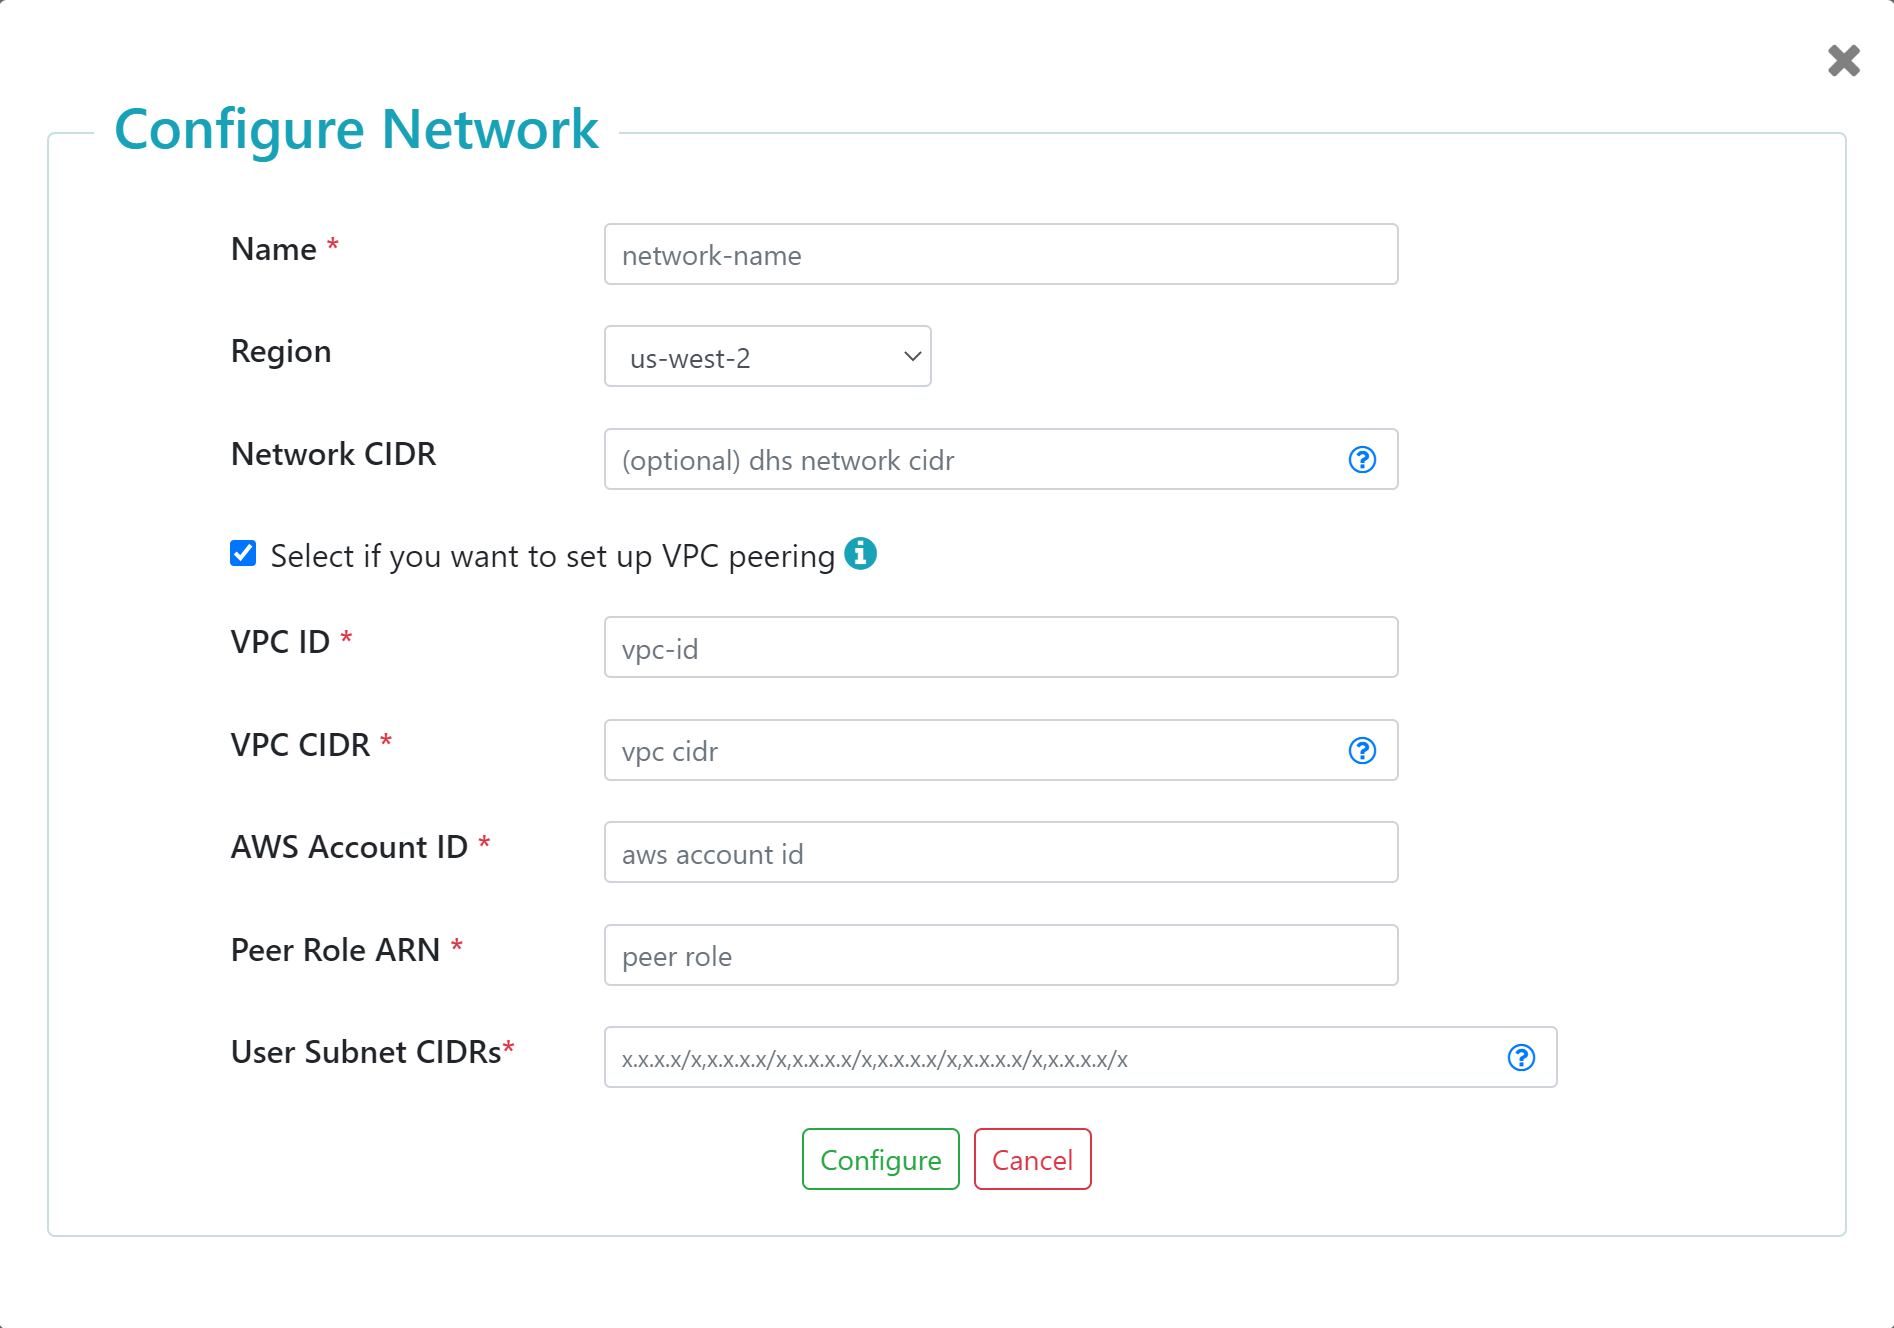
Field Description Name Name for the network. Region The region where your preconfigured network is located. Default: us-west-2. See Supported Regions - AWS.Important: Your client-side VPC and peered DHS network must be configured in the same region.Network CIDR (Optional) The CIDR (Classless Inter-Domain Routing) block for your DHS network. If you specify a custom network CIDR, the block size must be between a /16netmask and/22netmask. Otherwise, we will allocate a CIDR range for your DHS network.Tip: Specify a larger CIDR block to host more services in your DHS network.Example: For
10.128.4.0/22, the public subnet CIDR values are10.128.7.0/26, 10.128.7.64/26, and 10.128.7.128/26and the private subnet CIDR values are10.128.4.0/24, 10.128.5.0/24, and 10.128.6.0/24.Select if you want to set up VPC peering Select to set up VPC peering and create peered endpoints. VPC ID Your client-side VPC's identifier ( vpc-*).Important: The VPC ID must include thevpc-prefix.To find your VPC ID in AWS CloudFormation Console, navigate to the AWS CloudFormation Console.
- Select the stack created when you set up a client-side VPC.
- Select the Resources tab.
To find all of your VPC IDs in AWS, navigate to AWS.
- From the top menu, navigate to .
- In the Resources by Region page, click VPCs.
Example:
vpc-0f23c32843d97f2fbVPC CIDR Range of IPv4 addresses used to set up your client-side VPC. Primary CIDR block for your VPC. Example: 10.0.0.0/23Important: The CIDR range10.128.0.0/10is used internally. If your VPC CIDR is in the10.128.0.0/10range, your block size must be between a/20netmask and/28netmask. The maximum number of IP addresses including all subnets in this CIDR range is 4,096.AWS Account ID See Finding Your AWS Account ID. Peer Role ARN The unique AWS resource identifier that was generated when you created the peer role. For details, see AWS Identity and Access Management (IAM). Example: arn:aws:iam::123456789012:role/MLAAS-PeerRole-peerRole-PUE2MD0KEMI2User Subnet CIDRs Public and private subnet CIDRs used to set up your client-side VPC.
One to six user subnet CIDRs. If you are running your client or application servers across three AWS zones, you must provide all of the subnet CIDRs. If your service is running within a single zone, enter one CIDR. Example:
10.0.0.0/23, 10.0.2.0/23, 10.0.4.0/23, 10.0.6.0/25, 10.0.6.128/25, 10.0.7.0/25Click the following link to view a full list of DHS network resources.
Results
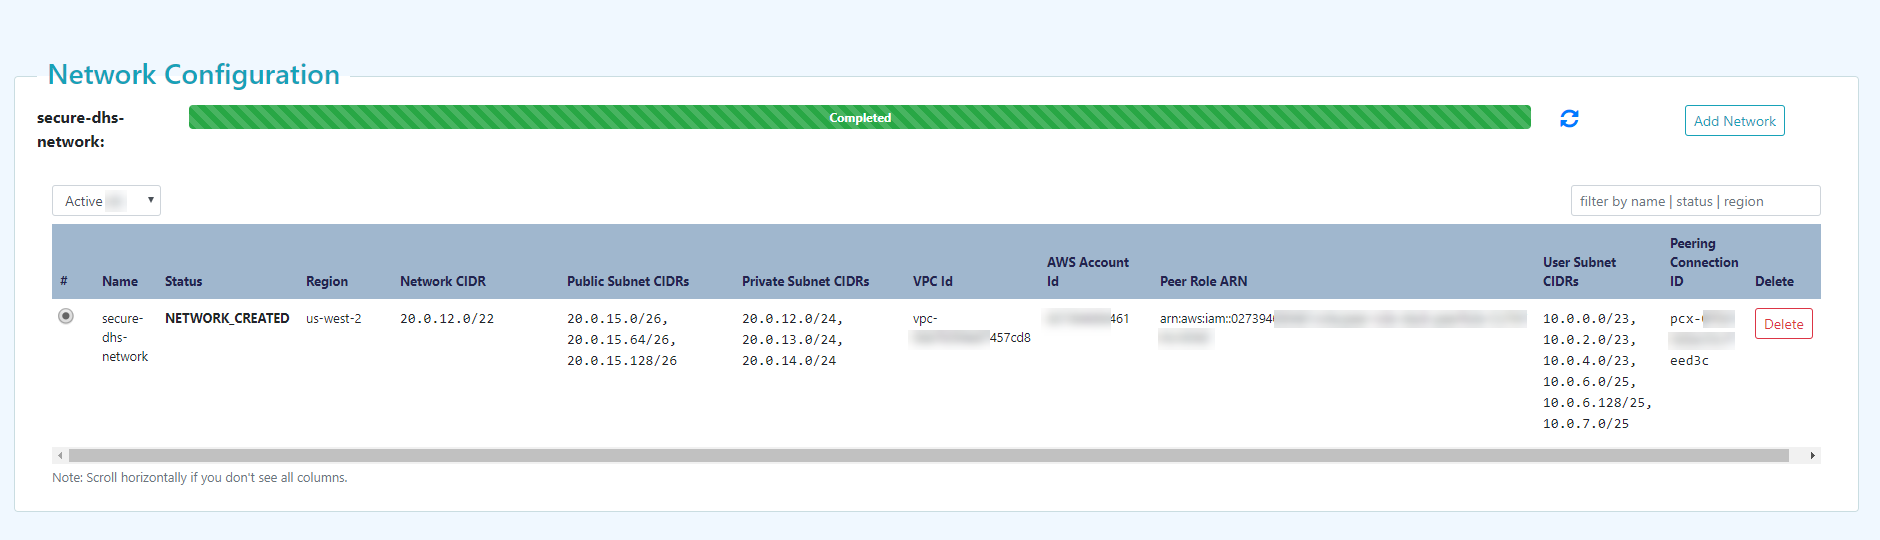
The dashboard displays information about each of the current network configurations, listing the information and status for each configuration. The status of the network in the status bar must be Completed. The public subnet CIDRs and the private subnet CIDRs are calculated from the network CIDR.
- To add a network configuration, click .
- To delete a network configuration, click in the configuration's row under the Delete column.
| Value | How to find | Required to |
|---|---|---|
| Public and Private Subnet CIDRs
Note: If using the
customer-example.template, these values are also known as Service Public and Private Subnet CIDRs. |
|
Configure Your Network Routing |
| Peering Connection ID |
|
Configure Your Network Routing |
| Name
Note: If adding an LDAP configuration, this value is also known as Network.
|
|
Add an LDAP Configuration |