Configure SSH Tunneling with Windows Using PuTTY

Overview

Set up tunneling if you prefer to work directly from your local environment using your own browsers to access the Data Hub Service endpoints.

Before you begin

You need:

About this task

Set up secure shell (SSH) tunneling to access the Data Hub Service (DHS) endpoints from your local environment. In this task, you will use PuTTY with Windows to set up SSH tunneling between your browsers and DHS.
Important: If your DHS uses private endpoints, you can set up SSH tunneling. See Getting Started with Data Hub Service in AWS, and follow the peered configuration.

Procedure

  1. Locate the certificate file for your client-side bastion host. Convert your certificate file into into a public-private key pair that PuTTY understands.
    Note: A typical choice is PuTTYgen.exe.
  2. To set up SSH tunneling, download and launch PuTTY.exe.


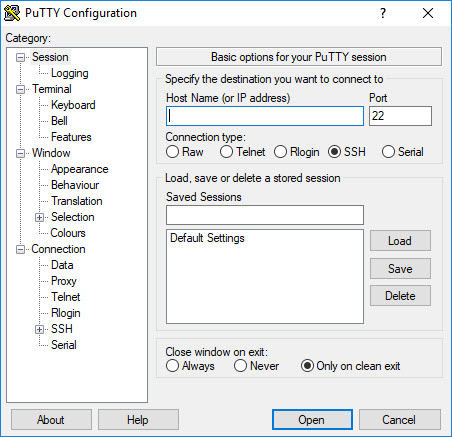
    Note: Use the left pane, titled Category, to show configuration options for each selected category.
  3. Select Session from the left pane.
    • In the Basic options for your PuTTY session page, supply one of the following bastion host labels for Host Name:
      • IP address
      • Host name/Fully Qualified Domain Name (FQDN)

    Click the following link to view a full list of configure SSH tunneling resources.

  4. Select Connection > Data from the left pane.
    • In the Data to send to the server page, specify "ec2-user" for Auto-login username.
  5. Select Connection > SSH > Auth from the left pane.
    • In the Options controlling SSH authentication page, click Browse to open your private key generated in step 1.
  6. Select Connection > SSH > Tunnels from the left pane.
    • In the Options controlling SSH port forwarding page, enter the following source port/destination pairs:
    Source Port Destination
    8000 <ICAlb>:8000
    8002 <ICAlb>:8002
    8010 <ICAlb>:8010
    8011 <ICAlb>:8011
    8013 <ICAlb>:8013
  7. Select Session from the left pane.
    • In the Basic options for your PuTTY session page, supply a NAME for Saved Sessions and click Save.
    Note: Saving the session enables future use.

Results

Important: Developers with an existing installation of MarkLogic will notice the potential conflict with use of port 8002. To avoid the conflict, use another port number for the tunnel or change the "Manage" port in your local MarkLogic installation.

What to do next

Ingest and Curate Your Data.