Set Up a Secure Client-Side VPC - AWS
Overview
To securely connect with MarkLogic Data Hub Service over a peered connection, you must set up a client-side VPC (virtual private cloud) and create a peer role to peer with your MarkLogic VPC. Then configure your network and routing to use the peer role.
Before you begin
You need:
- An AWS account with permissions to create and configure AWS VPCs.
- To subscribe to MarkLogic Data Hub Service (DHS) in AWS.
About this task
Note: To learn how to use a bastion host, see using PuTTY with Windows or using SSH with Mac / Linux.
Procedure
- Navigate to the AWS CloudFormation Console page.

- Click .
Important: Before you continue, ensure you are creating your stack in a region supported by Data Hub Service (DHS). See Supported Regions - AWS. - In the Create stack page, specify the template.
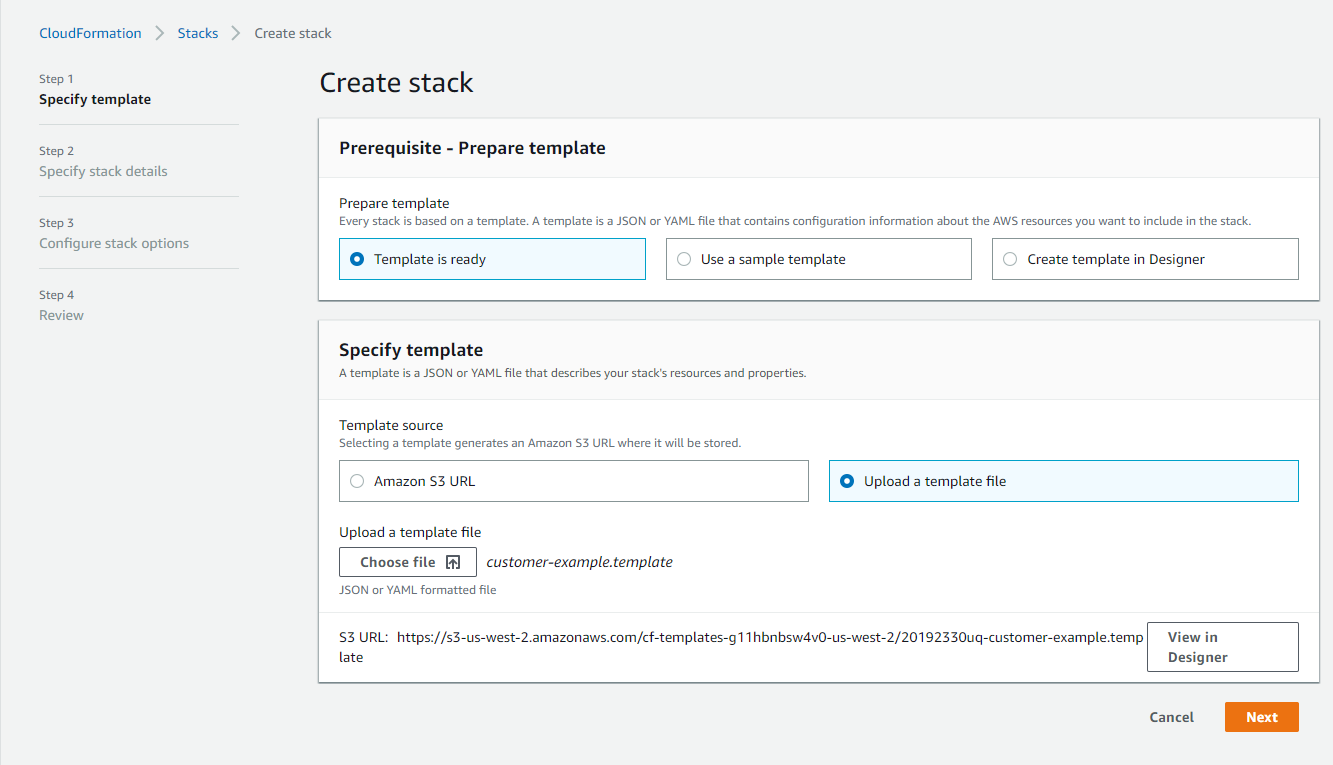
- Click .
- In the Specify stack details page, supply the fields with the following information:
Note: For more general information on creating a stack, see Creating a Stack on the AWS CloudFormation Console.
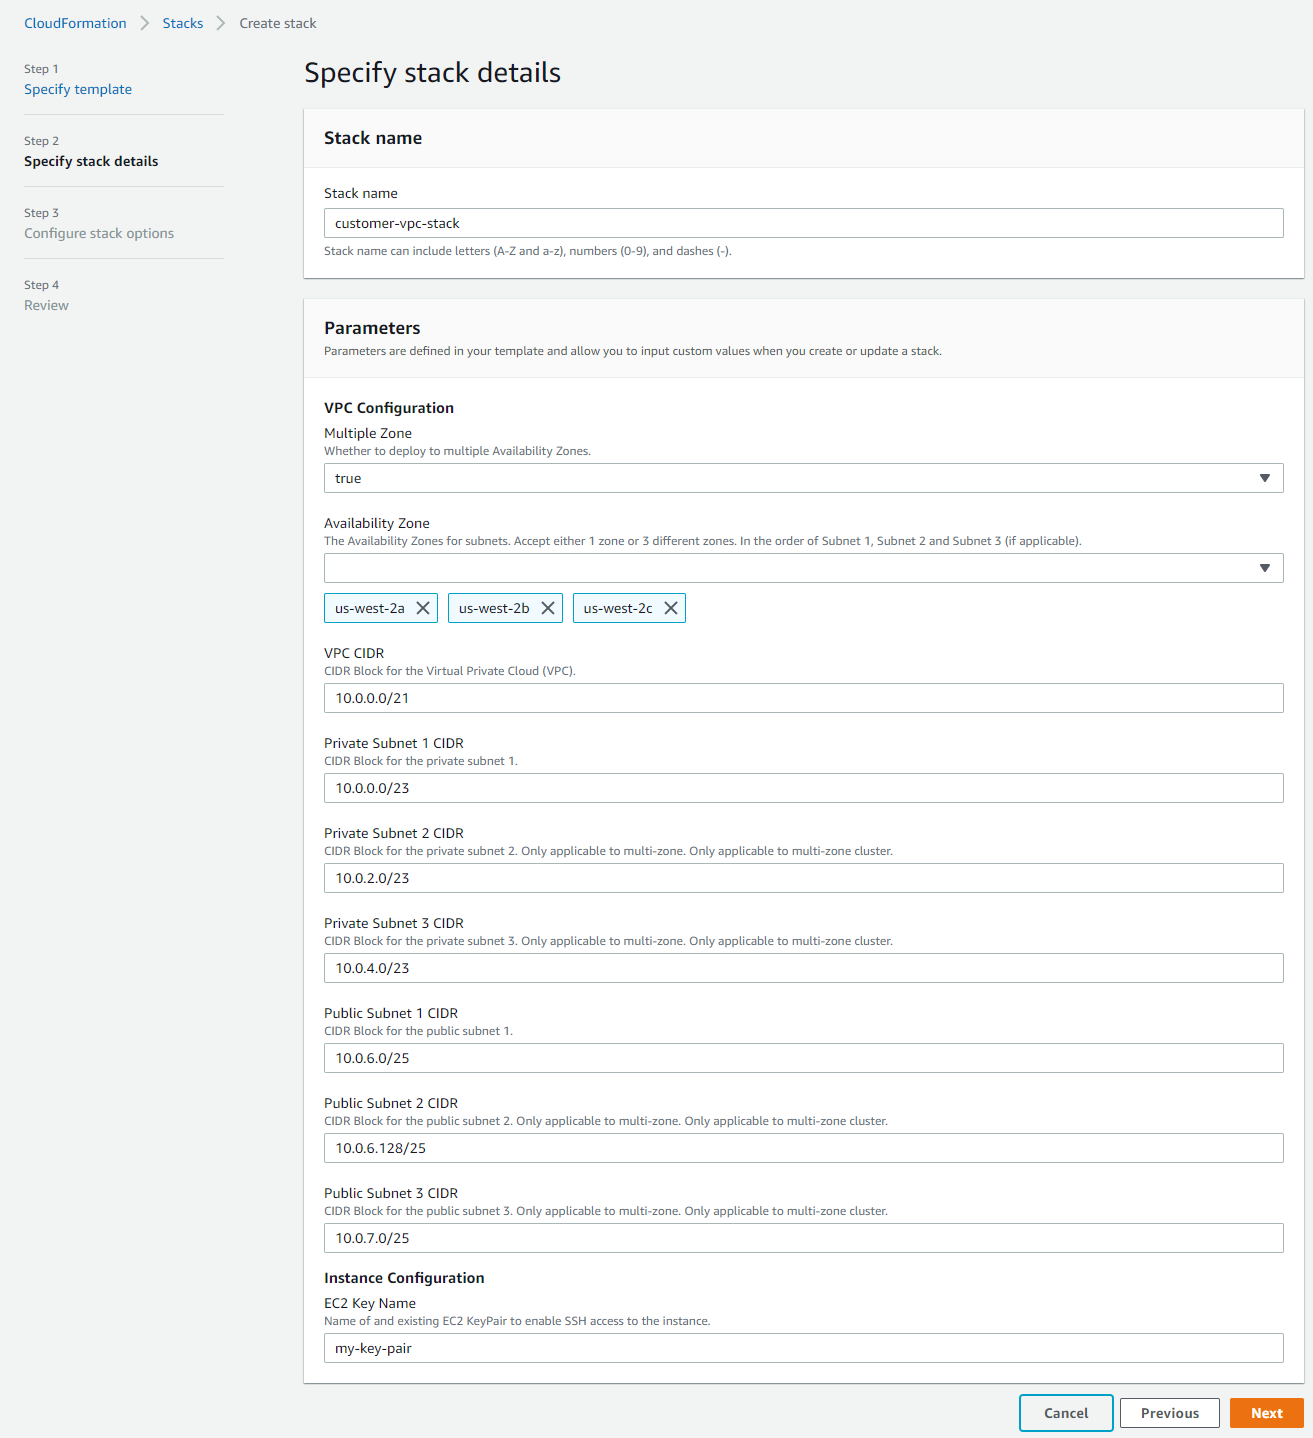
Field Description Stack name The name for this collection of AWS network resources. Availability Zone Select three of your preferred availability zones. DHS requires at least three availability zones to ensure high availability (HA). To view availability zones supported by DHS, see Supported Regions - AWS. Important: If you use more than three availability zones, download the template and modify the file to add more entries for Private/Public Subnet CIDRs, Route Associations, and so on. Use "Upload a template to Amazon S3" as the option when creating a CloudFormation stack.Note: For more general information on availbility zones supported by AWS, see Regions and Availability Zones.VPC CIDR Range of IPv4 addresses used to set up your client-side VPC. Primary CIDR (Classless Inter-Domain Routing) block for your VPC. Example: 10.0.0.0/21Important: The CIDR block20.0.0.0/10is used internally. If your VPC CIDR is within the20.0.0.0/10range of IP addresses, your CIDR block size must be between/20and/28subnet masks. The maximum amount of IP addresses in a CIDR block is 4,096, including all subnets.Public and Private Subnet CIDRs CIDR is used to allocate an IP address for each subnet. Enter one CIDR in each field. Example: 10.0.0.0/23, 10.0.2.0/23, 10.0.4.0/23, 10.0.6.0/25, 10.0.6.128/25, 10.0.7.0/25EC2 Key Name See Creating a Key Pair. Important: You will need the certificate file (.pemfile extension) to configure SSH tunneling.Click the following link to view a full list of client-side network resources.
- Click .
- Review the details.
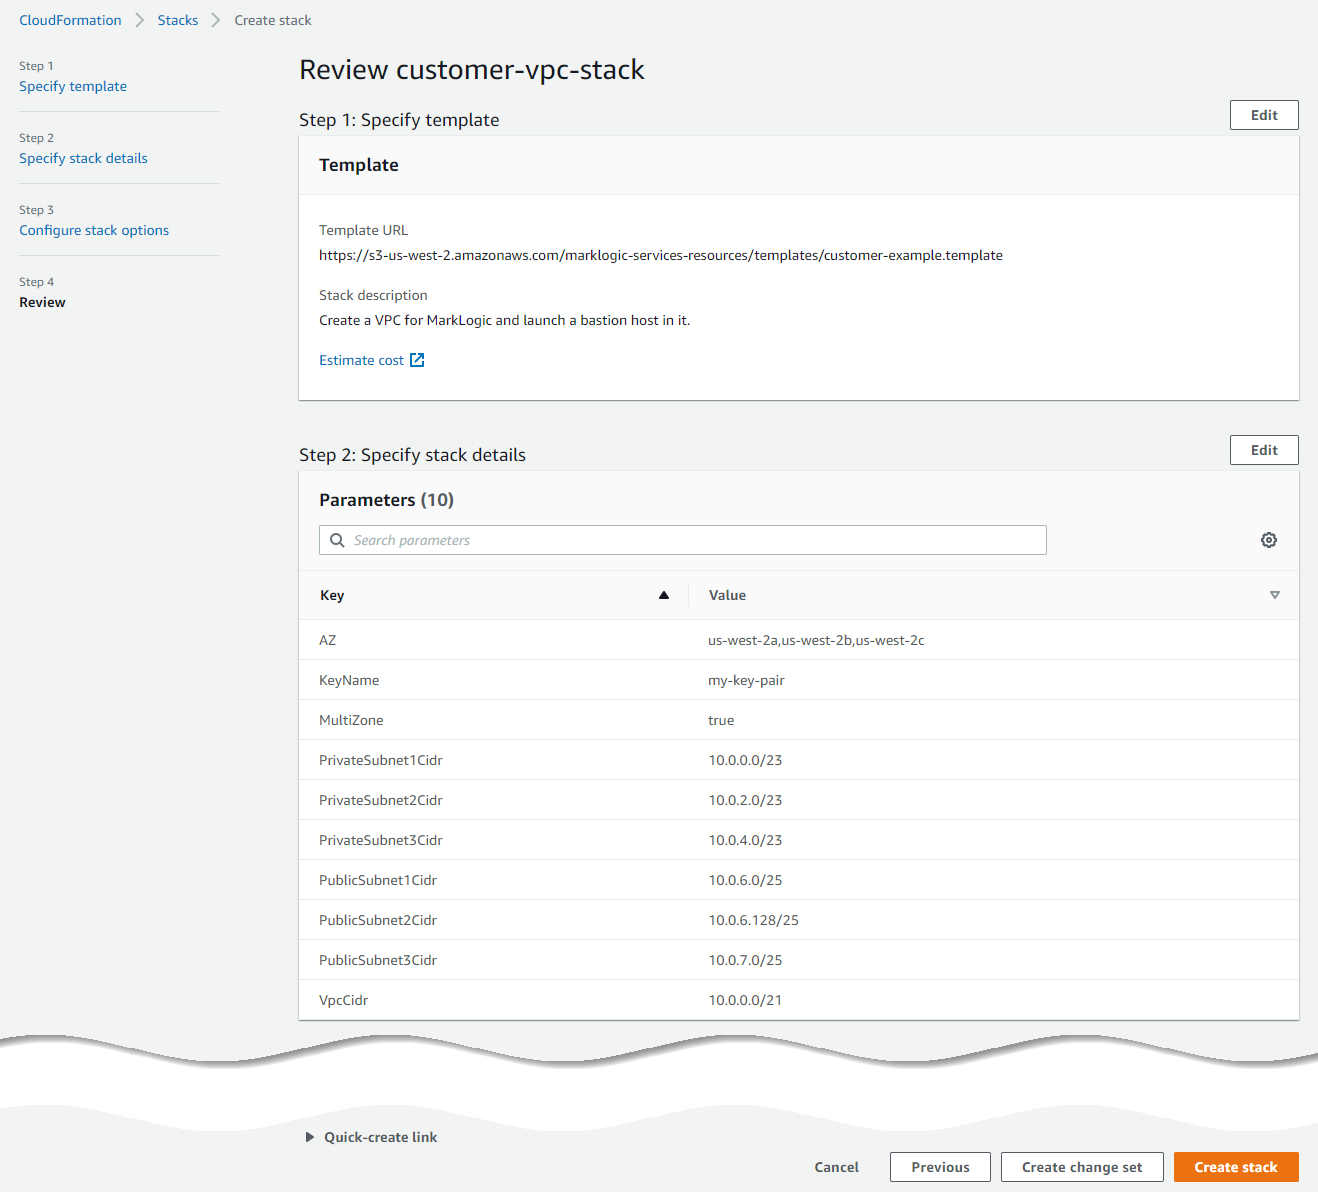
- To make changes, click .
- To confirm, click .
Results
CREATE_COMPLETE.
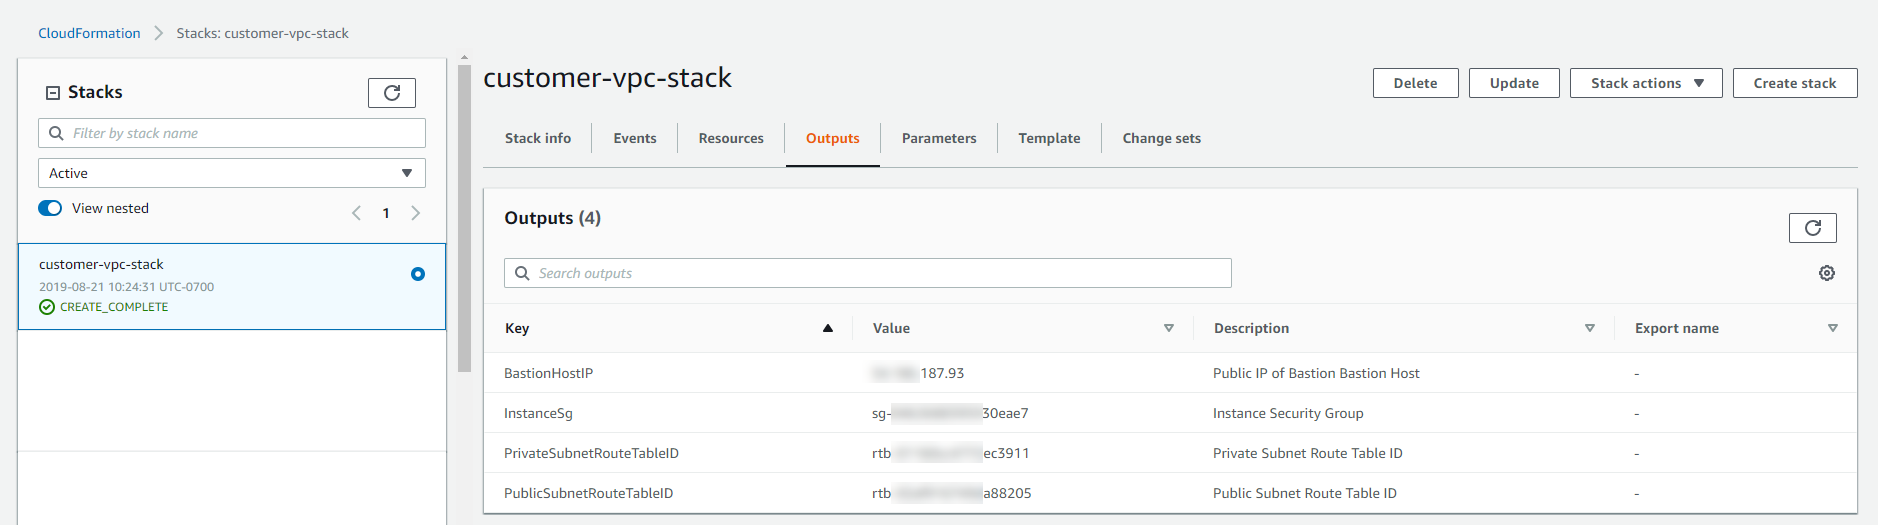
Important: You will need the Public and Private Subnet Route Tables, Public and Private CIDRs (used to execute this stack), and BastionHostIP.
- To view these values, click the Outputs tab.
In addition, you will need the VPC ID.
- To view this value, click the Resources tab.
- In the search box, enter "MarkLogicVPC". The VPC ID is in the Physical ID column.