Configure SSH Tunneling with Mac / Linux Using SSH

Overview

Set up tunneling if you prefer to work directly from your local environment using your own browsers to access the Data Hub Service endpoints.

Before you begin

You need:

About this task

Set up secure shell (SSH) tunneling to access the Data Hub Service (DHS) endpoints from your local environment. In this task, you will use SSH with Mac or Linux to set up SSH tunneling between your browsers and DHS instance.
Important: For this task, you must log into your DHS portal with the Security Administrator (SEC-ADMIN) or Service Administrator (SERV-ADMIN) portal role. See Portal Security Roles.
Important: To set up SSH tunneling, your DHS instance must use private endpoints. See Getting Started with Data Hub Service in AWS, and follow the peered configuration.

Procedure

  1. Go to the MarkLogic Data Hub Service home page.
  2. Navigate to your DHS instance to view the SSH tunneling script.
    • In the Service column, click the service name.

    Data Hub Service portal dashboard

    Tip: You can customize your dashboard with column sorting, column configuring, and services searching and filtering. See Customize DHS Dashboard.
  3. In the Data Hub Service page, click Action to open the drop-down menu.
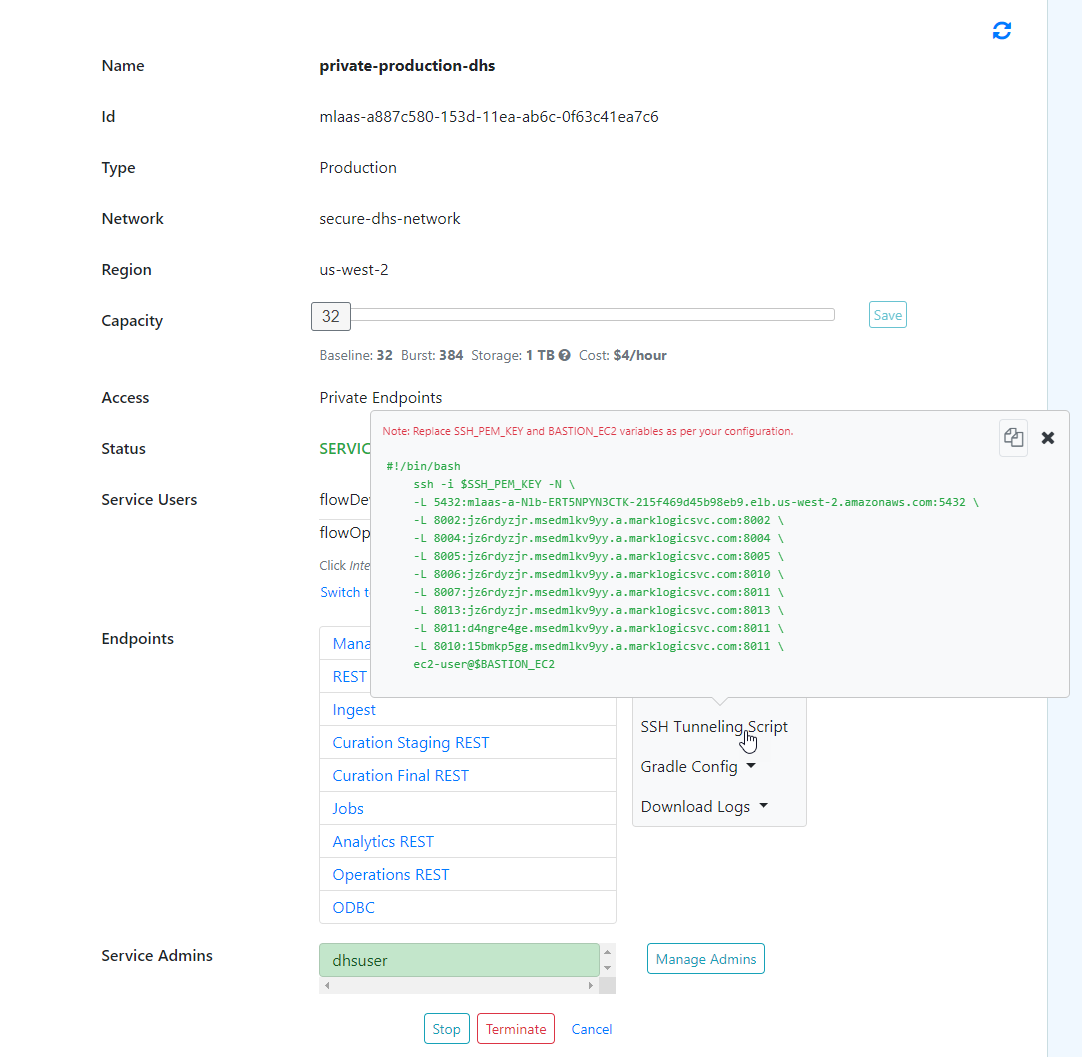
  4. In the Action drop-down menu, click SSH Tunneling Script to display the popup with the current settings.

    Data Hub Service SSH script

    • In the popup, copy the script to your clipboard:
      • highlight and copy the script, or
      • click the copy script icon ()

    Your script will look similar to the following:

     
      #!/bin/bash
        ssh -i $SSH_PEM_KEY -N \
        -L 5432:mlaas-c-Nlb-EF8FRR8YBPKH-84c6782c7069280a.elb.us-west-2.amazonaws.com:5432 \
        -L 8002:78vdoagkp.msedmlkv9yy.a.marklogicsvc.com:8002 \
        -L 8004:78vdoagkp.msedmlkv9yy.a.marklogicsvc.com:8004 \
        -L 8005:78vdoagkp.msedmlkv9yy.a.marklogicsvc.com:8005 \
        -L 8006:78vdoagkp.msedmlkv9yy.a.marklogicsvc.com:8010 \
        -L 8007:78vdoagkp.msedmlkv9yy.a.marklogicsvc.com:8011 \
        -L 8013:78vdoagkp.msedmlkv9yy.a.marklogicsvc.com:8013 \
        -L 8008:1jbnjaeqg.msedmlkv9yy.a.marklogicsvc.com:8008 \
        -L 8011:1jbnjaeqg.msedmlkv9yy.a.marklogicsvc.com:8011 \
        -L 8009:j7yba5b1l.msedmlkv9yy.a.marklogicsvc.com:8009 \
        -L 8010:j7yba5b1l.msedmlkv9yy.a.marklogicsvc.com:8011 \
      ec2-user@$BASTION_EC2
    
    • To edit the script, paste to a text file.
  5. In the text file, replace the following per your configuration: SSH_PEM_KEY and BASTION_EC2
    • Replace SSH_PEM_KEY with your /PATH/TO/KEY-PAIR.pem (certificate file generated when you set up a secure client-side VPC).
    • Replace BASTION_EC2 with your BastionHostIP.

    Click the following link to view a full list of configure SSH tunneling resources.

  6. In the command prompt, run the modified script.
    • You can run the script locally, or
    • You can save the script to a text file and run locally. Use the following command:
      • sh /PATH/TO/FILE.txt

Results

Important: Developers with an existing installation of MarkLogic will notice the potential conflict with use of port 8002. To avoid the conflict, use another port number for the tunnel or change the "Manage" port in your local MarkLogic installation.

What to do next

Deploy MarkLogic Data Hub and your flows to your cloud environment: