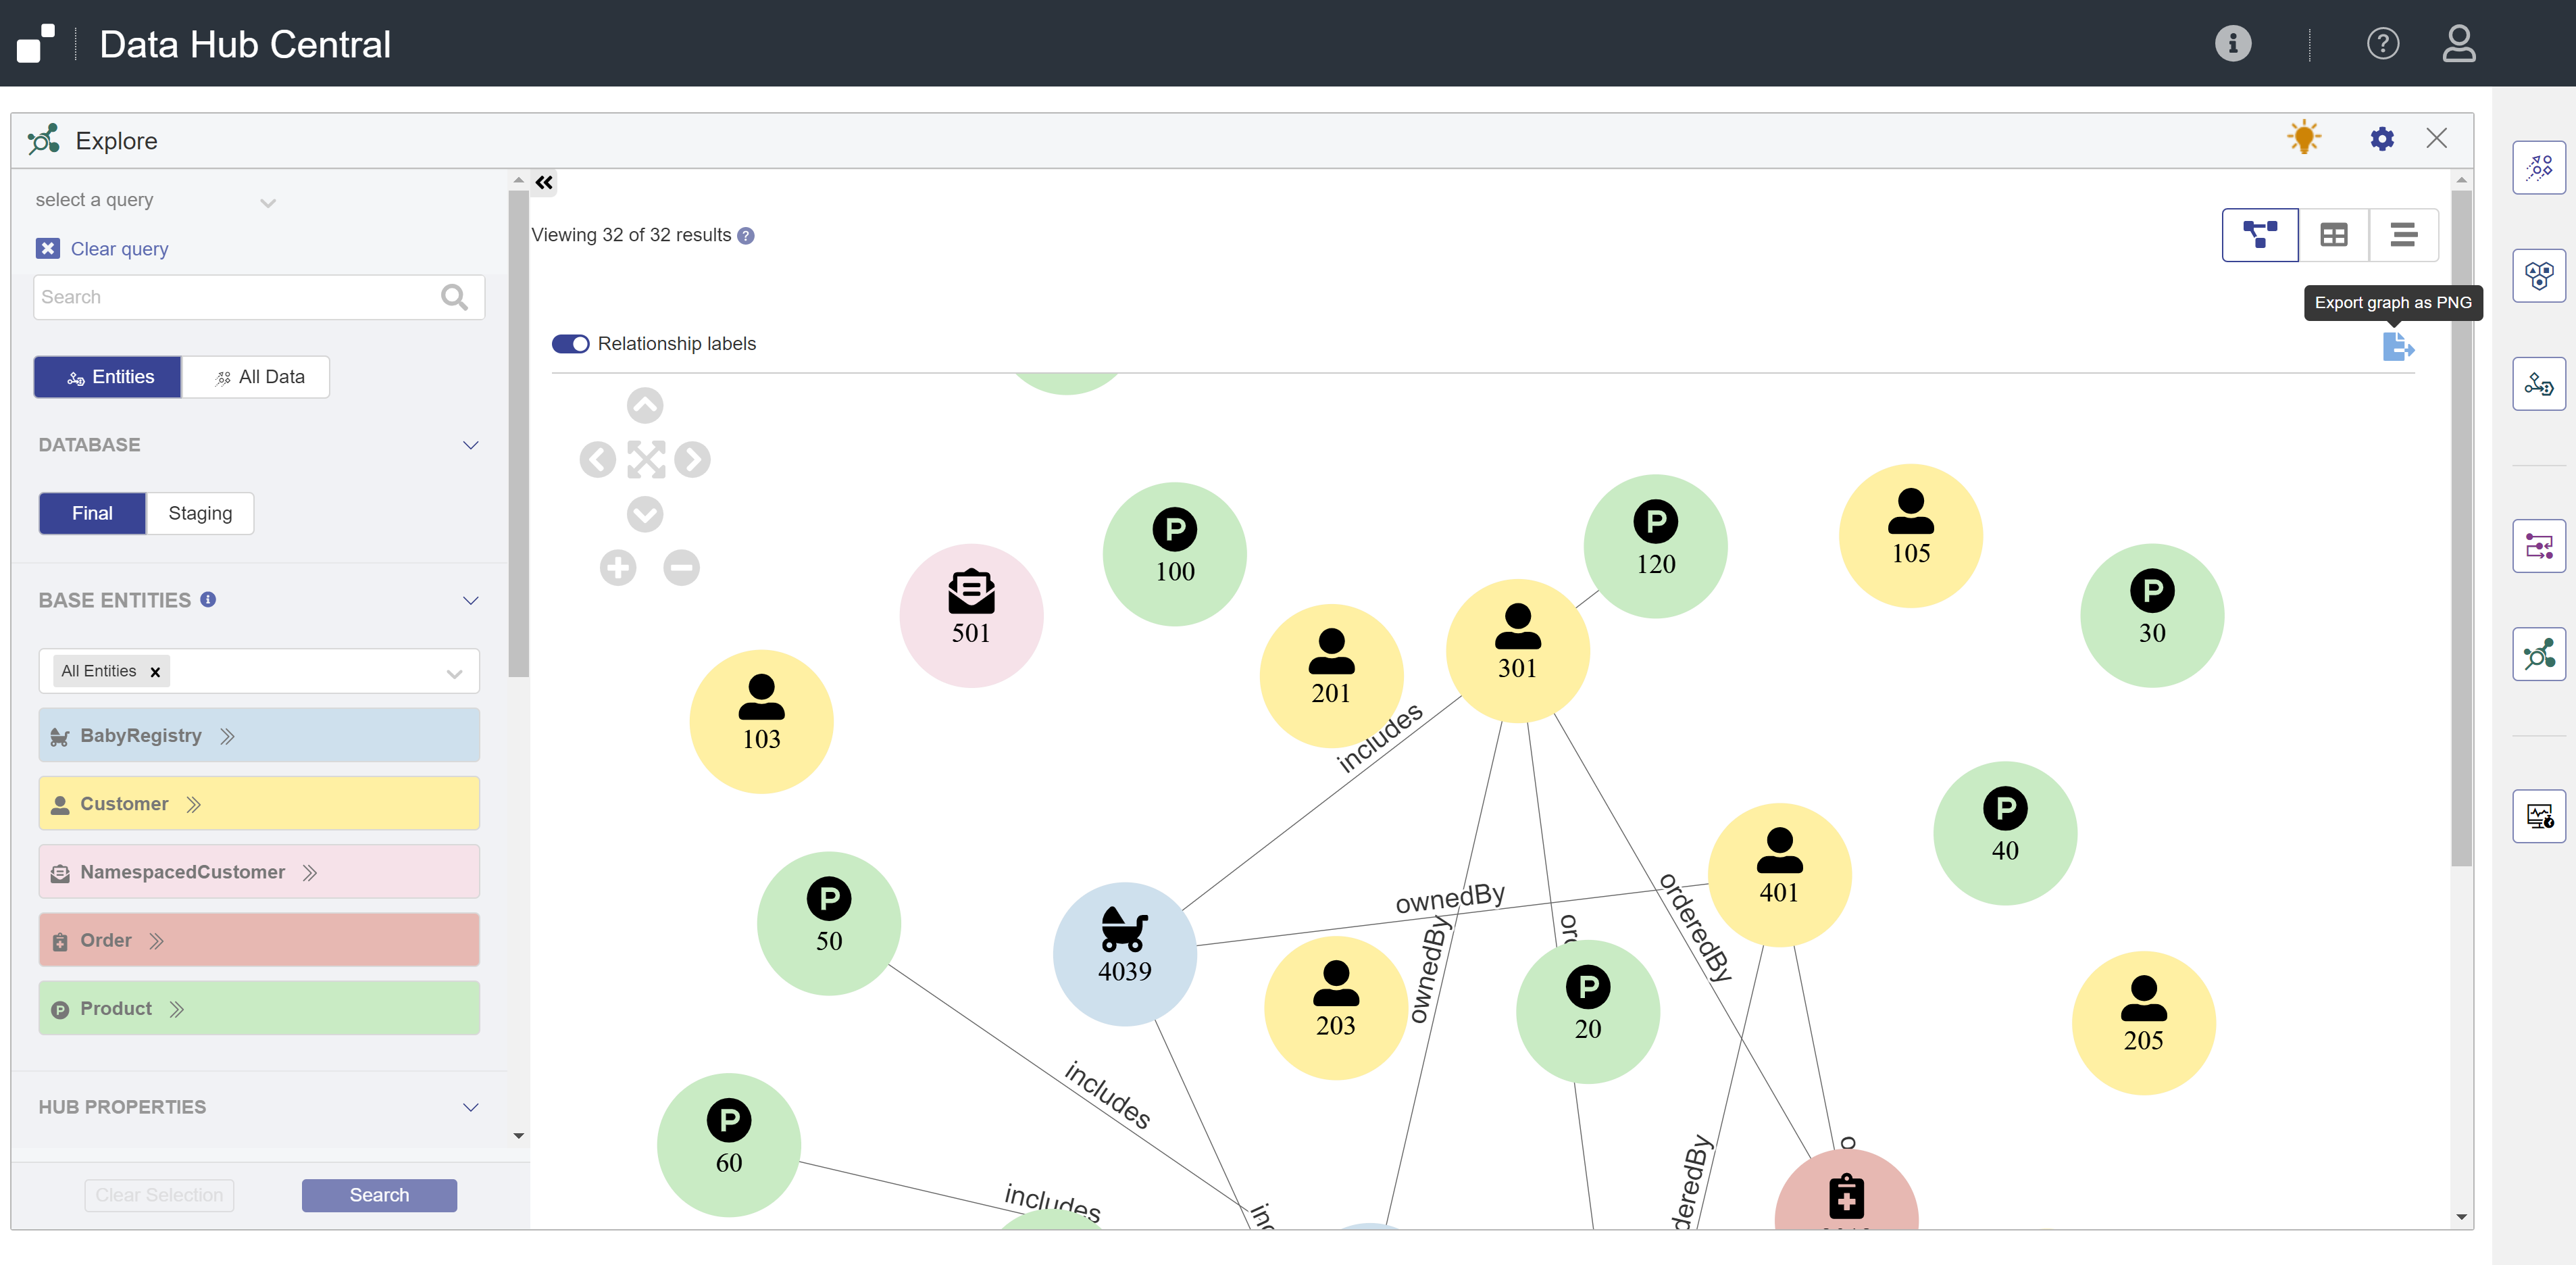
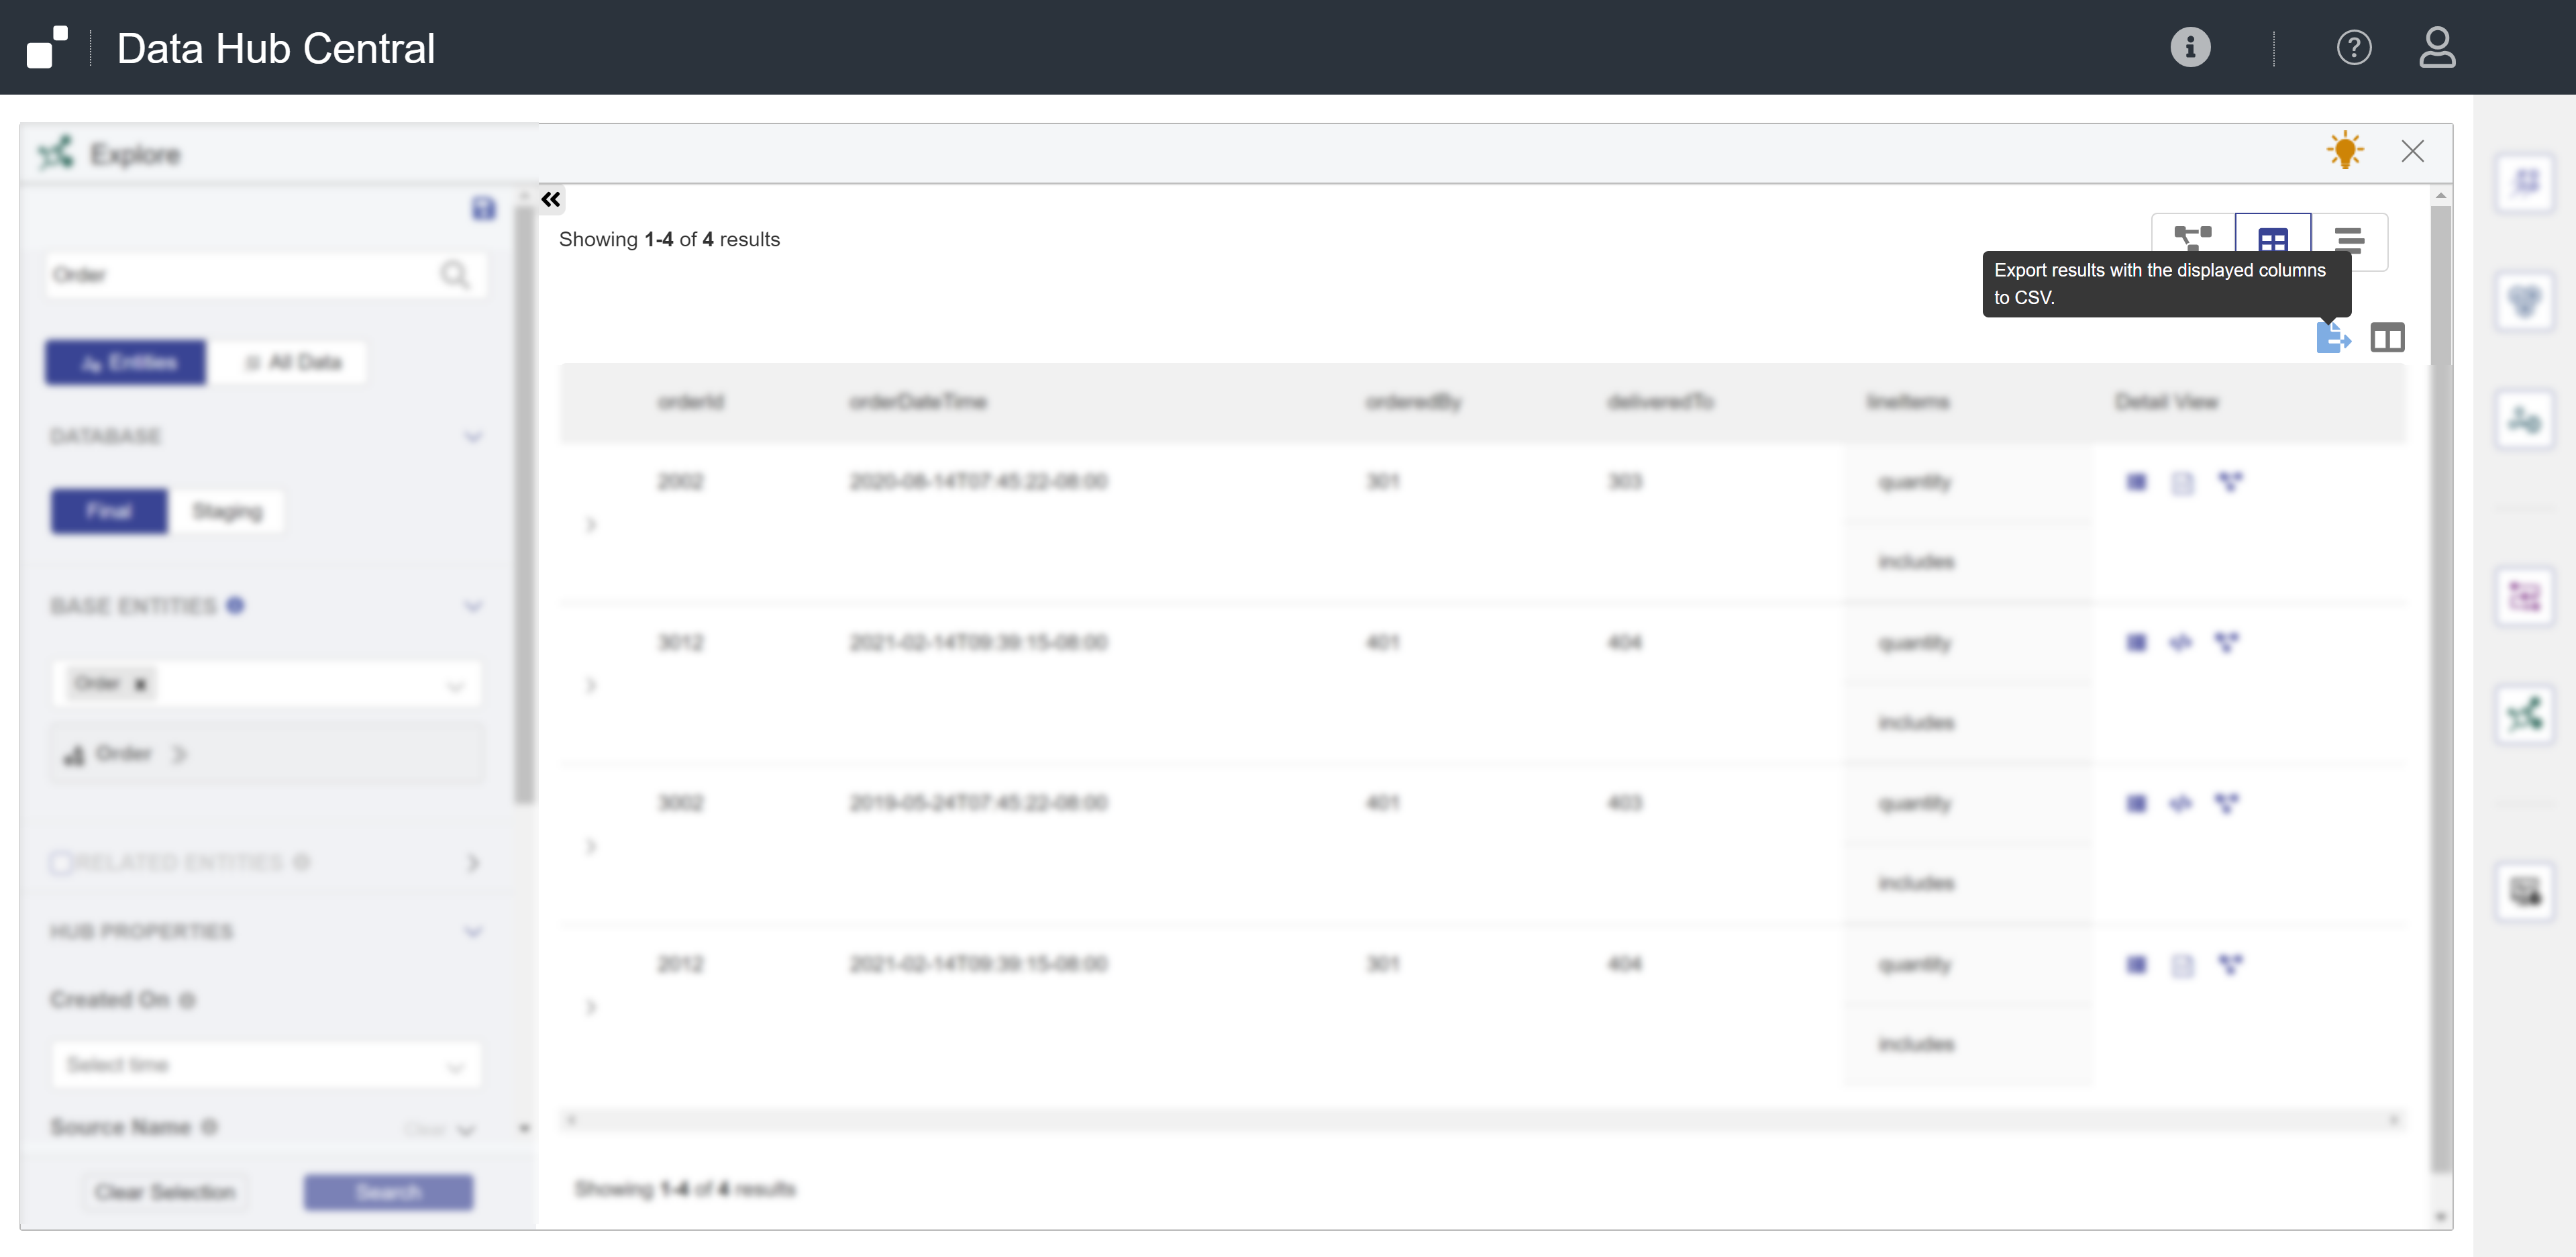
Export Data Using Hub Central
In the Table View, you can export as CSV file. In the Graph View, you can export graph as PNG file. All pages of the record list are included.
Note: Object and array datatype properties cannot be exported. If the selected dataset includes objects and arrays, a preview of the CSV is shown before the export is completed.
Note: If you do not have the required privileges to view, filter, or export a specific record, you will not be able to perform that action on that record. For example, if you are permitted to view the record but not export it, it is included in the displayed record list but it is excluded from the exported list.
Before you begin
You need:
- Security role(s):
- To view PII data: pii-reader
- To view all other data: any Hub Central role
- To save and run queries: Hub Central Explorer or Hub Central Operator
- To export data: Hub Central Explorer or Hub Central Operator
Procedure
- Go to the Explore area of Hub Central.
Learn how.
- Go to your Hub Central endpoint.
Note: Disregard this step if you are working from an on-prem environment. See Step 1b.
Learn more:
- In the icon bar, click the Explore icon (h).
- Go to your Hub Central endpoint.
- Click the Export icon () in both the Graph and Table Views.