Configure Merging Using Hub Central
About Merging
Merging is defined by two types of objects.
- A merge strategy is a predefined standard merge rule that can be reused.
- A merge rule defines how to combine the values for the same property in matching documents.
A merge rule can be one of the following types:
- Property-specific. Merging is done as specified in the merge rule.
- Strategy. Merging is done according to a predefined strategy.
- Custom. Merging is done using a custom function in a custom module.
Before you begin
You need:
- Security role: Hub Central Developer or any role that inherits it. Learn more: Users and Roles
Procedure
- Go to the Curate area of Hub Central.
Learn how.
- Go to your Hub Central endpoint.
Note: Disregard this step if you are working from an on-prem environment. See Step 1b.
Learn more:
- In the icon bar, click the Curate icon ().

- Go to your Hub Central endpoint.
- Click the sliders icon () for the step.

Merge Strategies
- Define your merge strategies.
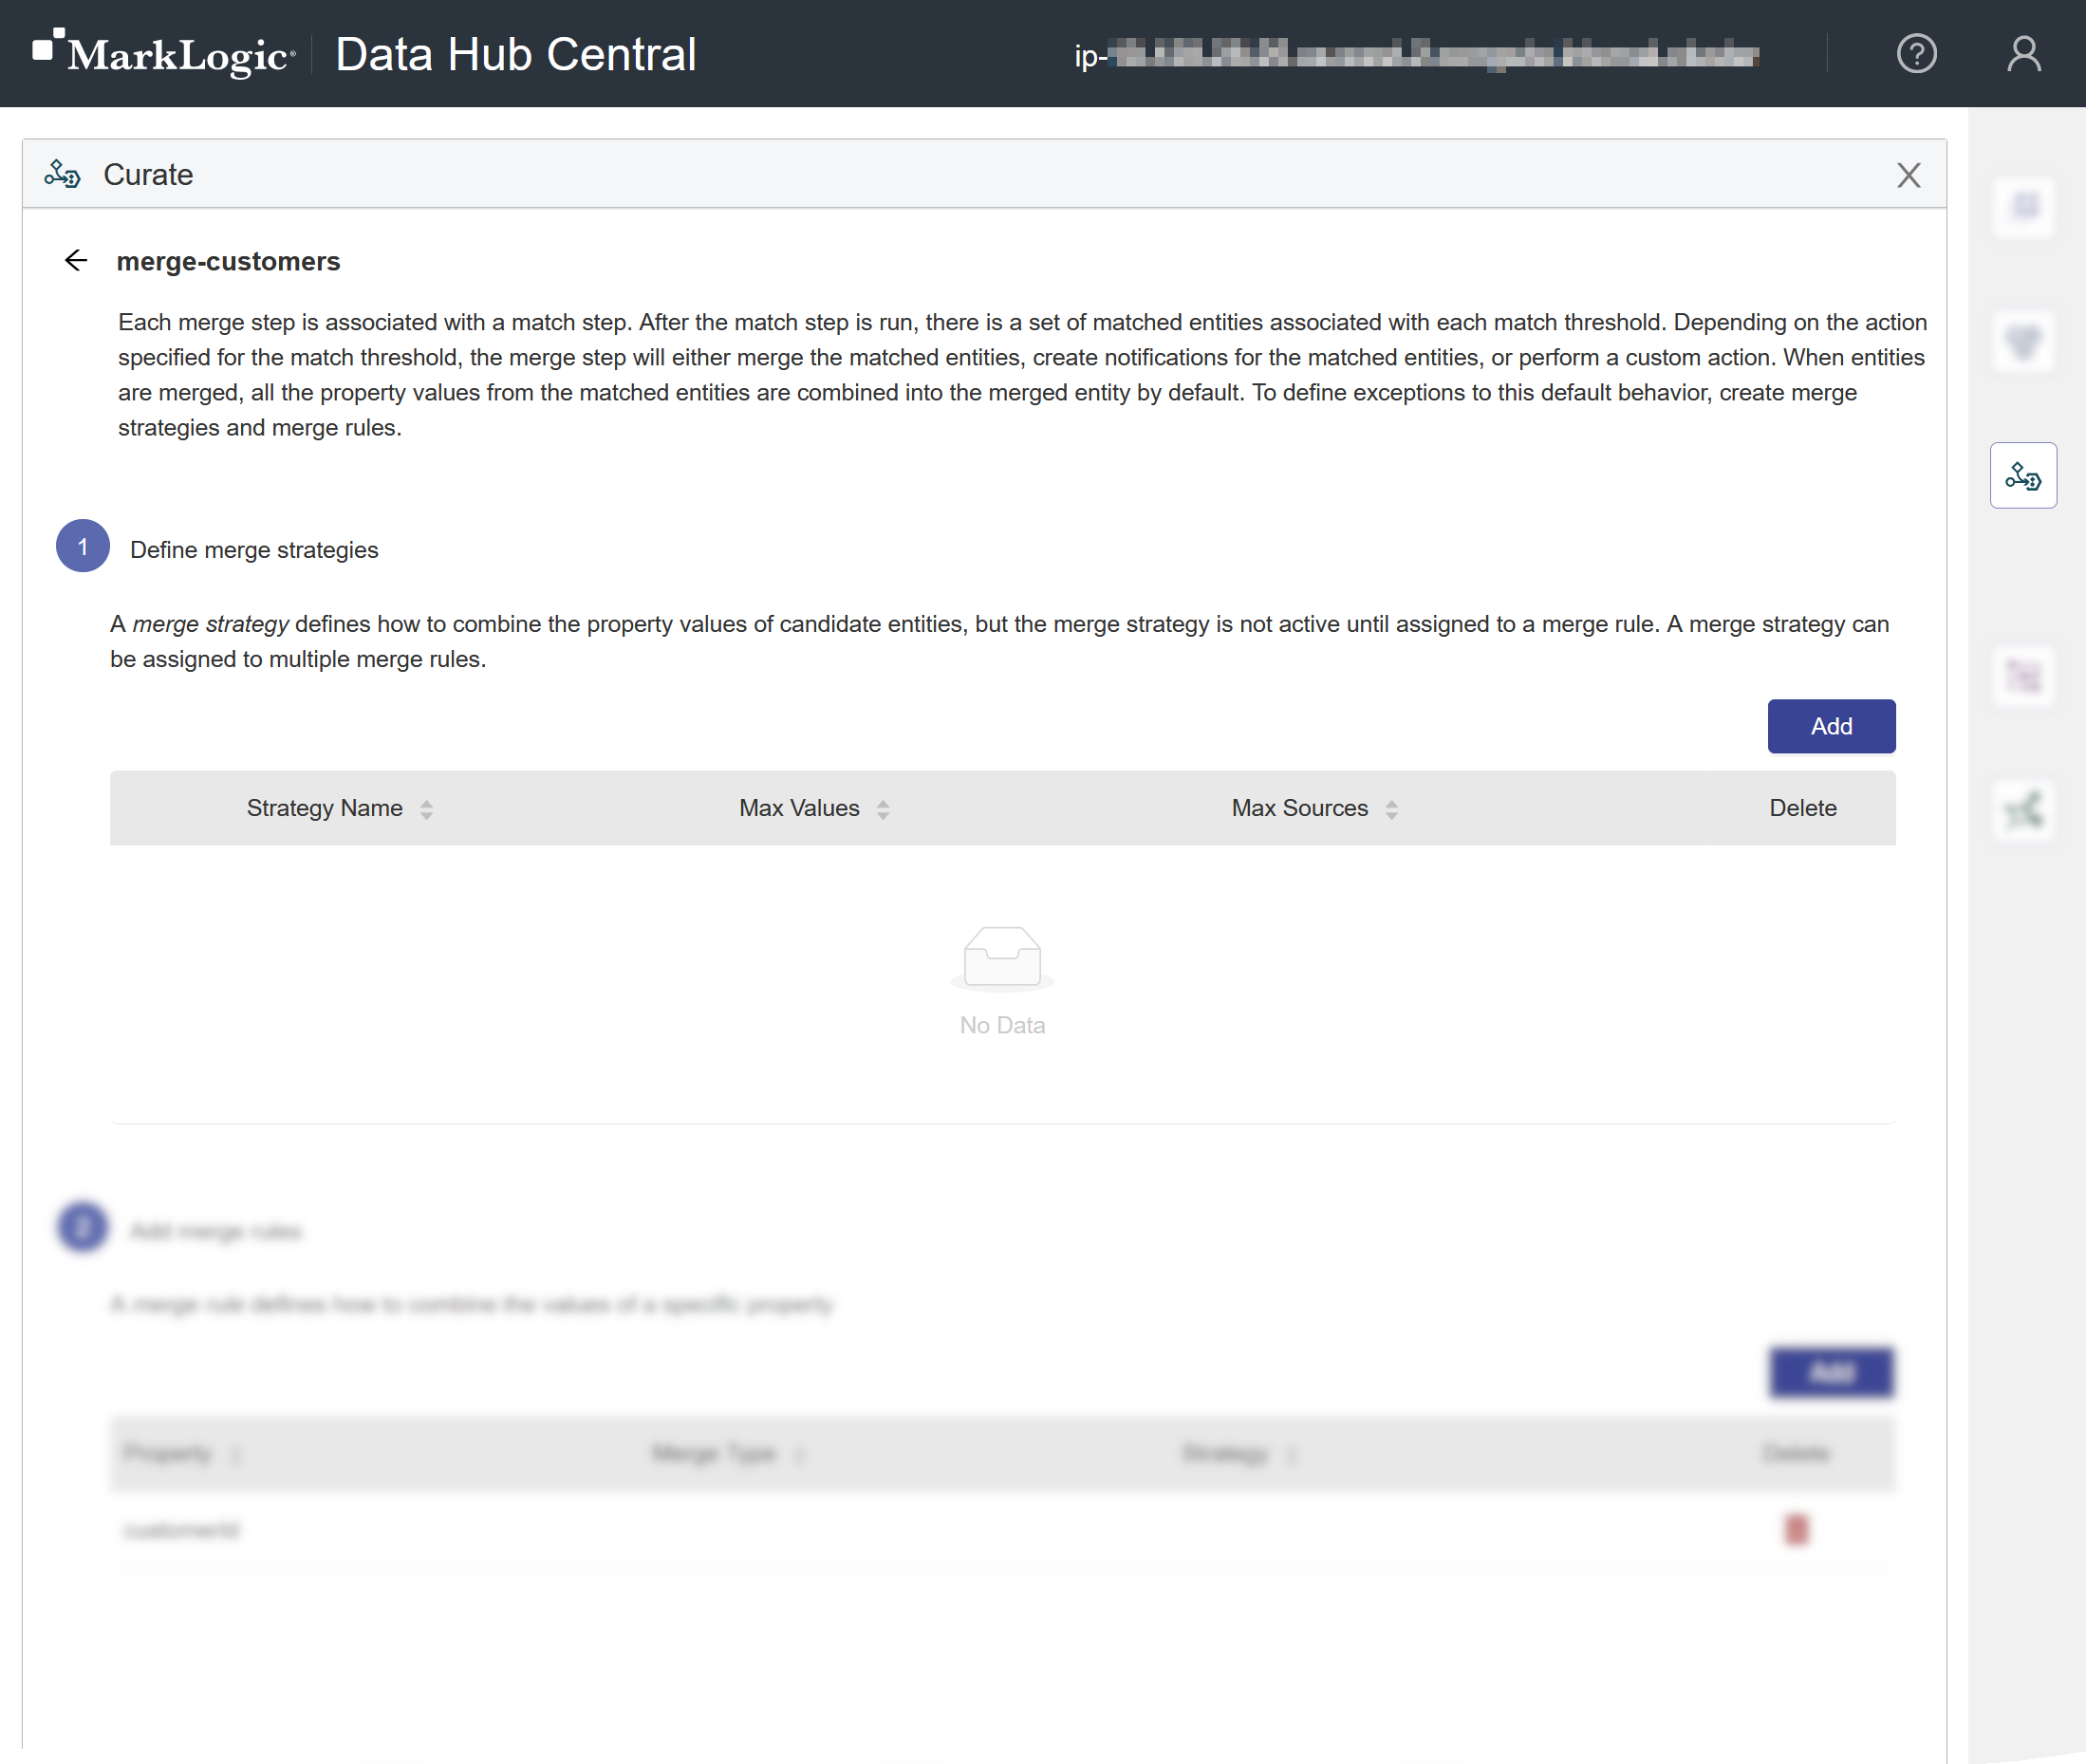
Under Define merge strategies:
- To create a new strategy, click .
- To edit an existing merge strategy, click its name on the list.
- To delete a merge strategy, click the trash icon () for it in the Delete column.
Merge Strategy properties
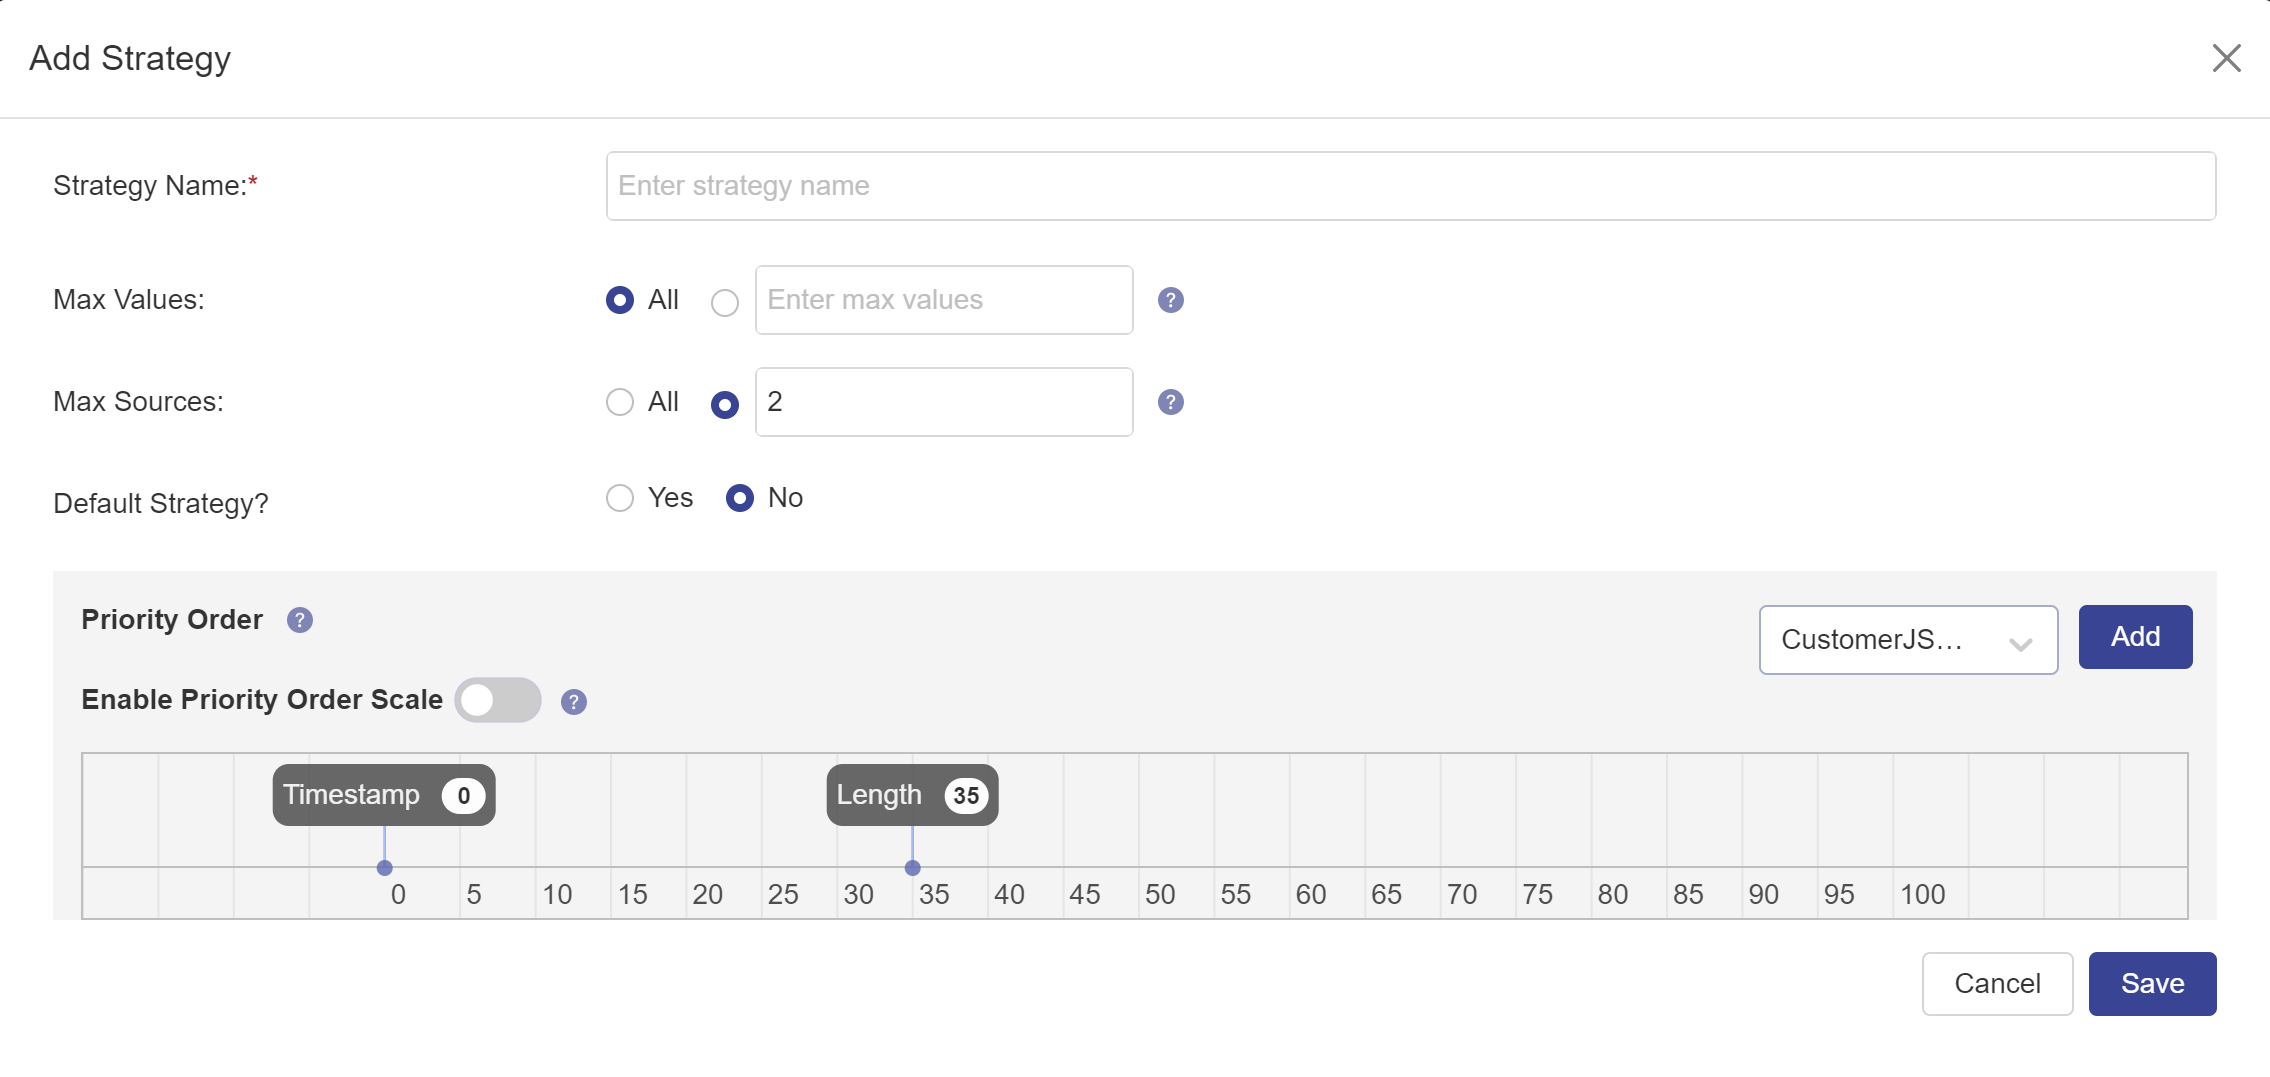
Name Description Strategy Name The name for the strategy. Max Values The maximum number of values to allow in the merged property. The default is 99. Max Sources The maximum number of data sources from which to get values to merge. For example, to copy values from a single source, set maxSourcesto 1.Default Strategy? Select Yes to make the merge strategy the default strategy. The default strategy is applied to all properties not assigned a merge rule. Priority Order The metadata (length and sources) plotted on a continuum from low to high, indicating the relative importance of each metadata when merging documents. - To create a priority setting,
- From the dropdown, choose the metadata (Length or any source) to prioritize.
- Click .
- To position the metadata, click the toggle switch.
- Move the priority setting of your selected metadata along the continuum from low to high to prioritize it relative to other selected metadata.
- A priority setting at the LOW end indicates that the length or source is of low importance.
- A priority setting at the HIGH end indicates that the length or source is of high importance.
- To delete a priority setting,
- Click the toggle switch.
- Click the priority setting you want to delete.
- In the confirmation modal window, click .
Note: The Timestamp node cannot be deleted.
Merge Rules
- Define your merge rules.
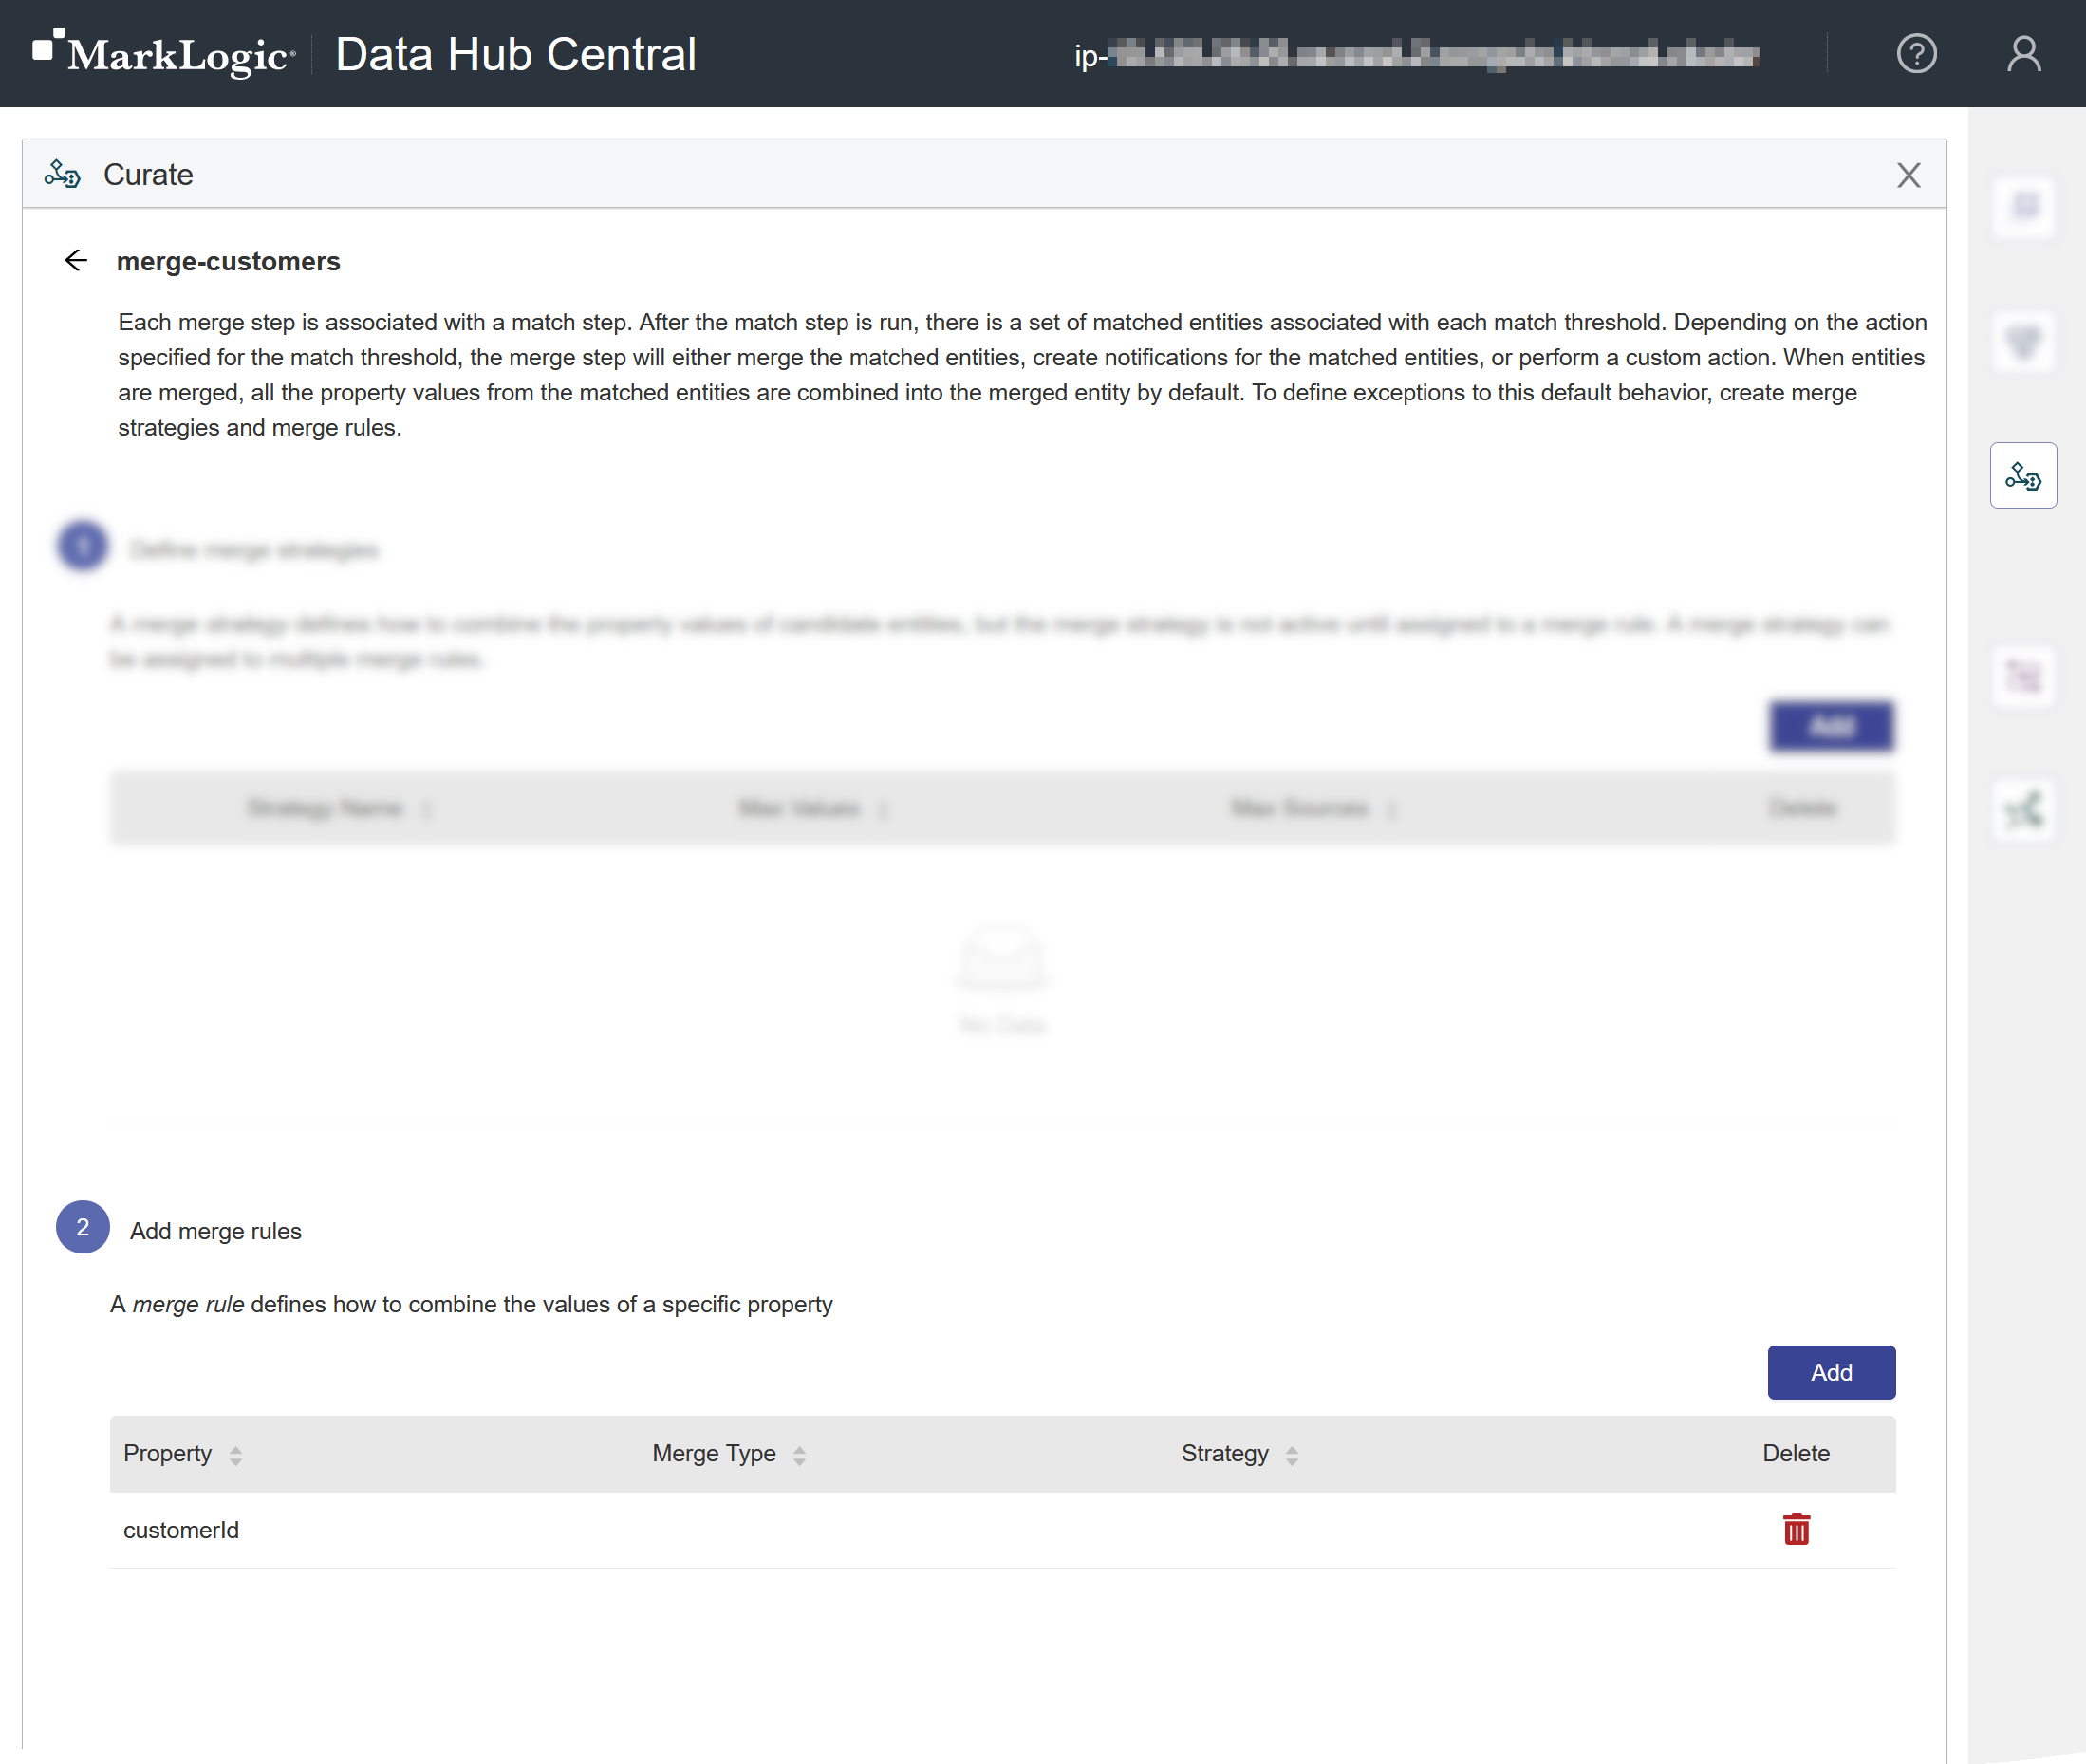
Under Add merge rules:
- To create a new rule, click .
- To edit an existing merge rule, click its name on the list.
- To delete a merge rule, click the trash icon () for it in the Delete column.
Merge Rule properties
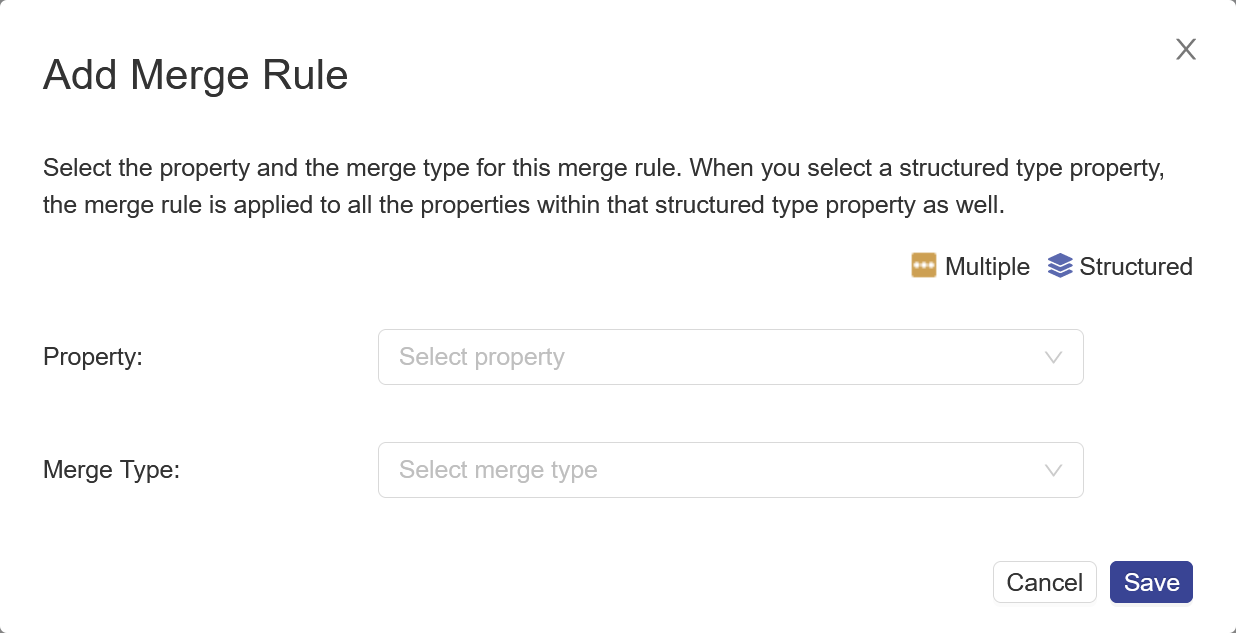
Name Description Property The name of the property to merge. Note: If the property is of a structured type, the merge rule is also applied to its child properties.Merge Type How the merging is done. - Property-specific. Merging is done as specified in the merge rule.
- Strategy. Merging is done according to a predefined strategy.
- Custom. Merging is done using a custom function in a custom module.
Additional settings for the Property-Specific merge type 
Max Values The maximum number of values to allow in the merged property. The default is 99. Max Sources The maximum number of data sources from which to get values to merge. For example, to copy values from a single source, set maxSourcesto 1.Priority Order The metadata (length and sources) plotted on a continuum from low to high, indicating the relative importance of each metadata when merging documents. - To create a priority setting,
- From the dropdown, choose the metadata (Length or any source) to prioritize.
- Click .
- To position the metadata, click the toggle switch.
- Move the priority setting of your selected metadata along the continuum from low to high to prioritize it relative to other selected metadata.
- A priority setting at the LOW end indicates that the length or source is of low importance.
- A priority setting at the HIGH end indicates that the length or source is of high importance.
- To delete a priority setting,
- Click the toggle switch.
- Click the priority setting you want to delete.
- In the confirmation modal window, click .
Additional settings for the Strategy merge type 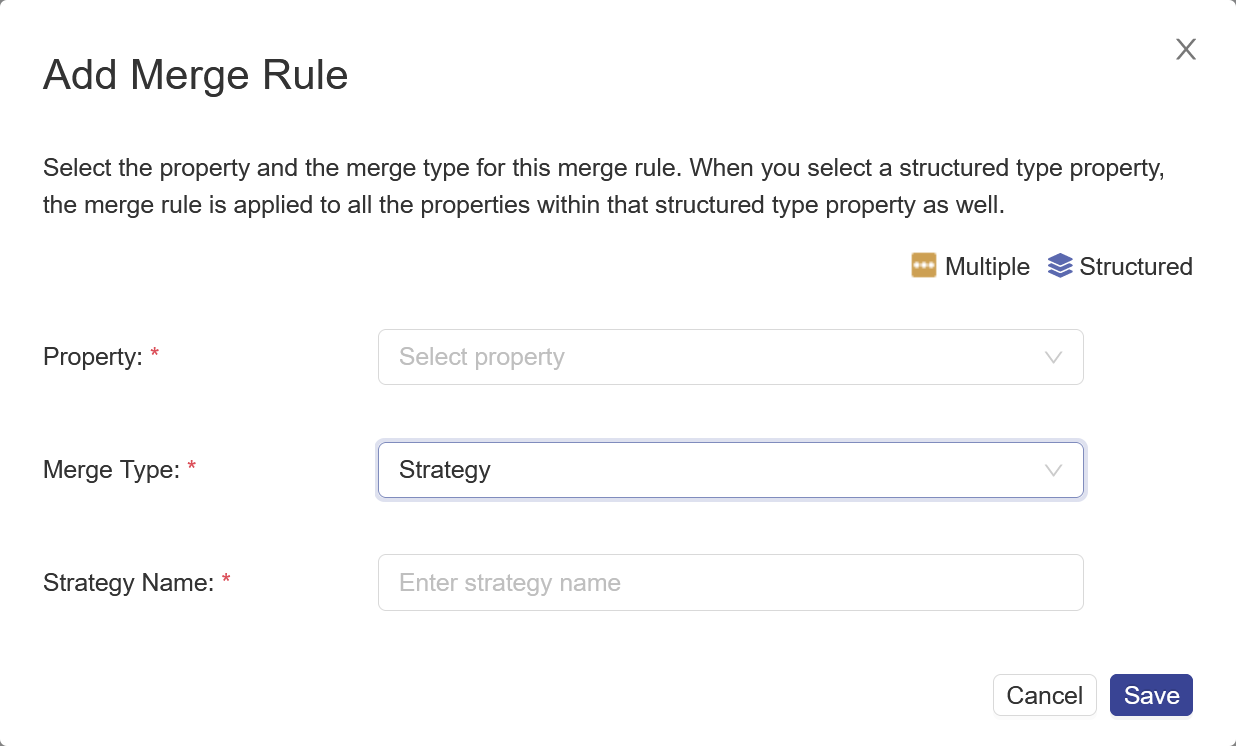
Strategy Name The predefined strategy or set of settings to use in merging. Additional settings for the Custom merge type 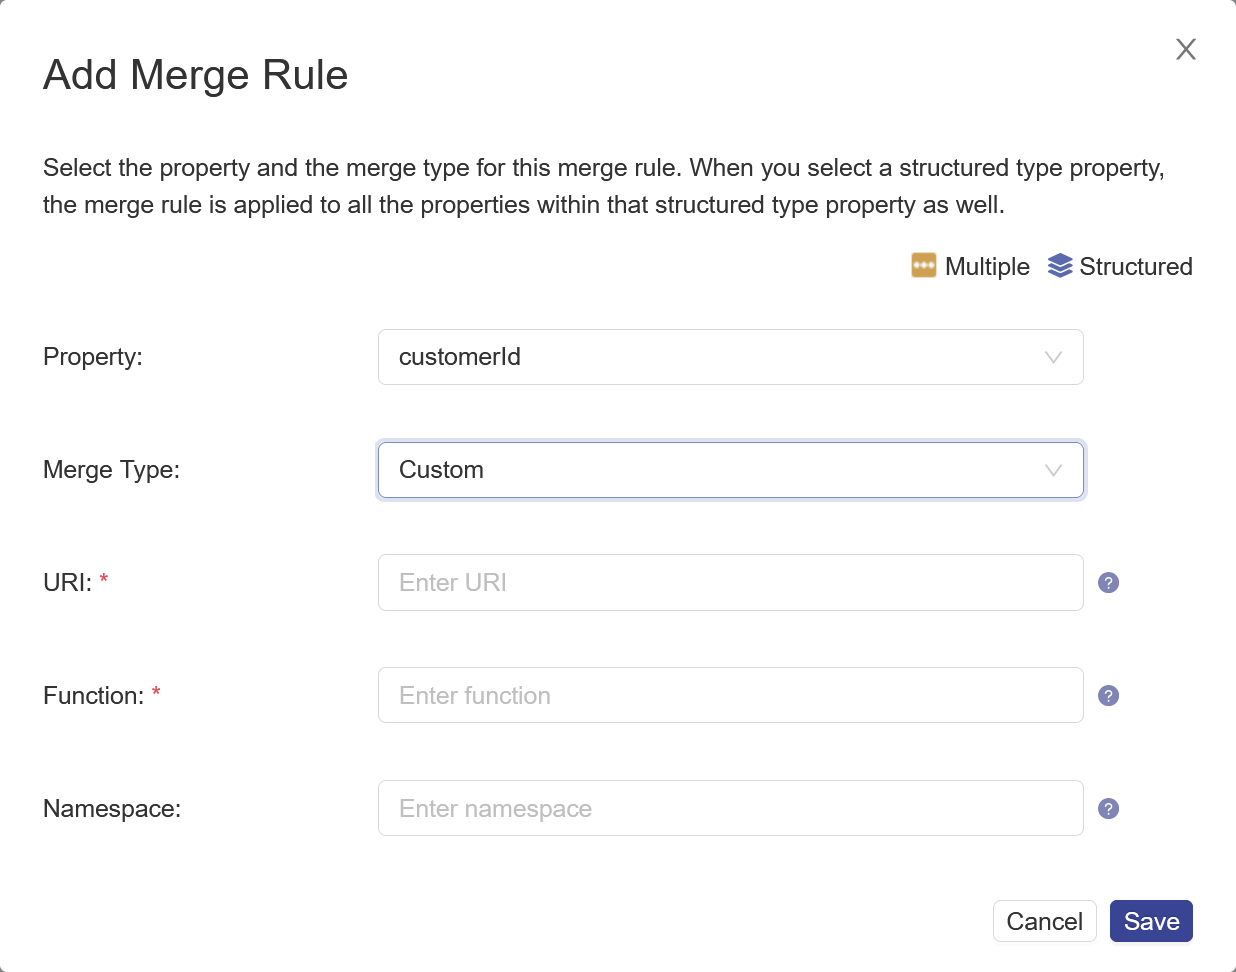
URI The location of the custom module. Function The name of the custom function within the custom module. Namespace The namespace of the library module where the custom function is. Blank, if the custom function is JavaScript code.
What to do next
- Add the step to a new flow or an existing one.
- Hover over the step tile.
- Click Add step to a new flow or select an existing flow under Add step to an existing flow.
Tip: You can add the step to multiple flows. - In the Run area, expand the flow and run the step.