Configure Mapping Using Hub Central

Before you begin

You need:

  • Security role: Hub Central Developer, Hub Central Curator, or any role that inherits any of these. Learn more: Users and Roles

Procedure

  1. Go to the Curate area of Hub Central.
    Learn how.
    1. Go to your Hub Central endpoint.
      Note: Disregard this step if you are working from an on-prem environment. See Step 1b.
    2. In the icon bar, click the Curate icon ().
      Hub Central - icon bar - Curate

  2. In the list, expand the entity type of the step to edit.
Mapping Configuration
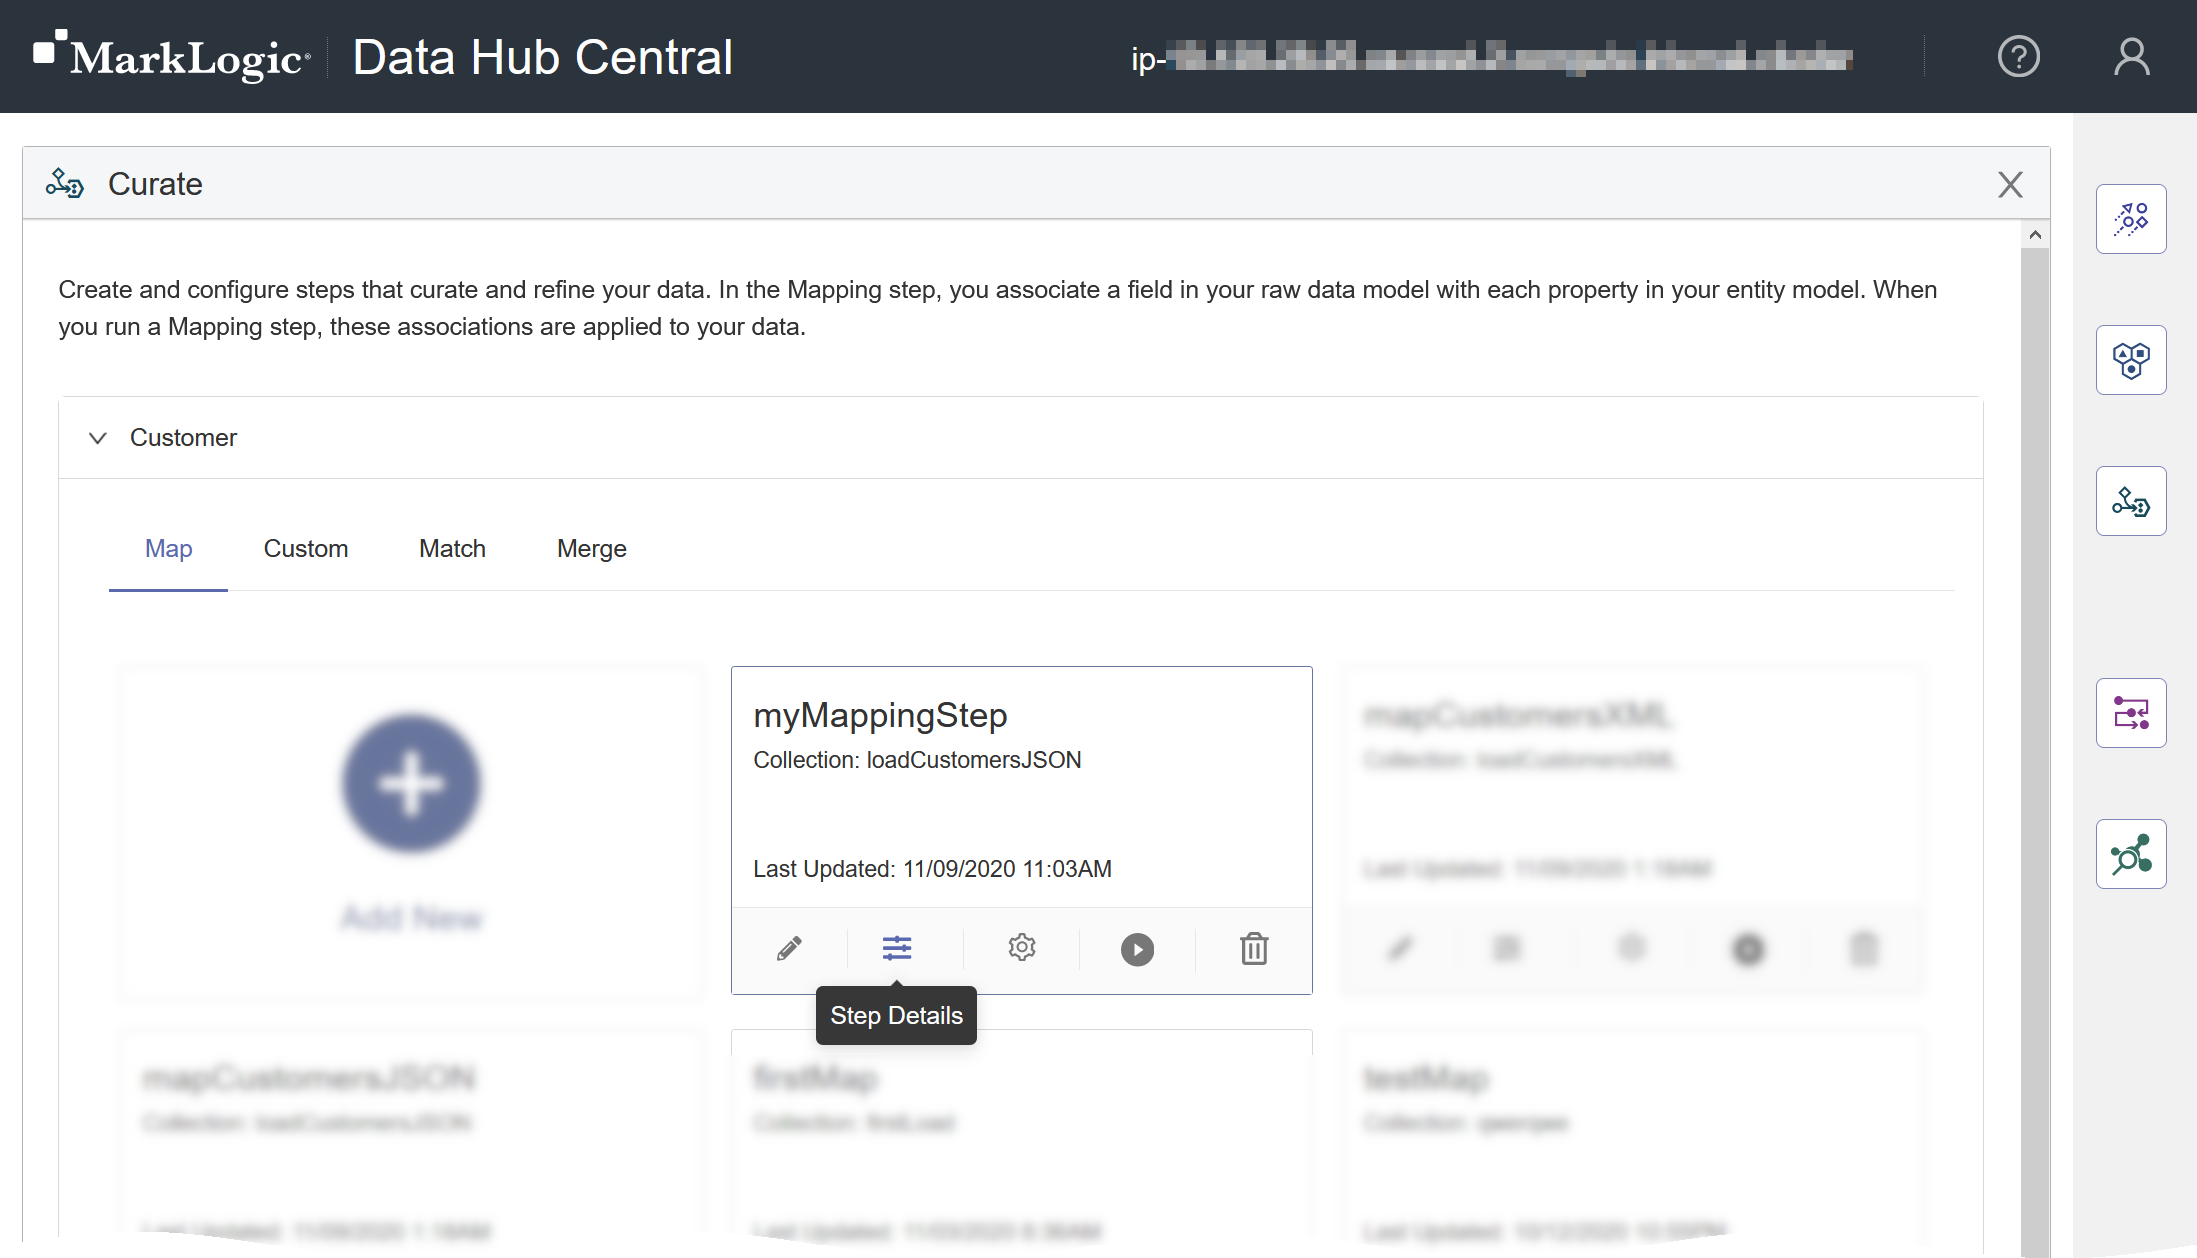
  1. Click the sliders icon () for the step.

    Hub Central - Mapping step - sliders icon

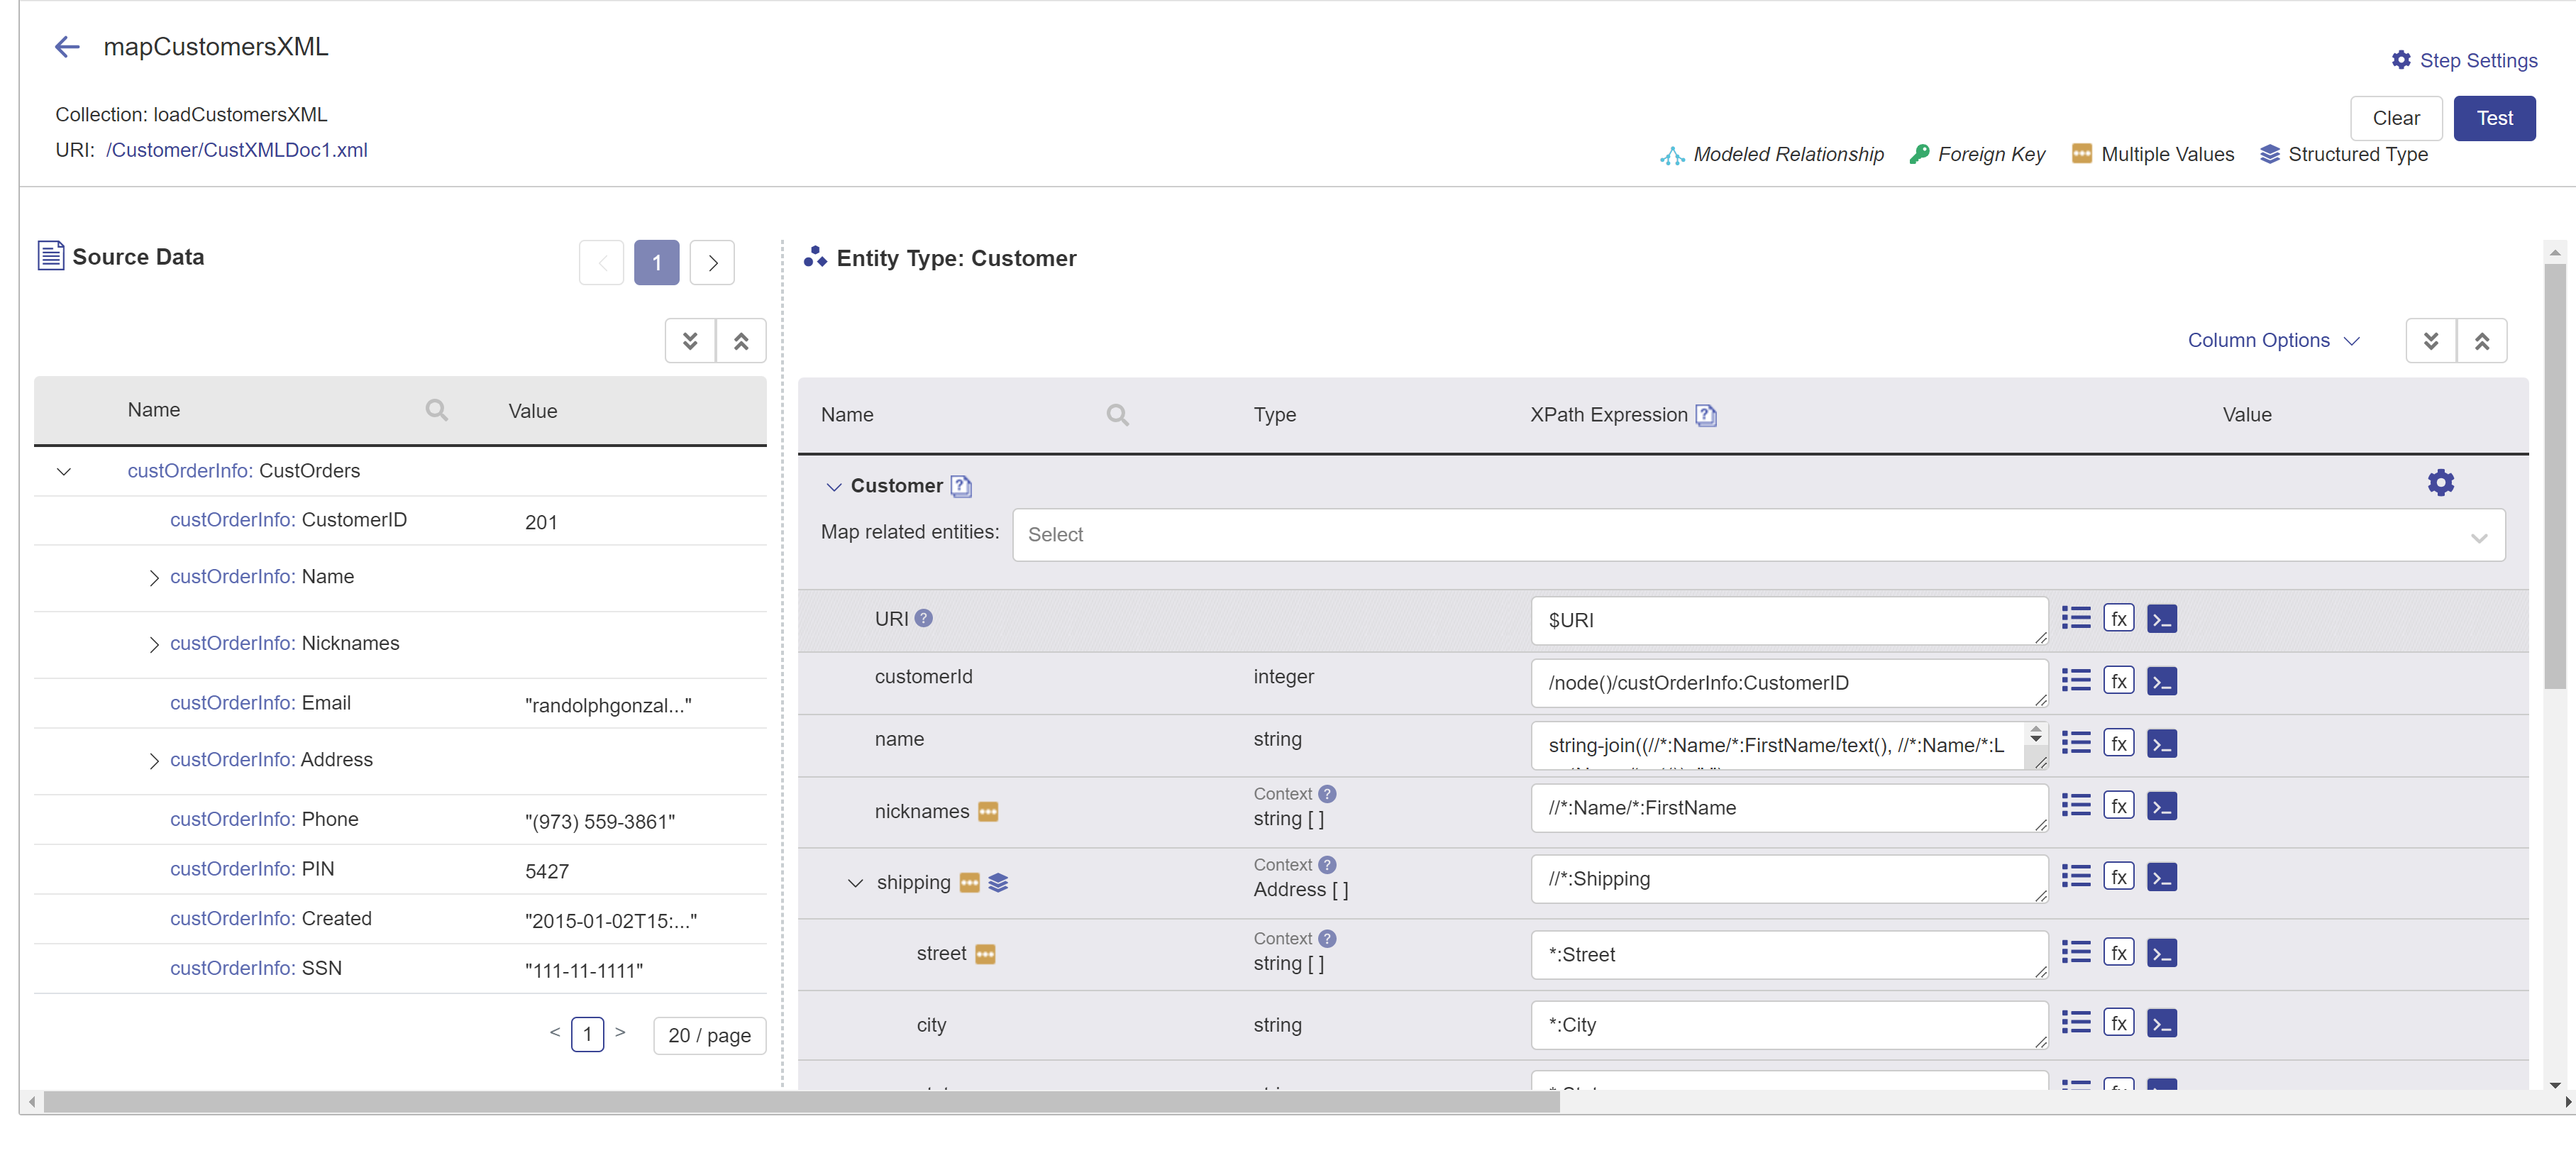
  2. For each property under Entity, select a source property to associate with it or enter an XPATH expression using functions to calculate the value.

    Hub Central - Mapping step - mapping definition page

    • Click the list icon () for a list of fields in the source data.
    • Click the function icon (f(x)) for a list of functions you can use in the mapping expressions.
    • Click the arrow next to a nested entity to display or hide its children. For Context, enter the name of the corresponding object or array of objects in the source data.
      Tip: Set Context to a slash ("/") if the source model is flat.
    Examples of expressions
    • upper-case(LastName)
    • if (MailingAddress/PostalCode = "") then "00000"

    The URI refers to a record that is randomly selected from the Source Collection or the Source Query specified in the step settings. The selected record is used as a reference to determine the source fields to include in the dropdown lists. You can choose a different record by changing the URI.

Testing
  1. Optional. Test your assignments and expressions.
    1. Click Test to verify that your assignments and expressions return the correct values.
      The Value column under Entity displays the assigned or calculated values based on the source record displayed under Source Data.
    2. Click on the arrows under Source Data to select other randomly selected source records.
      The Values column will be updated based on the displayed record.
    3. Click Clear to clear the Values column.

What to do next

  1. Add the step to a new flow or an existing one.
    1. Hover over the step tile.
    2. Click Add step to a new flow or select an existing flow under Add step to an existing flow.
    Tip: You can add the step to multiple flows.
  2. In the Run area, expand the flow and run the step.