
MarkLogic 9 Product DocumentationSecurity Guide — Chapter 11
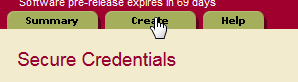
Secure Credentials
Secure credentials enable a security administrator to manage credentials, making them available to less privileged users for authentication to other systems without giving them access to the credentials themselves.
Secure credentials consist of a PEM encoded x509 certificate and private key and/or a username and password. Secure credentials are stored as secure documents in the Security database on MarkLogic Server, with passwords and private keys encrypted. A user references a credential by name and access is granted if the permissions stored within the credential document permit the access to the user. There is no way for a user to get access to the unencrypted credentials.
Secure credentials allow you to control which users have access to specific resources. A secure credential controls what URIs it may be used for, the type of authentication (e.g. digest), whether the credential can be used to sign other certificates, and the user role(s) needed to access the resource.
The security on a credential can be configured three different ways:
- Credentials that secure a resource by username and password.
- Credentials that secure a resource by a PEM encoded X509 certificate and a PEM encoded private key.
- Credentials that secure a resource by username and password, as well as a PEM encoded X509 certificate and a PEM encoded private key.
In most cases, the private key and x509 certificate used to configure a secure credential are obtained from a trusted Certificate Authority. However, there may be situations in which you may want to create your own Certificate Authority and generate your own private key and certificate, as described in the following sections:
- Creating a Secure Credential with Username and Password
- Creating a Secure Credential with PEM Encoded Public and Private Keys
Creating a Secure Credential with Username and Password
This section describes how to use the Admin Interface to create a simple secure credential that grants access to a resource by means of a username and password.
- In the Admin Interface, click the Security icon in the left tree menu.
- Click the Secure Credentials icon.
- Click the Create tab at the top of the Secure Credentials window:
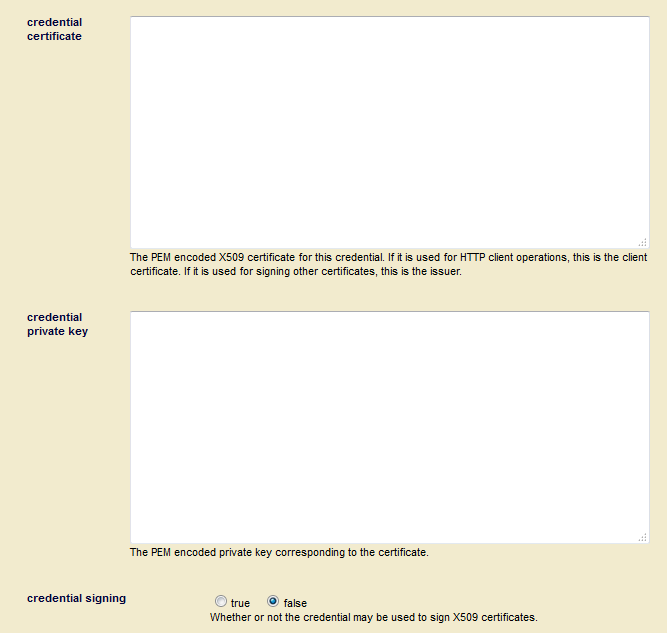
- In the New Credential window, enter the name of the credential. You can optionally specify a description, the name of the user and password to use to access the resource.
- Leave the credential certificate and credential private key fields empty. Set credential signing to false.
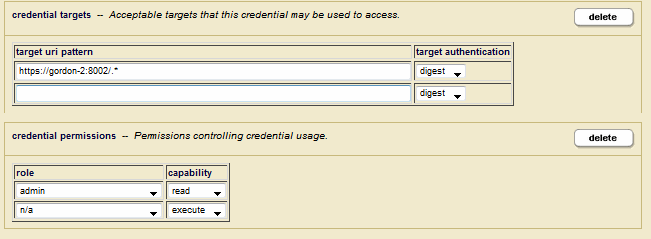
- In the target uri pattern field, enter the URIs of the MarkLogic App Servers this credential is to protect, starting with
https. Select the authorization used by the target App Servers. In the credential permissions menu, select which roles and permissions are required for a user to access the App Servers using this credential.A role with read capability implies execute capability, as well.

Creating a Secure Credential with PEM Encoded Public and Private Keys
You can skip this procedure if you have obtained a signed Certificate Authority (CA) from a trusted third party. In this case, you can paste the credential and private key into the Secure Credentials window described above in Creating a Secure Credential with Username and Password.
Generating a secure credential that includes PEM encoded public and private keys is a two-step procedure that is best done in code:
Creating a Certificate Authority
Secure credentials that contain PEM encoded public and private keys can be used to control access to a CA stored in a MarkLogic Security database. To create and insert a CA into the Security database, use the pki:create-authority function.
For example, the following query creates a CA, named acme-ca:
xquery version "1.0-ml";

import module namespace pki = "http://marklogic.com/xdmp/pki"
      at "/MarkLogic/pki.xqy";

declare namespace x509 = "http://marklogic.com/xdmp/x509";

pki:create-authority(
  "acme-ca", "Acme Certificate Authority",
  element x509:subject {
    element x509:countryName            {"US"},
    element x509:stateOrProvinceName    {"California"},
    element x509:localityName           {"San Carlos"},
    element x509:organizationName       {"Acme Inc."},
    element x509:organizationalUnitName {"Engineering"},
    element x509:commonName             {"Acme CA"},
    element x509:emailAddress           {"ca@acme.com"}
  },
  fn:current-dateTime(),
  fn:current-dateTime() + xs:dayTimeDuration("P365D"),
  (xdmp:permission("admin","read")))
Creating Secure Credentials from a Certificate Authority
Once you have created a CA as described in Creating a Certificate Authority, you can use the CA to create a client certificate and private key to build a secure credential.
Use the pki:authority-create-client-certificate function to create a client certificate with PEM encoded public/private keys. Next, use the sec:create-credential to generate and insert the credential.
For example, to create a secure credential, named acme-cred, from the acme-ca CA that includes PEM encoded public and private keys, a username and password, and that enables access to the target, https://MLserver:8010/.*, do the following:
xquery version "1.0-ml";

import module namespace sec = "http://marklogic.com/xdmp/security"
      at "/MarkLogic/security.xqy";
import module namespace pki = "http://marklogic.com/xdmp/pki"
      at "/MarkLogic/pki.xqy";

declare namespace x509 = "http://marklogic.com/xdmp/x509";

let $tmp :=
  pki:authority-create-client-certificate(
    xdmp:credential-id("acme-ca"),
    element x509:subject {
      element x509:countryName            {"US"},
      element x509:stateOrProvinceName    {"California"},
      element x509:localityName           {"San Carlos"},
      element x509:organizationName       {"Acme Inc."},
      element x509:organizationalUnitName {"Engineering"},
      element x509:commonName             {"Elmer Fudd"},
      element x509:emailAddress           {"elmer.fudd@acme.com"}
    },
    fn:current-dateTime(),
    fn:current-dateTime() + xs:dayTimeDuration("P365D"))

let $cert := $tmp[1]
let $privkey := $tmp[2]

return  sec:create-credential(
    "acme-cred", "A credential with user/password and certificate",
    "admin", "admin", $cert, $privkey,
    fn:false(),
    sec:uri-credential-target("https://MLserver:8010/.*", "digest"),
    xdmp:permission("admin","read"))
To create a secure credential, named simple-cred, that uses only a username and password, do the following:
xquery version "1.0-ml";

import module namespace sec = "http://marklogic.com/xdmp/security"
      at "/MarkLogic/security.xqy";

sec:create-credential(
    "simple-cred", "A simple credential without a certificate",
    "admin", "admin", (), (),
    fn:false(),
    sec:uri-credential-target("https://MLserver:8010/.*", "digest"),
    xdmp:permission("admin","read"))
As described in Configuring SSL on App Servers, MarkLogic App Servers authenticate clients by means of a host certificate associated with a certificate template. The following example shows how to create a host certificate using the CA described in Creating a Certificate Authority and import it into the myTemplate certificate template. For details on how to create a certificate template, see Creating a Certificate Template.
xquery version "1.0-ml";

import module namespace pki = "http://marklogic.com/xdmp/pki"
      at "/MarkLogic/pki.xqy";

declare namespace x509 = "http://marklogic.com/xdmp/x509";

let $tmp :=
  pki:authority-create-host-certificate(
    xdmp:credential-id("acme-ca"),
    element x509:subject {
      element x509:countryName            {"US"},
      element x509:stateOrProvinceName    {"California"},
      element x509:localityName           {"San Carlos"},
      element x509:organizationName       {"Acme Inc."},
      element x509:organizationalUnitName {"Engineering"},
      element x509:commonName             {"MLserver.marklogic.com"},
      element x509:emailAddress           {"me@marklogic.com"}
    },
    fn:current-dateTime(),
    fn:current-dateTime() + xs:dayTimeDuration("P365D"),
    "www.eng.acme.com", "1.2.3.4")

let $template := pki:template-get-id(
                    pki:get-template-by-name("myTemplate"))
let $cert := $tmp[1]
let $privkey := $tmp[2]

return pki:insert-host-certificate($template, $cert, $privkey)