
MarkLogic 9 Product DocumentationOps Director Guide — Chapter 8
SUPPORT view
The SUPPORT view shows alerts for application servers in your enterprise, allows you to view and filter server logs, and displays tasks that run on your managed clusters.
This chapter covers the following topics:
System Alerts
Use the SYSTEM ALERTS tab to review alerts from all monitored servers throughout the enterprise.
Alerts are associated with all types of resources. For example, if you have a resource group of databases containing db1 and db2, then only alerts associated with db1 and db2 and their forests are displayed.
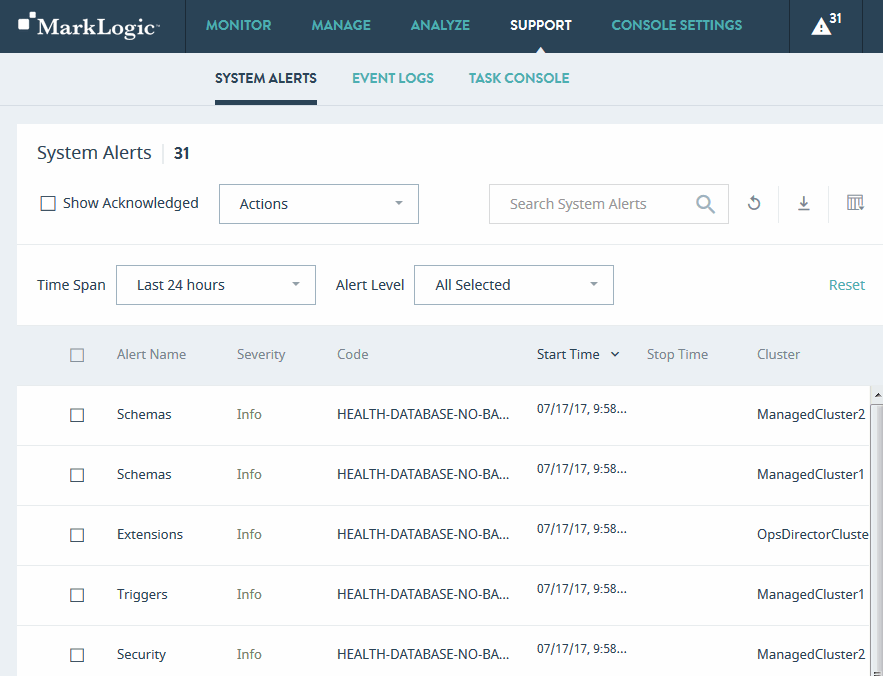
The columns displayed for SYSTEM ALERTS are described in the following table.
| Column | Description |
|---|---|
| Resource Name | The name of the resource related to the alert. |
| Severity | Color-coded alert severity level. For details, see Alert Levels. |
| Code | The alert code. |
| Start Time | Alert timespan starting date and time |
| Stop Time | Alert timespan ending date and time |
| Cluster | Name of the cluster that generated the alert |
| Alert Details | Detailed description of alert |
| Status | Alert status (Open/Closed/Acknowledged) |
| Action | Select Acknowledge to remove the alert from the list or Analyze to navigate to the ANALYZE view of the resource. For details, see the ANALYZE View. |
You may export data from the System Alerts tab as a CSV (Comma Separated Values) file by clicking the Export icon in the upper right corner. The following rules apply:
- The resulting CSV file will have the same columns as the System Alerts table in the UI.
- All available columns are exported, regardless of whether they are visible or hidden in the UI.
- All records that satisfy the set filter parameters are exported.
- Data types of the fields in the CSV file correspond to those in the UI. In case of boolean values, Yes/No in the UI corresponds to TRUE/FALSE in the CSV file.
You may then import the CSV file into other applications (such as Excel) for further processing or analysis.
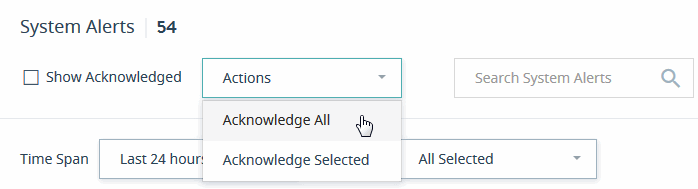
Once you have reviewed an alert, you can mark specific or all alerts as acknowledged to remove them from the list. Once acknowledged, the alert is suppressed from further notifications. The acknowledge action toggles depending on the state of an alert. If the alert is suppressed then the option changes to Unacknowledge, which unsuppresses the alert.
Select Acknowledge All to acknowledge all alerts, whether or not they are currently displayed. Acknowledge Selected is enabled if one or more alerts is selected via checkboxes. Select Acknowledge Selected to acknowledge those selected alerts.
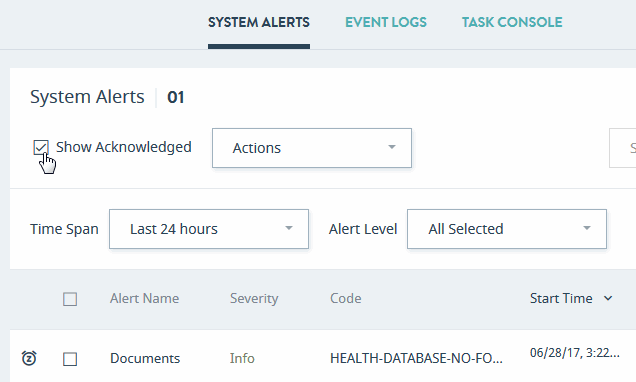
Acknowledged alerts are indicated by an icon to the left of each acknowledged alert. The Acknowledged state is a property of the alert that is shared for all users. You can include acknowledged alerts in the table by selecting the Show Acknowledged checkbox. Uncheck to exclude acknowledged alerts.
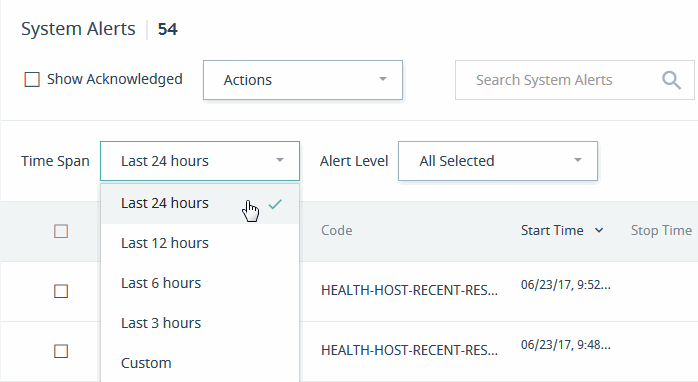
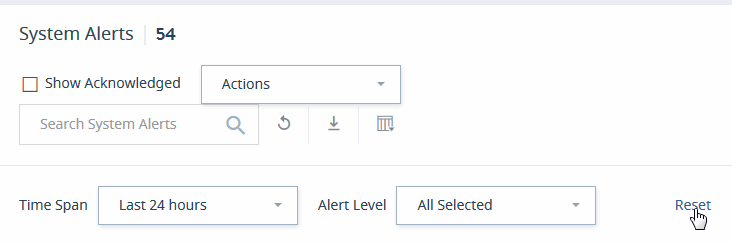
You can narrow the results by specifying a time period, resource name, and alert severity.
Time Span -- You can select from the list of predefined time spans or select a custom date and time range by choosing a start date and time and end date and time, as described in Date and Time Filters.
Alert Level -- You can select one or more alert levels to narrow the list of alerts that have the specified levels.

Search System Alerts -- You can search for specific system alerts. The search text must be more than two characters.

The spaces in the string that you pass in the Search System Alerts box are trimmed off. For example, entering HEALTH SERVER with a space at the end will search for all alerts starting with HEALTH SERVER, such as HEALTH SERVER-DISABLED and so on.
Click Reset to reset the applied filters to their default values. The Reset button is enabled when you make changes to any of the currently applied filters.
Alert Levels
The color-coded alert levels are described in the following table.
Point-in-Time Alerts
Point-in-time alerts are derived from logs.
Certain log messages in the server logs make Ops Director generate alerts. Generation of the alerts is based on rules configured in the debug.xml file in the Ops Director database. Each rule specifies a log level and a regular expression to which a log message of that level has to match. This log message is translated into an alert of the severity specified in the rules.
Event Logs
Use the EVENT LOGS tab to review events from all monitored App Servers throughout the enterprise. Narrow the results by specifying a time period, log type, and log file.
Access to log data is based on your access to hosts and clusters. For example, if you have a resource group of hosts containing host1 and host2, only logs associated only with host1 and host2 are displayed.
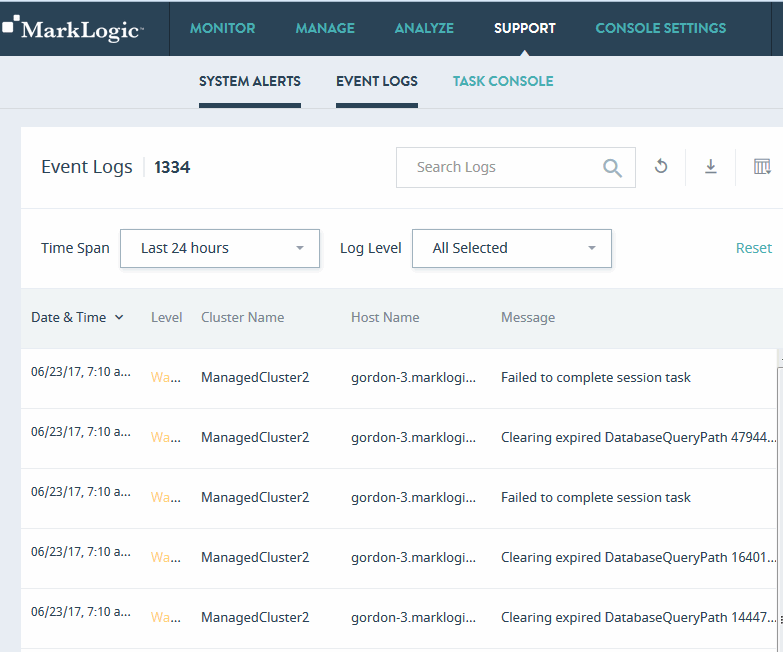
The columns displayed for EVENT LOGS are described in the following table.
| Column | Description |
|---|---|
| Date & Time | Datetime of the logged event. |
| Level | The log level of the event. For a description of the log levels, see Understanding the Log Levels in the Administrator's Guide. |
| Cluster Name | The name of the cluster on which the logged event occurred. |
| Host Name | The name of the host on which the logged event occurred. |
| Message | The logged error message. |
| Log File | The full text of the logged event. |
You may export data from the EVENT LOGS tab as a CSV (Comma Separated Values) file by clicking the Export icon in the upper right corner. The following rules apply:
- The resulting CSV file will have the same columns as the Event Logs table in the UI.
- All available columns are exported, regardless of whether they are visible or hidden in the UI.
- All records that satisfy the set filter parameters are exported.
- Data types of the fields in the CSV file correspond to those in the UI. In case of boolean values, Yes/No in the UI corresponds to TRUE/FALSE in the CSV file.
You may then import the CSV file into other applications (such As Excel) for further processing or analysis.
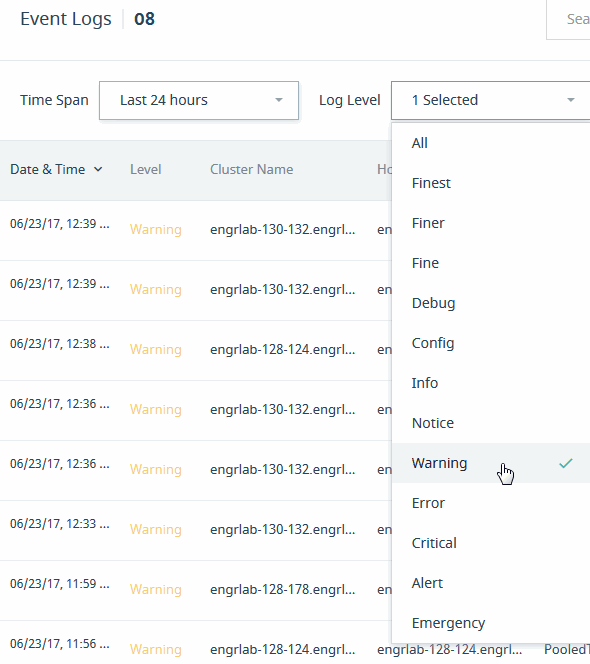
By default, all event logs are displayed. Use the Log Level filter to select which types of event logs to view. For a description of the log levels, see Understanding the Log Levels in the Administrator's Guide.
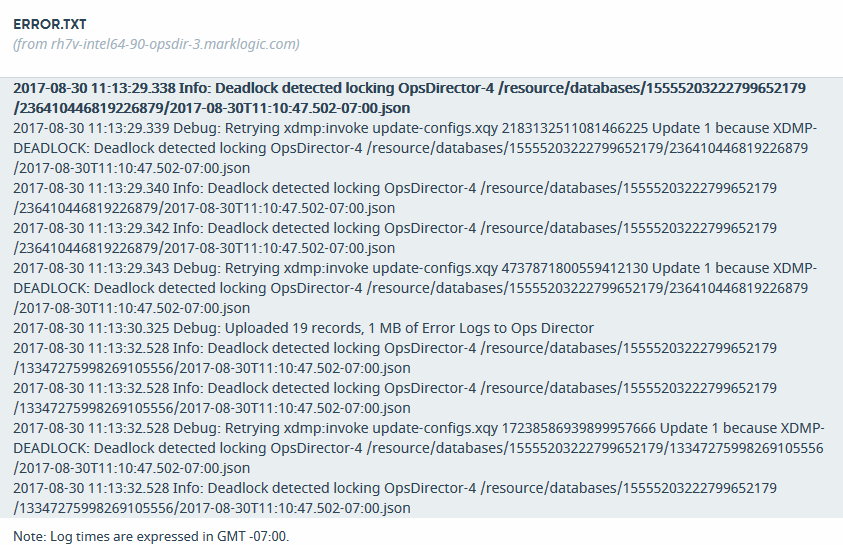
Select any log file to access its full contents, which may be downloaded for further analysis, or for archival and audit purposes.

The text for the event log is displayed in a popup window. The selected log entry is boldfaced. The window includes entries up to 10 minutes before and 5 minutes after the selected entry.
Task Console
Use the TASK CONSOLE tab for an overview of all tasks throughout the enterprise. The data table presents the following information:
- the task name
- the cluster, host, and database on which it is running
- the user who initiated the task
- the task priority
- the current state of the task
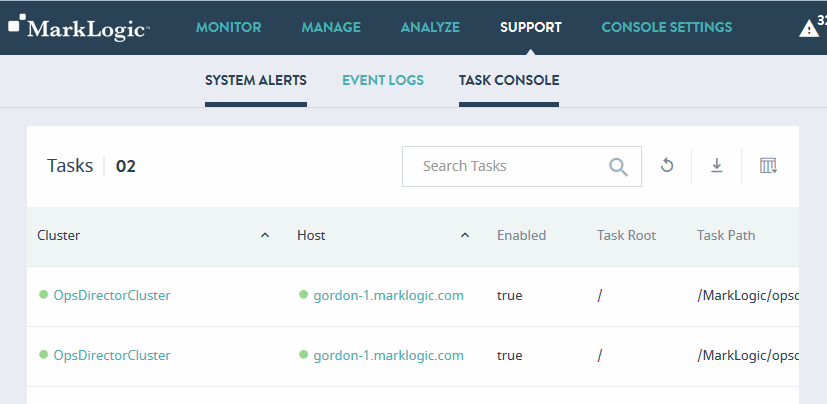
The columns displayed for TASK CONSOLE are described in the following table.
You may export data from the Task Console tab as a CSV (Comma Separated Values) file by clicking the Export icon in the upper right corner. The following rules apply:
- The resulting CSV file will have the same columns as the Task Console table in the UI.
- All available columns are exported, regardless of whether they are visible or hidden in the UI.
- All records that satisfy the set filter parameters are exported.
- Data types of the fields in the CSV file correspond to those in the UI. In case of boolean values, Yes/No in the UI corresponds to TRUE/FALSE in the CSV file.
You may then import the CSV file into other applications (such as Excel) for further processing or analysis.