Administrator's Guide — Chapter 24
Security Administration
MarkLogic Server uses a role-based security model. A user's privileges and permissions are based on the roles assigned to the user. For background information on understanding the security model in MarkLogic Server, see Security Guide. This section describes administration tasks related to security, and includes the following sections:
This chapter describes how to use the Admin Interface to manage security objects. For details on how to manage security objects programmatically, see Creating and Configuring Roles and Users and User Maintenance Operations in the Scripting Administrative Tasks Guide.
Security Entities
The key entities in MarkLogic Server's security model are:
- User
A user within the model has a set of roles. A user has privileges and permissions within the system based on the roles he is given.
- Role
A role gives privileges and permissions to a user. A role may inherit from multiple roles. Role inheritance is an is-a relationship. Hence, an inherited role also has the privileges and permissions of its parent(s).
- Execute Privilege
An execute privilege grants authorization to perform a protected action. Only roles (and their inherited roles) specified in the execute privilege can perform the action.
- URI Privilege
A URI privilege grants authorization to create a document within a protected base URI. Only roles (and their inherited roles) specified in the URI privilege can create the document within the protected base URI.
- Permission
A permission protects a document or a collection. Each permission associates a single role with a capability (Read, Update, Insert). A protected document or collection has a set of associated permissions.
- Collection
A collection groups a set of documents that are related. A document may belong to any number of collections. A collection exists in the system when a document in the system states that it is part of that collection. However, an associated collection object is not created and stored in the Security database unless it is protected.
Permissions created at the collection level apply to the collection but not to documents within the collection. A user needs to have permissions at the both the collection and document level to be able to add documents to a protected collection.
- Amp
An amp gives the User additional roles temporarily while the user is performing a certain task (executing a function).
- Certificate Authority
A certificate authority (CA) is a trusted third party that certifies the identity of entities, such as users, databases, administrators, clients, and servers. A CA is used by the SSL (Secure Sockets Layer) security standard to provide encrypted protection between browsers and App Servers. When an entity requests certification, the CA verifies its identity and grants a certificate, which is signed with the CA's private key. If the CA is trusted, then any certificate it issues is trusted unless it has been revoked. For details on SSL support in the MarkLogic Server, see Configuring SSL on App Servers in the Security Guide.
- Certificate Template
A certificate template is a MarkLogic construct that is used to generate certificate requests for the various hosts in a cluster. A certificate template is used by the SSL (Secure Sockets Layer) security standard to provide encrypted protection between browsers and App Servers. The template defines the name of the certificate, a description, and identity information about the owner of the certificate. For details on SSL support in the MarkLogic Server, see Configuring SSL on App Servers in the Security Guide.
- External Authentication
An External Authentication Configuration Object is used to configure MarkLogic Server for external authentication by LDAP or Kerberos. An external authentication configuration object specifies which authentication protocol and authorization scheme to use, along with any other parameters necessary for LDAP authentication. For details on external authentication with MarkLogic Server, see the External Security chapter in the Security Guide.
- Security Entity Relationships
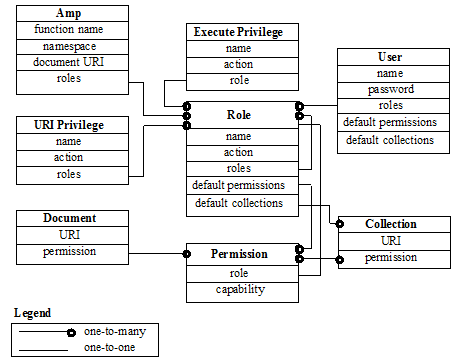
The following diagram illustrates the relationships between the different entities in the MarkLogic Server security model.
The remaining sections of this chapter detail the procedures to administer MarkLogic Server security entities. All security administrative tasks are hot-- the changes take effect immediately without a server restart.
Permissions are not administered through the administrative interface and are not described in detail in this document. For more information on using permissions in MarkLogic Server, see the MarkLogic XQuery and XSLT Function Reference.
Users
A User has a set of roles. A user has privileges and permissions within the system based on the roles he is given. A user can perform tasks (execute functions) based on his privileges and access data based on his permissions.
Each user has an associated user name and password. A user also has default collections. When a user creates a document but does not explicitly associate the document with a set of collections, the document is automatically added to the user's default collections. Default permissions can be created for a user. When a user creates a document but does not explicitly set the permissions for the document, the document will be given the user's default permissions.
If security is turned on for an HTTP, ODBC, or XDBC server, all users in the security database will have access to the server. Finer granularity security control to functions in XQuery programs running on the HTTP, ODBC, or XDBC servers are accomplished through the use of xdmp:security-assert() within the code. Granular secured access to documents is achieved through the use of permissions associated with each protected document.
Use the following procedures to create, manage and maintain users:
Creating a User
Follow these steps to create a user:
- Click the Security icon in the left tree menu.
- Click the Users icon.
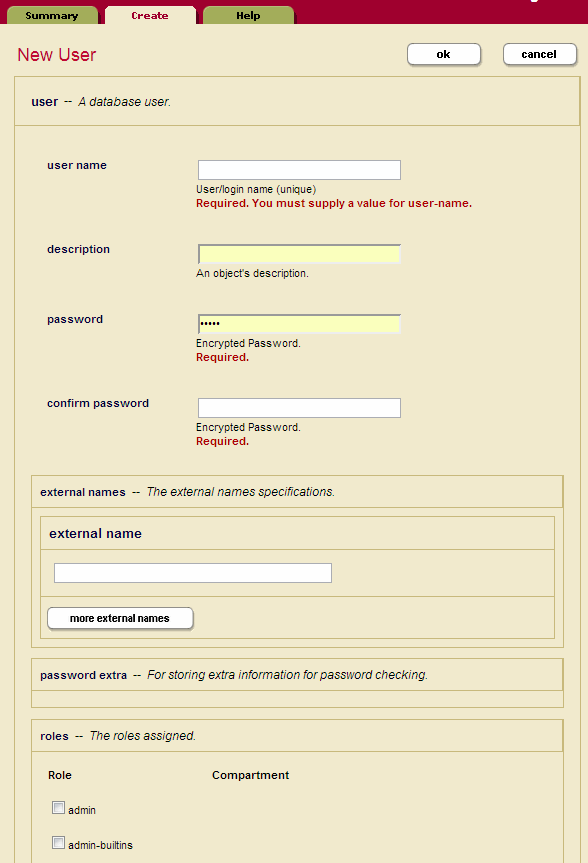
- Click the Create tab. The User Configuration page appears:
- Enter a name for the user in the username field.
- Enter the description for the user (optional).
- Enter a password for the user.
- Re-enter the password to confirm it.
- If the user is to be authorized externally by LDAP or Kerberos, enter one or more Distinguished Names (LDAP) or User Principals (Kerberos) in the External Names section. For details on external authorization, see the External Security chapter in the Security Guide.
- Under the roles section, check the roles to assign the user.
- Create default permissions for this user (optional). Select a role and pair the role with the appropriate capability (read, insert, update). If there are more than 3 default permissions you want to add for this user, you can do so on the next screen after you click OK.
- Create default collections for this user (optional). Type in the collection URI for each collection you want to add to the user's default collection. If there are more than 3 default collections you want to add for this user, you can do so on the next screen after you click OK.
- Click OK.
The user is now added to the system and the user configuration page appears. If you want to add more default permissions or collections to the user, scroll down to the section for default permissions or collections.
Modifying a User Configuration
Perform the following steps to modify the configuration for a user:
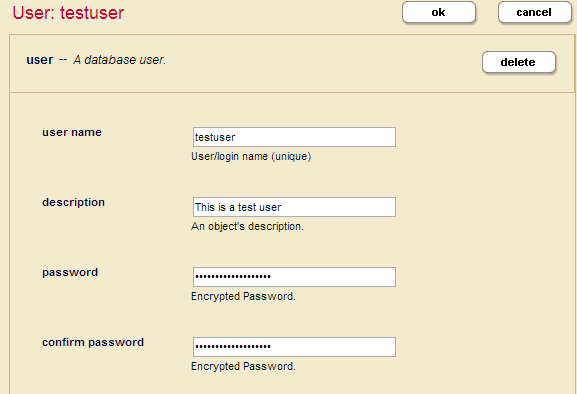
- For the user to which you want to modify, view that user's configuration as described in Viewing a User Configuration.
- Perform any modifications needed to the user's configuration. Modifications might include changing any of the user credentials (including password), adding or removing role assignments, adding or removing default permission settings, or adding or removing default collection settings.
Making changes to the to the user configuration affects the access control policy for that user, which can either increase or decrease the activities authorized for the user. For more details on how the security system works, see Security Guide.
- Click OK to save the changes.
The new changes are in effect for all transactions beginning after the user changes are committed.
Deleting a User
Perform the following steps to delete a user from the security database:
Roles
MarkLogic Server implements a role-base security model. Therefore, the Role is a central security concept in MarkLogic Server. A role gives a user privileges (both Execute and URI) to perform certain actions in a system. An Execute Privilege allows a user to perform a protected action. A URI Privilege allows a user to create a document under a protected URI. A role also gives a user the permissions to access protected documents.
A role may inherit from multiple roles. The inheritance relationship for roles is an is-a relationship. Therefore, a role gets the privileges and permissions of the roles from which they inherit.
MarkLogic Server is installed with the following pre-defined roles:
While you are able to change the configuration settings of these pre-defined roles (except for the admin role) or delete any of them, we strongly recommend that you proceed with caution.
A role has default collections. When a user of a role creates a document but does not explicitly associate the document with a set of collections, the document is automatically added to a set of default collections. This set of default collections is the union of the default collections defined for the user, the roles the user has, and the roles from which the user's directly assigned roles inherit.
A role has default permissions. When a user of a role creates a document but does not explicitly set the permissions for the document, the document will be given a set of default permissions. This set of default permissions is the union of the default permissions defined for the user, the roles the user has, and the roles from which the user's directly assigned roles inherit.
For more details about the role-based security model in MarkLogic Server, see Security Guide.
Use the following procedures to create, manage and maintain roles:
Creating a Role
Perform the following steps to create a role.
- Click the Security icon in the left tree menu.
- Click the Roles icon.
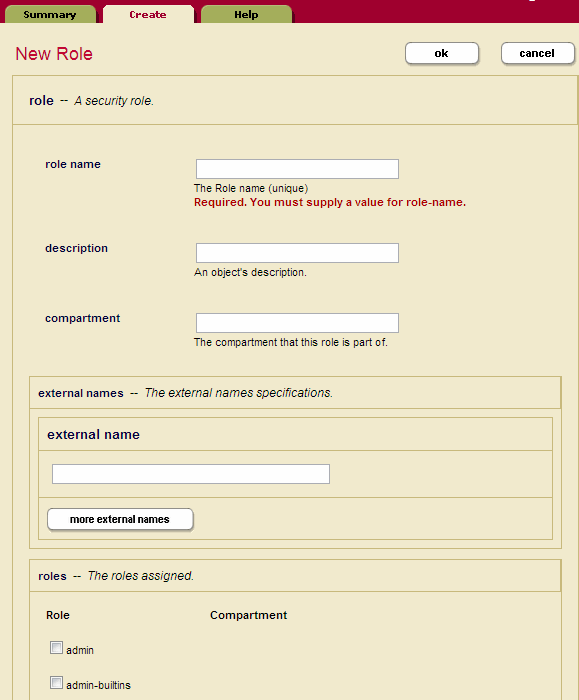
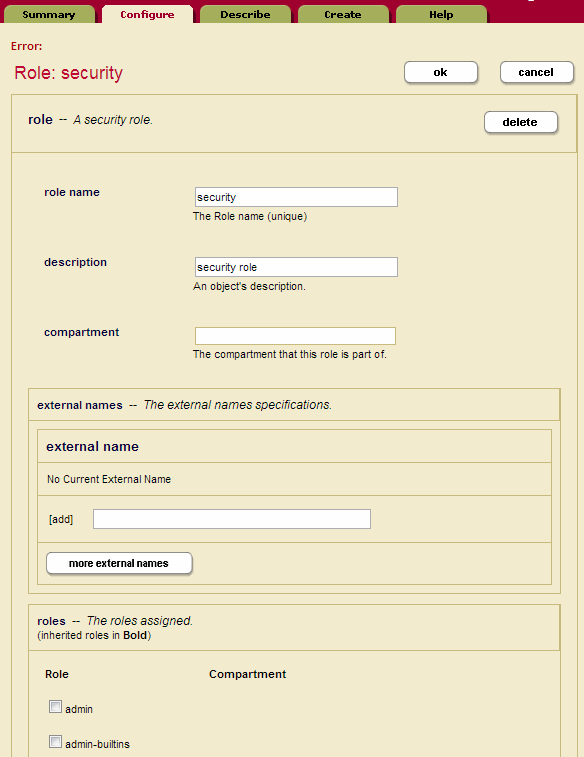
- Click the Create tab. The Role Configuration page appears:
- Type in a name for role in the role name field.
- Type in a description for the role (optional).
- If you want to place the role into the named compartment, enter name of the compartment in the Compartment field. If a document has any permissions (role/capability pairs) with roles that have a compartment, then the user must have those roles with each of the compartments (regardless of which permission they are in) to perform any of the capabilities.
- If the role is to be mapped to an LDAP group, enter one or more group names in the External Names section. For details on external authorization, see the External Security chapter in the Security Guide.
- Under the roles section, select the roles from which this role will inherit.
- Under the execute privileges section, select from the available execute privileges to be associated with the role.
- Under the URI privileges section, select from the available URI privileges to be associated with the role.
- Create default permissions for this role (optional). Select a role and pair the role with the appropriate capability (read, insert, update). If there are more than 3 default permissions you want to add for this role, you can do so on the next screen after you click OK.
- Create default collections for this role (optional). Type in the collection URI for each collection you want to add to the role's default collections. If there are more than 3 default permissions you want to add for this user, you can do so on the next screen after you click OK.
- Click OK.
The role is now added to the system and the Role Configuration page appears. If you want to add more default permissions or collections to the role, scroll down to the section for default permissions or collections.
Viewing a Role
Modifying a Role Configuration
Perform the following steps to modify a role configuration:
- For the role to which you want to modify, view the role configuration as described in Viewing a Role.
- Perform any modifications needed to the role configuration. Modifications might include adding or removing role assignments, adding or removing default permission settings, or adding or removing default collection settings.
Making changes to the to the role configuration affects the access control policy for that role, which can either increase or decrease the activities authorized for any users who have that role (either directly or indirectly). For more details on how the security system works, see Security Guide.
- Click OK to save the changes.
The new changes are in effect for all transactions beginning after the user changes are committed.
Deleting a Role
You can delete a role from the security database. The system does not check to see if there are any users with that role before deleting it. A deleted role is automatically removed from all users still assigned to that role. Users who were assigned to the deleted role lose the permissions and privileges given by that role.
Execute Privileges
The actions that a user can perform in the server are determined by the set of privileges that they possess. Privileges are connected to users with roles. An Execute Privilege grants authorization to perform a protected action. An execute privilege specifies a protected action, and the roles that can perform the action. Roles that inherit from the specified roles can also perform the protected action. The protected action is represented as a URI.
Once an execute privilege is created, it is enforced in XQuery programs through the use of xdmp:security-assert(<protected-action-uri>, "execute") in the code. That is, xdmp:security-assert(<protected-action-uri>, "execute") can be added at the entrance to function or a section of code that has been protected. If the system is executing as a user without the appropriate roles as specified by the execute privilege, an exception is thrown. Otherwise, system satisfies the security-assert condition and proceeds to execute the protected code.
Use the following procedures to create, manage and maintain execute privileges:
- Creating an Execute Privilege
- Execute Privilege: grant-my-privilege
- Viewing an Execute Privilege
- Modifying an Execute Privilege
- Deleting an Execute Privilege
Creating an Execute Privilege
Perform the following steps to create an execute privilege:
- Click the Security icon in the left tree menu.
- Click on the Execute Privileges icon.
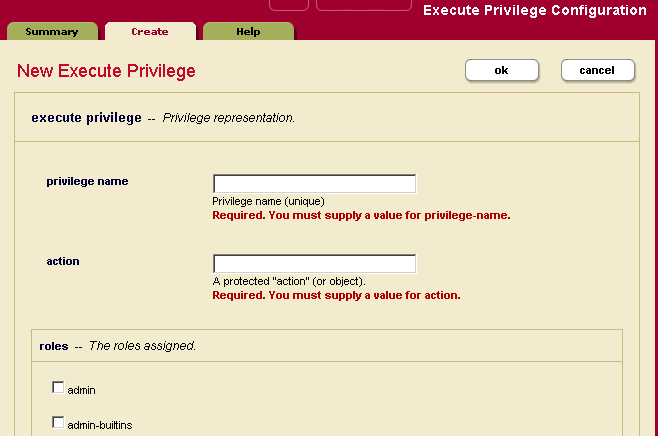
- Click the Create tab. The Execute Privilege Configuration page appears:
- Enter the name of the execute privilege. Use a name that is descriptive of the action this execute privilege will protect. For example,
create-useris the name of an execute privilege that gives a role the authorization to create a user. - Enter a protected action, represented as a URI. You can use any URI but we recommend you follow the conventions for your company. For example, the URI for the
create-userexecute privilege ishttp://marklogic.com/xdmp/privileges/create-user. - Under the roles section, select the roles that are allowed to perform the protected action.
- Click OK.
The execute privilege is now added to the security database. You can now use the xdmp:security-assert() function in your code to associate this privilege with a protected operation.
Execute Privilege: grant-my-privilege
In MarkLogic 10.0-3 and later, the grant my privilege feature be used as part of Executive Privileges to assign some privileges to roles. In the context of Data Hub Service, non-admin users (users with the manage role but not admin, Security, or manage-admin roles) need to be able to assign some privileges to roles so that they become available to the users in possession of those roles.
A user with the grant-my-privileges privilege can assign privileges that they already possess to roles that they are allowed to modify. This feature works in conjunction with the data roles feature. The grant-my-privileges privilege is useless in isolation, as its only purpose is to assign privileges to roles.
To access the grant-my-privilege feature in the Admin UI:
- Click the Security icon in the left tree menu.
- Click on the Execute Privileges icon.
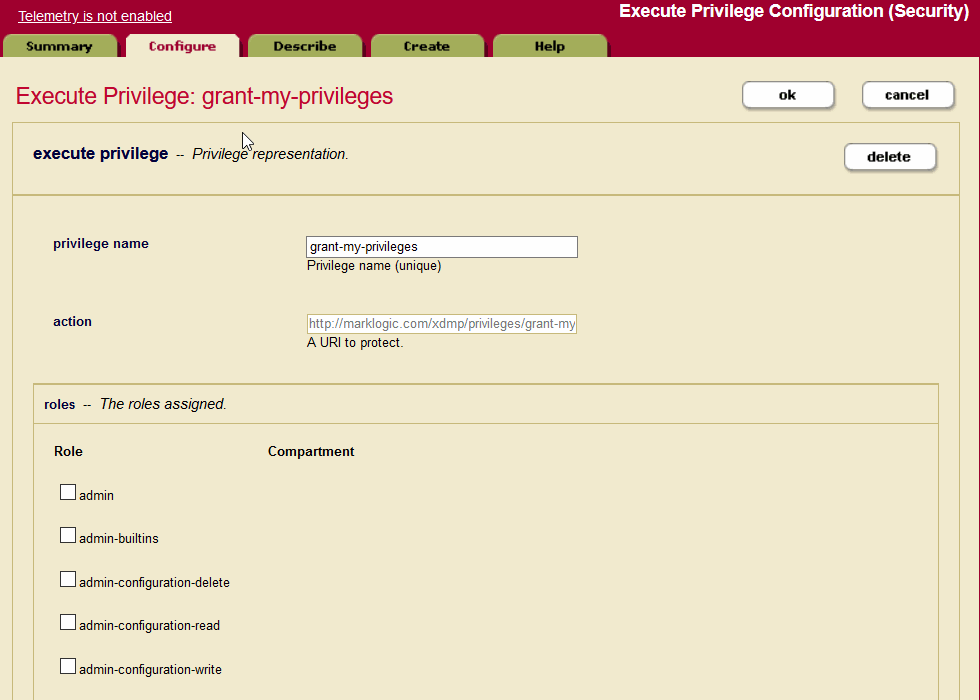
- Scroll down on this page to find grant-my-privileges and click on the link.
The Execute Privilege: grant-my-privileges screen opens, where you can select the roles assigned this privilege.
The precise set of privileges that a user can assign is determined by the privileges that they already possess. It is not possible for a user to assign a privilege that they do not possess (admin, for example). If a user attempts to change the privileges associated with a role, the request will succeed if (and only if) the following conditions apply:
- The user has the grant-my-privileges privilege. A user without this privilege cannot make any changes to the privileges associated with a role.
- The user has the create-data-roles privilege and the necessary granular edit privilege for the role that they are modifying. Without these privileges, they cannot modify the role.
- The user possesses all of the privileges that they are attempting to add or remove from the role.
Modifying an Execute Privilege
Perform the following steps to modify an execute privilege:
- For the privilege to which you want to modify, view the configuration as described in Viewing an Execute Privilege.
- Perform any modifications needed to the privilege (for example, add or remove role assignments).
Making changes to the to the execute privilege configuration affects the access control policy for that privilege, which can either increase or decrease the activities authorized for any users who have any of assigned roles (either directly or indirectly). For more details on how the security system works, see Security Guide.
- Click OK to save the changes.
The new changes are in effect for all transactions beginning after the user changes are committed.
Deleting an Execute Privilege
You can delete an execute privilege from the security database. However, an exception will be thrown when a security-assert() on the protected action specified in the deleted execute privilege is encountered. That is, a deleted execute privilege behaves like an execute privilege for which no role has been given access to the protected action. Follow these steps to delete an execute privilege:
- Click the Security icon in the left tree menu.
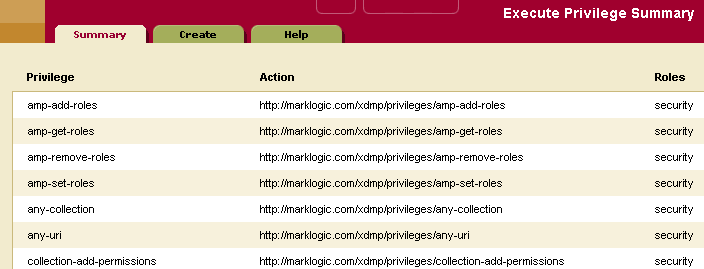
- Click the Execute Privileges icon. The Execute Privileges Summary page appears:
- Click the name of the execute privilege that you want to delete.
- On the Execute Privileges page for the given privilege, click the Delete button.
- Click OK to confirm deleting the execute privilege.
The execute privilege is now deleted from the security database.
URI Privileges
A URI Privilege grants authorization to create documents under a protected URI. That is, a URI privilege specifies the roles that are allowed to create documents with the protected URI as the base URI (prefix) in the document URI. Roles that inherit from the specified roles can also create the documents under the protected URI.
Unlike an execute privilege, where xdmp:security-assert() needs to be called explicitly to protect a function, a URI privilege is automatically enforced. When xdmp:document-insert() is called, the system checks the base URIs (prefix) of the document URI specified to see if they might be protected by a URI privilege. If the base URI has an associated URI privilege, it checks the roles of the user to see if any of the user's roles gives the user authorization to create the document within the protected base URI. If the user has the requisite authorization, the document is inserted into the database. Otherwise, an exception is thrown.
Use the following procedures to create, manage and maintain URI privileges:
Creating a URI Privilege
Perform the following steps to create a URI privilege:
- Click the Security icon in the left tree menu.
- Click the URI Privileges icon.
- Click on the Create tab. The URI Privilege Configuration page appears:
- Enter the name of the URI privilege. Use a name that is descriptive of the base URI to be protected. For example, to restrict the creation of documents under a base URI reserved for the accounting group, you might use the name accounting_files.
- In the action field, enter the base URI to be protected. While the base URI does not have to map to an actual directory, it should follow the directory structure convention (for example,
/myfiles/accounting_files). In this example, only the user with this URI privilege can create a file with the URI/myfiles/accounting_files/account1.xml. - Under the roles section, select the roles that are allowed to create documents under the base URI.
- Click OK.
The URI privilege is created and added to the security database.
Modifying a URI Privilege
Perform the following steps to modify an execute privilege:
- For the privilege to which you want to modify, view the configuration as described in Viewing a URI Privilege.
- Perform any modifications needed to the privilege (for example, add or remove role assignments).
Making changes to the to the URI privilege configuration affects the access control policy for that privilege, which can either increase or decrease the activities authorized for any users who have any of assigned roles (either directly or indirectly). For more details on how the security system works, see Security Guide.
- Click OK to save the changes.
The new changes are in effect for all transactions beginning after the user changes are committed.
Deleting a URI Privilege
You can delete a URI privilege from the security database. Perform the following steps to delete a URI privilege:
- Click the Security icon in the left tree menu.
- Click the URI Privileges icon. The URI Privileges Summary Page appears:
- On the URI Privileges page for the given privilege, click the Delete button.
- Click OK to confirm deleting the URI privilege.
The URI privilege is now deleted from the security database.
Amps
An Amp gives the user additional roles temporarily while the user is performing a certain task (executing a function). While the user is executing the amp-ed function, the user receives additional privileges and permissions given by the additional roles. An amp is useful when a user needs additional privileges and permissions only while the user is executing a certain function.
Giving the user additional roles permanently could compromise the security of the system. On the other hand, an amp enables granular security control by limiting the effect of the additional roles (privileges and permissions) to a specific function. For example, a user may need a count of all the documents in the database when the user is creating a report. However, the user does not have read permissions on all the documents in the database, and hence does not know the existence of all the documents in the database. An amp can be created for the document-count() function to elevate the user to an admin role temporarily while the user is executing the function to count the documents in the system.
An amp is defined by the local name of the function, the namespace and the document URI. The document URI must begin with a forward slash / and is treated as being rooted relative to the Modules directory in the installation path. When resolving an amp, MarkLogic Server looks for the file using a path rooted relative to the Modules directory in the installation path. If it finds a function that matches the local name and namespace using the specified path, it applies the amp to the function.
Starting in 9.0-7 for triggers and 10.0-2 for amps, Database names can be used in the trigger and amp creation apis, thus making it easy to support the same functionality on replica clusters for databases with the same names.
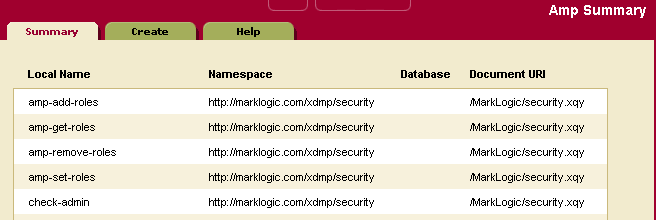
For more details about amps, see Security Guide. For examples of amps, look at one of the amps created during installation. To view an amp, follow the instructions in the section Viewing an Amp.
Use the following procedures to create, manage and maintain amps:
Creating an Amp
To create an amp, Perform the following steps:
- Click the Security icon in the left tree menu.
- Click the Amps icon.
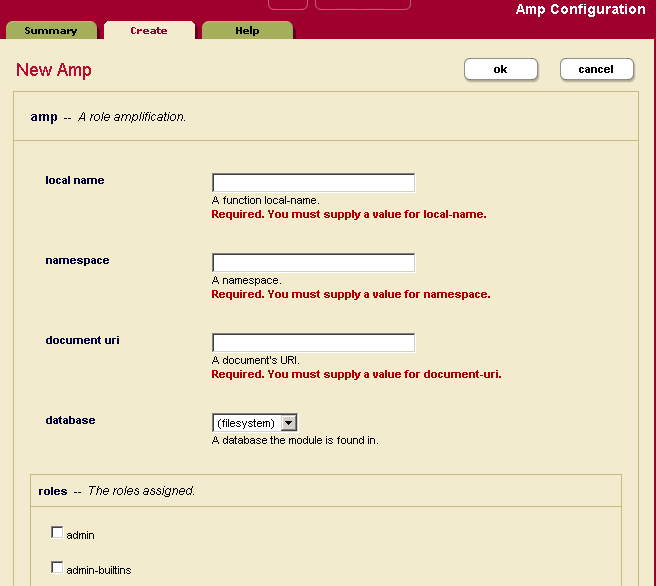
- Click on the Create tab. The Amp Configuration page appears:
- Enter the database in which the function is stored. If the function is stored in the Modules directory on the filesystem, set the database to
filesystem(which is the default value). - Enter the local name of the function (without parentheses) in which the amp takes effect. For example:
my-function. - Enter the namespace in which the function is defined.
- Enter the document URI for the document in which the function is defined. This document URI must begin with a forward slash (for example,
/amped-functions.xqy). The specified document must be placed in the Modules directory within the installation path. For example, if/mydir/my-amps.xqyis specified in the document uri,my-amps.xqymust be placed in installation-directory/Modules/mydir. - Under the roles section, select the additional roles that will be given to the user while the user is executing the function.
- Click OK.
Modifying an Amp
Perform the following steps to modify an amp:
- For the amp to which you want to modify, view the configuration as described in Viewing an Amp.
- Perform any modifications needed to the amp (for example, add or remove role assignments).
Making changes to the to the amp configuration affects the access control policy for that amp, which can either increase or decrease the activities authorized for any users who have any of assigned roles (either directly or indirectly). For more details on how the security system works, see Security Guide.
- Click OK to save the changes.
The new changes are in effect for all transactions beginning after the user changes are committed.
Deleting an Amp
You can delete an amp from the security database. Perform the following steps to delete an amp:
Protected Collections
A collection groups a set of documents that are related and enables queries to target subsets of documents within a database efficiently. A document may belong to any number of collections simultaneously. A collection exists in the system when a document in the system states that it is part of that collection.
A protected collection is one for which only authorized users can associate documents with the collection. When you create a protected collection, an associated protection collection object is created and stored in the security database.
You must understand the following key concepts and limitations of protected collections:
- A protected collection dictates who can add documents to the collection. It provides no other access control.
- A protected collection does not control access to the documents in the collection. Use document permissions for this purpose.
- Only users with a role that has update permissions for the collection can add documents to the collection or use explicit collection operations such as xdmp.documentRemoveCollections to remove a document from a protected collection.
- A user with update permissions on a document can remove the document from a protected collection by reinserting the document with a different set of collections.
Use the following procedures to create, manage, and maintain collections:
- Creating a Protected Collection
- Viewing a Protected Collection
- Removing a Permission from a Protected Collection
- Deleting a Protected Collection
Creating a Protected Collection
Perform the following steps to create a protected collection:
- Click the Security icon in the left tree menu.
- Click the Collections icon.
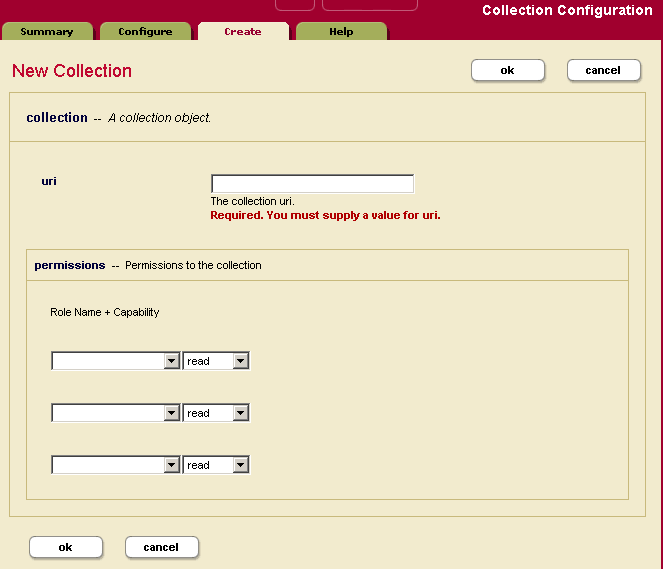
- Click the Create tab, The Collection Configuration page appears:
- Enter the URI for the collection.
- In the permissions section, add permissions (role-capability pair) to the collection. Select from the available roles and pick a capability for the role. You should usually select the update capability as this is the only one that affects how users interact with the collection. Only users with a role with the update capability can add documents to the collection; for details, see Protected Collections.
- Click OK.
Removing a Permission from a Protected Collection
Perform the following steps to remove a permission from a protected collection:
- Click the Security icon in the left tree menu.
- Click the Collections icon. The Collection Summary page appears.
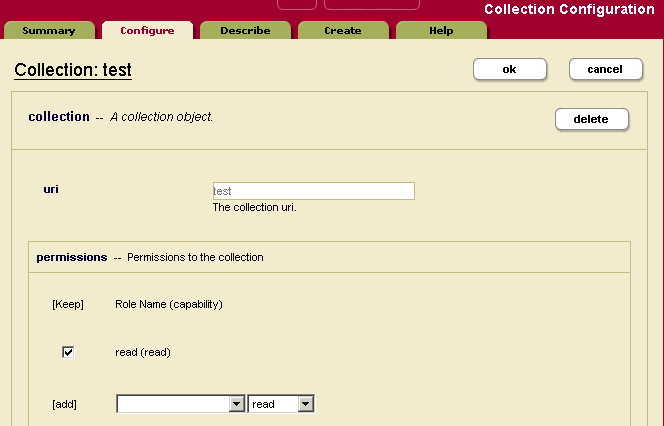
- Click the name of the collection from which you want to remove a permission, either on the tree menu or on the summary page. The Collection Configuration page appears.
- In the permissions section, uncheck the box next to the permission you want to remove.
- Click OK.
Deleting a Protected Collection
Perform the following steps to remove delete a protected collection:
- Click the Security icon in the left tree menu.
- Click the Collections icon.
- Click the name of the collection you want to delete, either on the tree menu or on the summary page. The Collection Configuration page appears.
- Click on the Delete button near the top right.
- Click OK to confirm deleting the collection.
The protected collection is deleted from the security database.
Certificate Templates
A Certificate Template contains the identification information associated with an SSL certificate. See Configuring SSL on App Servers in the Security Guide for details.
Realm
MarkLogic Server stores the realms for application servers in the security database. Each application server takes its realm from the security database to which it is connected. Realms are used in computing digest passwords.
Setting the Realm
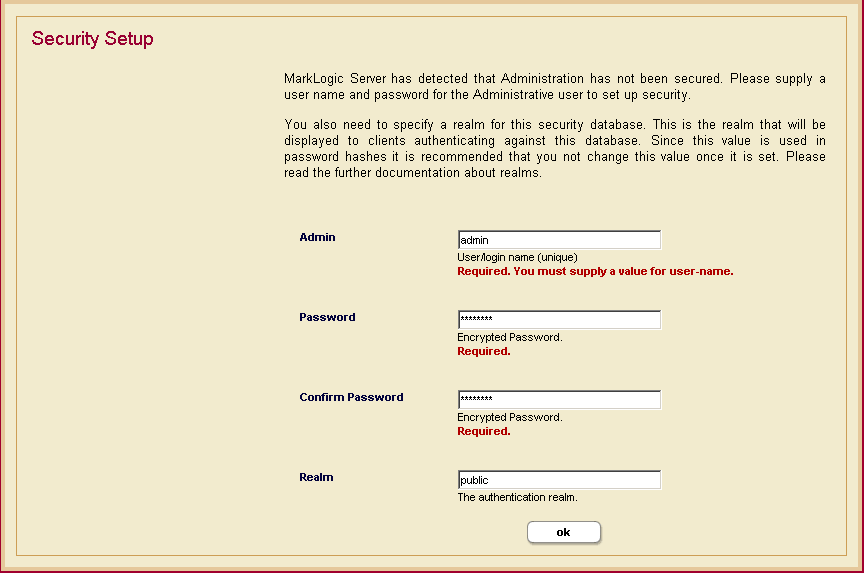
The realm is stored in the security database to which the Admin Interface is connected, and is set at installation time:
Changing the Realm
Changing the realm in the security database invalidates all user digest passwords. This only affects application servers whose authentication setting is digest or digestbasic mode.
In digest mode, you need to re-enter all user passwords in the security database. Changing the passwords in the security database will cause the server to recalculate the digest passwords. In digestbasic mode, the first time a user logs into the server after the realm is changed, the user will be prompted to enter their passwords multiple times before they are logged into the system. However, the server will automatically recalculate their digest password with the new realm at that time, and they will have a normal login process for future access.
If you change the realm, any App Servers that uses digest authentication will no longer accept the existing passwords. This includes the Admin Interface, and includes passwords for users with the admin role. Therefore, changing the realm will make it so you can no longer log into the Admin Interface.
If you are sure you want to change the realm after installation despite the warning, perform the following steps:
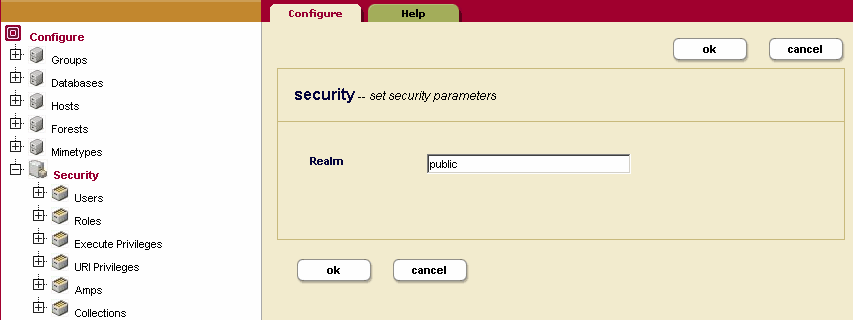
- Click Security in the left tree menu.
- Click the Configure tab. The Security Configuration page appears.
- Change the realm to the desired value.
- Click OK.
- Click OK again on the confirmation page. Note that this will invalidate all digest passwords, including the password for the current user running the Admin Interface if the Admin Interface App Server is set to digest authentication (which is the default setting).
