MarkLogic 9 Product DocumentationSQL Data Modeling Guide — Chapter 6
Connecting Tableau to MarkLogic Server
This chapter describes how to set up your Tableau to communicate with MarkLogic Server. The main topics are:
- Install Tableau
- Connect Tableau to MarkLogic Server
- Add Tables to Tableau Workbook
This chapter describes how to connect and configure Tableau version 10. The procedures described here may be different if you are using an older version of Tableau.
Install Tableau
Install Tableau, as described in the Tableau documentation.
Tableau has select * as the default query for the initial connection. To improve performance between Tableau and MarkLogic, follow the instructions below.
In the path shown below, save the following xml structure as odbc-marklogic.tdc (the name does not matter, but extension has to be .tdc):
C:\Users\**\Documents\My Tableau Repository\Datasources
If installing the 32-bit ODBC driver, the contents of the odbc-marklogic.tdc file should look like the following:
<?xml version='1.0' encoding='utf-8' ?>
<connection-customization class='genericodbc' enabled='true' version='10.2'>
   <vendor name='MarkLogic' />
   <driver name='MarkLogic SQL (X86)' />
 <customizations>
   <customization name='CAP_QUERY_TOP_0_METADATA' value='yes' />
   <customization name='CAP_ODBC_METADATA_SUPPRESS_SELECT_STAR' value='yes' />
   <customization name='CAP_QUERY_WHERE_FALSE_METADATA' value='no' />
   <customization name='CAP_CREATE_TEMP_TABLES' value='no' />
 </customizations>
</connection-customization>
Connect Tableau to MarkLogic Server
This section describes how to connect Tableau to MarkLogic Server.
The procedure described in this section assumes you have first installed the MarkLogic ODBC driver and configured it as an ODBC data source on the client server, as described in Installing and Configuring the MarkLogic Server ODBC Driver.
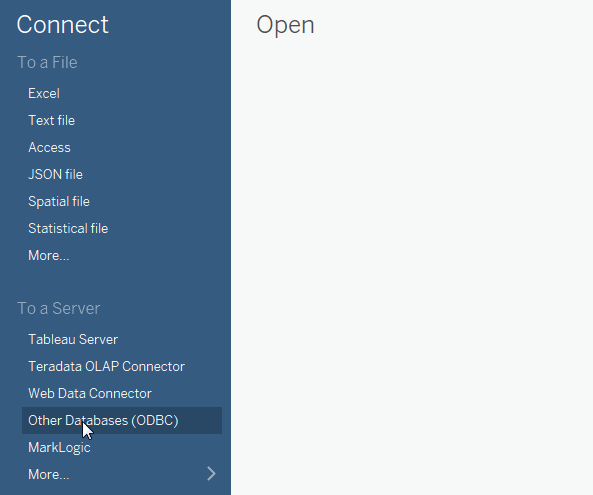
- Open Tableau and click
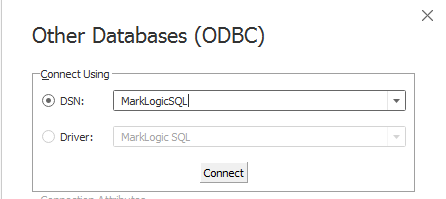
Other Databases (ODBC): - In the Other Databases (ODBC) window, select MarkLogicSQL from the DSN pulldown window. Click
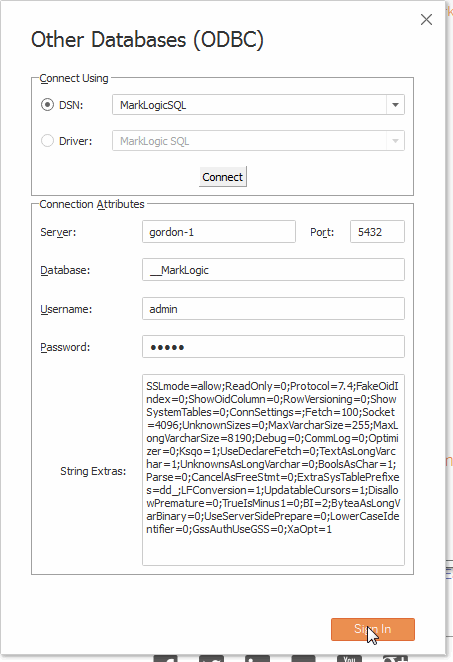
Connect: - In the Connection Attributes portion of the Other Databases (ODBC) window, enter the name of your MarkLogic server, the port number of your ODBC App Server (5432, in this example), and login credentials (the
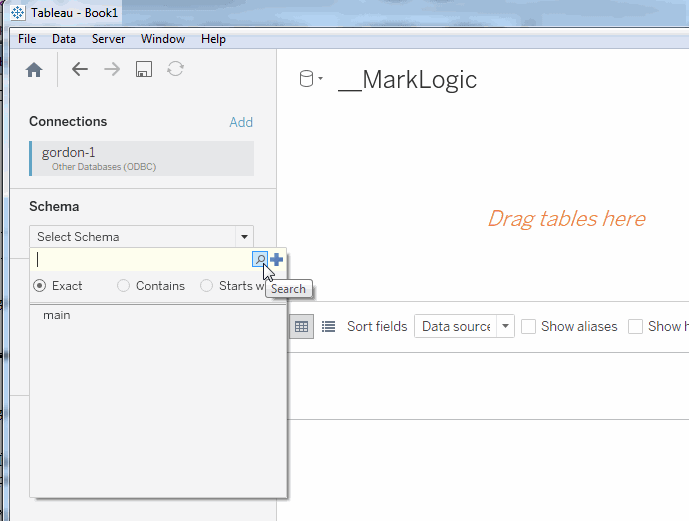
Databasefield is ignored). ClickSign In: - In the Data Source window, click Select Schema, then on the magnifying glass icon and select your schema (in this example, 'main') from the menu:
Add Tables to Tableau Workbook
After successfully connecting Tableau to MarkLogic Server, you can add the defined views, as tables, to your workbook.
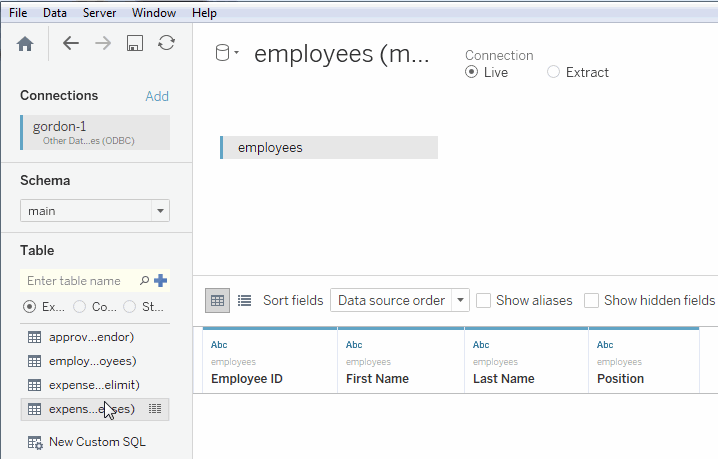
- In the Data Source window, click Select Table, then on the magnifying glass icon to populate the menu below with the views from your schema:
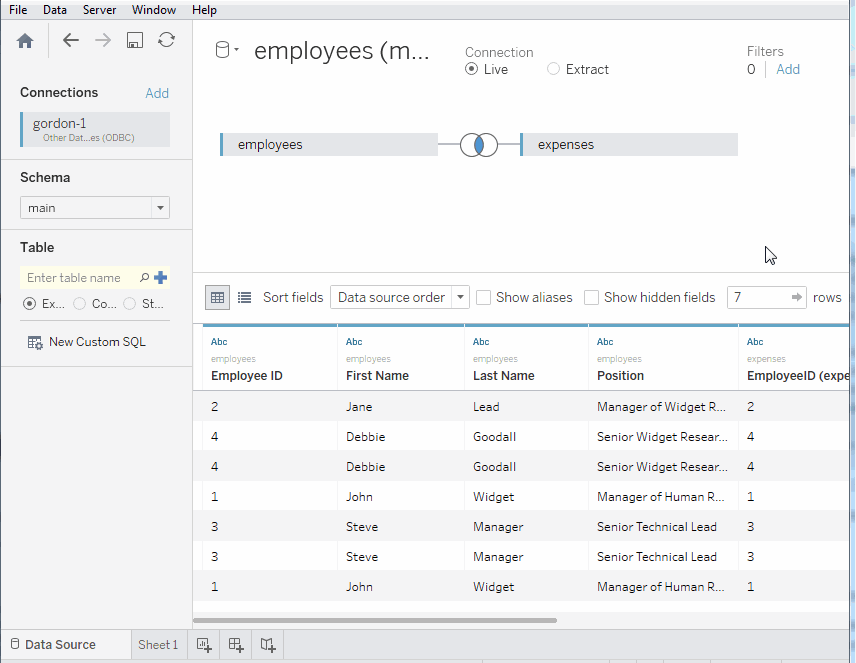
- Drag the views in the Tables menu to the canvas. In this example, the
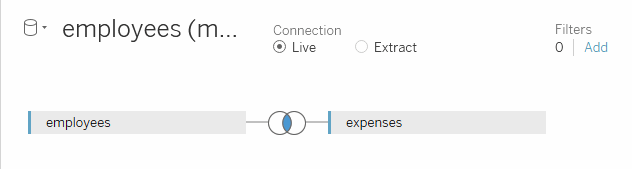
employeesview is dragged to the workbook: - Drag another view to the workbook. In this example, the
expensesview is dragged to the canvas and joined withemployeeswith an inner join. The results are shown below.

- At the top of your canvas, select the desired Connection type:
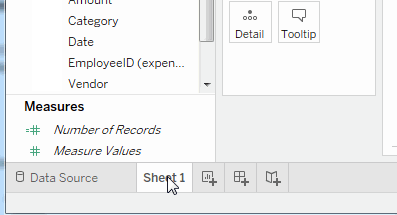
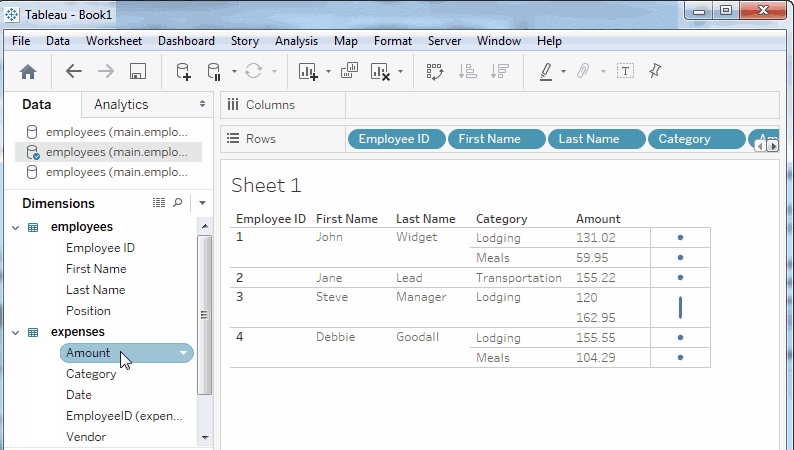
- At the bottom of the Tableau window, navigate to
Sheet1. - In the
Sheet1window, dragEmployeeID,FirstNameandLastNamefrom theemployeesview in theDimensionspane to theRowsfield. DragCategoryandAmountfrom theexpensesview to theRowsfield. You should see your data stored in MarkLogic Server displayed in table on the right.