MarkLogic Server on Amazon Web Services (AWS) Guide — Chapter 2
Getting Started with MarkLogic Server on AWS
This chapter describes how to launch a MarkLogic Server AMI and access the MarkLogic Server Admin interface. This chapter includes the following sections:
- Security
- Separate MarkLogic Converters
- Summary of Deployment Procedures
- Creating an AWS Account
- Enabling a MarkLogic Server for EC2 AMI
- Initial Setup Procedures
- AWS Configuration Variables
- EC2 User Data
- Configuration using the /etc/marklogic.conf File
- Other Configuration Methods
- Configuration Security Considerations
Security
Access to MarkLogic server is controlled by the mechanisms described in the Security Guide. Within the AWS environment, access to EC2 instances is controlled by three mechanisms:
- Key Pairs, as described in Creating a Key Pair.
- AWS Identity and Access Management (IAM), as described in Creating an IAM Role.
- Security Groups, which are created by the CloudFormation template described in Deploying MarkLogic on EC2 Using CloudFormation.
Amazon periodically updates its security resources. Each time you create a new instance of MarkLogic Server, the latest security updates are applied to that instance. Your older instances are not automatically updated and must be manually updated in order to obtain uniform and up-to-date security across your cluster. You can optionally disable automatic security updates for new instances. For details on security updates, see http://docs.aws.amazon.com/AWSEC2/latest/UserGuide/AmazonLinuxAMIBasics.html#security-updates.
Separate MarkLogic Converters
Starting with MarkLogic 9.0-4, the MarkLogic converters/filters are offered as a package (called MarkLogic Converters package) separate from the MarkLogic Server package. For EC2, the converter installer/package is located in your default user home directory. There is a README.txt file in the package describing what the package is for, and pointing to the MarkLogic documentation for more information. See MarkLogic Converters Installation Changes Starting at Release 9.0-4 in the Installation Guide for more details.
Summary of Deployment Procedures
The following is a summary of the procedures for deploying MarkLogic Server on EC2.
| Procedure | For Details See |
|---|---|
| If you don't already have an AWS account, create one. | Creating an AWS Account |
| Enable a MarkLogic Server AMI. | Enabling a MarkLogic Server for EC2 AMI |
| Open the Amazon AWS Management Console. | Accessing the AWS Management Console |
| Create an IAM role. | Creating an IAM Role |
| If you don't already have a key pair, create one. | Creating a Key Pair |
| Create a Simple Notification Service (SNS) Topic. | Creating a Simple Notification Service (SNS) Topic |
| Create CloudFormation stack from a CloudFormation template. | Deploying MarkLogic on EC2 Using CloudFormation |
| Open the MarkLogic Server Admin interface. | Accessing a MarkLogic Server Instance |
Creating an AWS Account
Before you can order a MarkLogic Server for EC2 AMI, you must set up an AWS account. To set up an AWS account, go to and click Sign Up for AWS:
Then follow the directions to create a new account. You will need to provide email and mail addresses, create a password, and provide credit card information.
Enabling a MarkLogic Server for EC2 AMI
You can use a MarkLogic-supplied AMI or build your own custom AMI using standard Amazon tools. This guide focuses on the MarkLogic-supplied AMIs that are available in AWS MarketPlace.
To enable your MarkLogic AMI, do the following:
- Go to https://aws.amazon.com/marketplace.
- Search for MarkLogic.
- In the MarkLogic product page, click the Accept Terms button.
Unless, you plan to deploy your MarkLogic cluster manually, rather than use the recommended CloudFormation procedure, do not click on any of the Launch EC2 Instance buttons.
Initial Setup Procedures
This section describes how to access the AWS management console and create a security group and key pair. Typically, you will create your security groups and key pairs once and reuse them for each instance you create. The topics in this section are:
- Accessing the AWS Management Console
- Creating an IAM Role
- Creating a Key Pair
- Creating a Simple Notification Service (SNS) Topic
Accessing the AWS Management Console
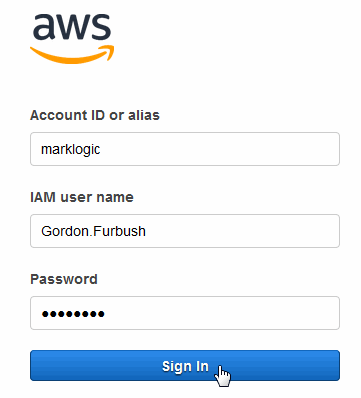
This section describes how to access the Amazon AWS Management Console.
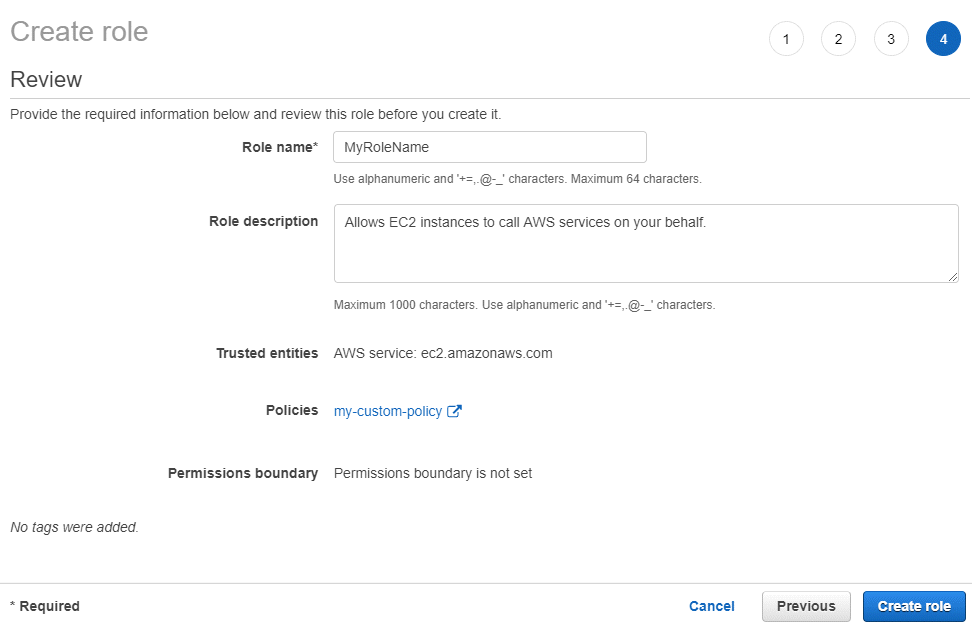
Creating an IAM Role
AWS Identity and Access Management (IAM) is a web service that enables you to manage users and user permissions in AWS. The service is targeted at organizations with multiple users or systems that use Amazon EC2, Amazon DynamoDB, and the AWS Management Console. With IAM, you can centrally manage users, security credentials such as access keys, and permissions that control user access to AWS resources.
This section describes how to create an IAM role. This section describes each step in the procedure, but does not discuss all of the options for each step. For more details, see http://docs.aws.amazon.com/AWSEC2/latest/UserGuide/iam-roles-for-amazon-ec2.html.
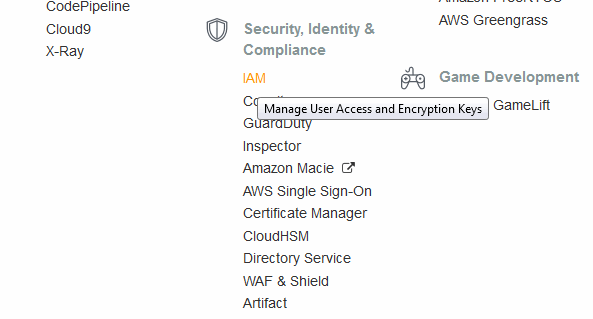
- In the Security, Identity & Compliance section of the Amazon Web Services page, click on
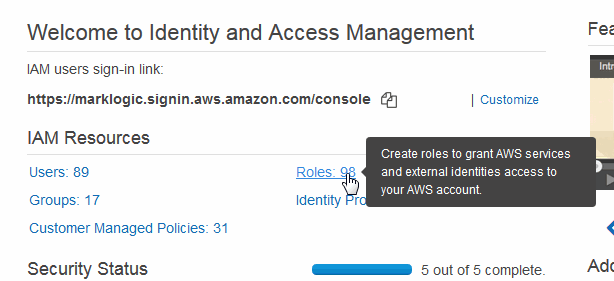
IAM: - In the IAM Resources section of the Getting Started page, click Roles:
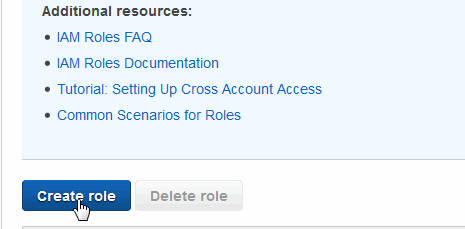
- In the Roles page, click Create Role:
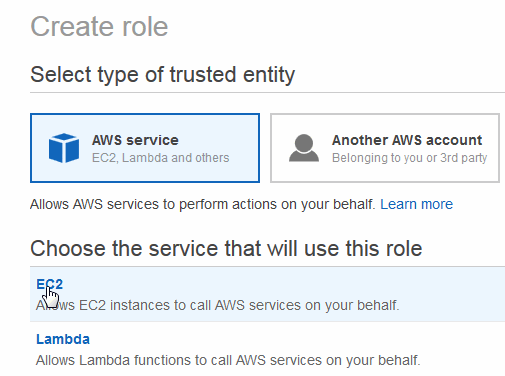
- Select the AWS Service box and EC2. At the lower right hand portion of the page, click Next: Permissions.
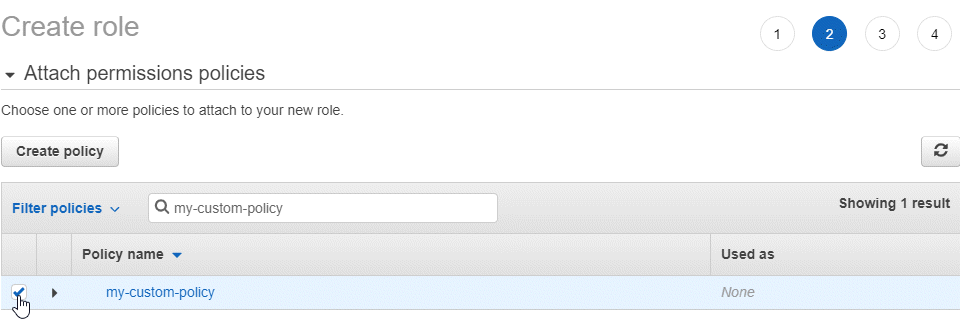
- In the Set Permissions window, select the access policy for the role. For details on IAM policies, see http://docs.aws.amazon.com/AWSEC2/latest/UserGuide/iam-policies-for-amazon-ec2.html.
The minimal privileges needed to launch a MarkLogic CloudFormation template, as tested, are as follows:
The following set of permissions are the minimum required permissions to create and delete a MarkLogic CloudFormation stack. You will need additional permissions for S3 backups and KMS. The permissions below are quoted because they are in JSON format.
MarkLogic recommends that you follow AWS best practices for controlling access to your AWS resources. For details, see https://docs.aws.amazon.com/IAM/latest/UserGuide/access_tags.html.
Amazon has changed the pattern for the ARN (https://docs.aws.amazon.com/general/latest/gr/aws-arns-and-namespaces.html). The ARN now needs to specify the region and account details. This can be all regions and all accounts, which can be indicated using a wildcard *as in this example:
arn:aws:autoscaling:*:*:launchConfiguration::launchConfigurationName/*
Otherwise, the ARN should be specific to region, account, and the specific service, as in this example:
arn:aws:autoscaling:ap-southeast-2:758929958593:autoScalingGroup:*:autoScalingGroupName/*
- "cloudformation:CreateUploadBucket"
- "cloudformation:DeleteStackInstances"
- "cloudformation:ListExports"
- "cloudformation:ListStackSetOperations"
- "cloudformation:ListStackInstances"
- "cloudformation:DescribeStackResource"
- "cloudformation:CreateStackInstances"
- "cloudformation:ListStackSetOperationResults"
- "cloudformation:DescribeStackEvents"
- "cloudformation:DescribeStackSetOperation"
- "cloudformation:DescribeChangeSet"
- "cloudformation:ListStackResources"
- "cloudformation:ListStacks"
- "cloudformation:ListImports"
- "cloudformation:DescribeStackInstance"
- "cloudformation:DescribeStackResources"
- "cloudformation:GetTemplateSummary"
- "cloudformation:DescribeStacks"
- "cloudformation:GetStackPolicy"
- "cloudformation:DescribeStackSet"
- "cloudformation:ListStackSets"
- "cloudformation:CreateStack"
- "cloudformation:GetTemplate"
- "cloudformation:DeleteStack"
- "cloudformation:ValidateTemplate"
- "cloudformation:ListChangeSets"
- "Resource": "*"
- "dynamodb:DeleteTable"
- "dynamodb:CreateTable"
- "dynamodb:DescribeTable"
- "Resource": "arn:aws:dynamodb:*:*:table/*MarkLogicDDBTable*"
- "ec2:DisassociateAddress"
- "ec2:DeleteSubnet"
- "ec2:ModifyVolumeAttribute"
- "ec2:DescribeAddresses"
- "ec2:CreateNatGateway"
- "ec2:CreateVpc"
- "ec2:AttachInternetGateway"
- "ec2:AssociateRouteTable"
- "ec2:DescribeInternetGateways"
- "ec2:DescribeAvailabilityZones"
- "ec2:CreateInternetGateway"
- "ec2:CreateSecurityGroup"
- "ec2:DescribeVolumes"
- "ec2:ModifyVpcAttribute"
- "ec2:DescribeRouteTables"
- "ec2:ReleaseAddress"
- "ec2:CreateRouteTable"
- "ec2:DetachInternetGateway"
- "ec2:DescribeNatGateways"
- "ec2:DisassociateRouteTable"
- "ec2:AllocateAddress"
- "ec2:DescribeSecurityGroups"
- "ec2:DescribeVpcs"
- "ec2:DeleteNatGateway"
- "ec2:DescribeVpcEndpoints"
- "ec2:DeleteVpc"
- "ec2:CreateSubnet"
- "ec2:DescribeSubnets"
- "Resource": "*"
- "ec2:RevokeSecurityGroupIngress"
- "ec2:DeleteRoute"
- "ec2:AuthorizeSecurityGroupIngress"
- "ec2:DeleteVpcEndpoints"
- "ec2:DeleteRouteTable"
- "ec2:CreateTags"
- "ec2:CreateVolume"
- "ec2:DeleteVolume"
- "ec2:DeleteInternetGateway"
- "ec2:DeleteSecurityGroup"
- "ec2:CreateRoute"
- "ec2:DeleteVpcEndpoints"
- "ec2:CreateVpcEndpoint"
- "Resources":
- "arn:aws:ec2:*:*:internet-gateway/*"
- "arn:aws:ec2:*:*:volume/*"
- "arn:aws:ec2:*:*:subnet/*"
- "arn:aws:ec2:*:*:route-table/*"
- "arn:aws:ec2:*:*:vpc-endpoint/*"
- "arn:aws:ec2:*:*:security-group/*"
- "arn:aws:ec2:*:*:vpc/*"
- "arn:aws:ec2:*:*:security-group/*"
- "arn:aws:ec2:*:*:route-table/*"
- "arn:aws:ec2:*:*:vpc-endpoint/*"
- "arn:aws:ec2:*:*:route-table/*"
- "arn:aws:ec2:*:*:security-group/*"
- "arn:aws:ec2:*:*:vpc-endpoint/*"
- "arn:aws:ec2:*:*:security-group/*"
- "arn:aws:ec2:*:*:route-table/*"
- "ec2:CreateTag"
- "Resource": "*"
- "elasticloadbalancing:DescribeLoadBalancers"
- "Resource": "*"
- "elasticloadbalancing:DeleteLoadBalancerPolicy"
- "elasticloadbalancing:DeleteLoadBalancer"
- "elasticloadbalancing:CreateLoadBalancer"
- "elasticloadbalancing:ModifyLoadBalancerAttributes"
- "elasticloadbalancing:CreateLoadBalancer"
- "elasticloadbalancing:SetLoadBalancerPoliciesOfListener"
- "elasticloadbalancing:CreateLoadBalancer"
- "elasticloadbalancing:CreateLoadBalancerPolicy"
- "elasticloadbalancing:ConfigureHealthCheck"
- "elasticloadbalancing:SetLoadBalancerPoliciesOfListener"
- "elasticloadbalancing:CreateLoadBalancerPolicy"
- "elasticloadbalancing:DeleteLoadBalancerPolicy"
- "elasticloadbalancing:ConfigureHealthCheck"
- "elasticloadbalancing:SetLoadBalancerPoliciesOfListener"
- "elasticloadbalancing:CreateLoadBalancer"
- "elasticloadbalancing:CreateLoadBalancer"
- "elasticloadbalancing:CreateLoadBalancer"
- "elasticloadbalancing:DeleteLoadBalancer"
- "elasticloadbalancing:CreateLoadBalancer"
- "elasticloadbalancing:ModifyLoadBalancerAttributes"
- "elasticloadbalancing:ConfigureHealthCheck"
- "elasticloadbalancing:CreateLoadBalancerPolicy"
- "Resources": "arn:aws:elasticloadbalancing:*:*:loadbalancer/*"
- "elasticloadbalancing:AddTags"
- "elasticloadbalancing:RemoveTags"
- "Resource": "*"
- "autoscaling:DescribeLaunchConfigurations"
- "autoscaling:DescribeScalingActivities"
- "autoscaling:DescribeAutoScalingGroups"
- "Resource": "*"
- "autoscaling:CreateLaunchConfiguration"
- "autoscaling:DeleteLaunchConfiguration
- "autoscaling:DeleteAutoScalingGroup"
- "autoscaling:CreateAutoScalingGroup"
- "autoscaling:UpdateAutoScalingGroup"
- "Resources":
- "arn:aws:autoscaling:*:*:launchConfiguration::launchConfigurationName/*"
- "arn:aws:autoscaling:*:*:autoScalingGroup::autoScalingGroupName/*"
- "sns:ListSubscriptionsByTopic"
- "sns:Publish"
- "sns:GetTopicAttributes"
- "sns:DeleteTopic"
- "sns:CreateTopic"
- "sns:ConfirmSubscription"
- "sns:SetTopicAttributes"
- "sns:Subscribe"
- "sns:ListEndpointsByPlatformApplication"
- "sns:Unsubscribe"
- "sns:ListTopics"
- "sns:ListSubscriptions"
- "sns:ListPlatformApplications"
- "Resource": "*"
- "iam:GetRole"
- "iam:PassRole"
- "iam:DeleteRolePolicy"
- "iam:CreateRole"
- "iam:DeleteRole"
- "iam:PutRolePolicy"
- "Resource": "*"
- "lambda:CreateFunction"
- "lambda:AddPermission"
- "lambda:InvokeFunction"
- "lambda:GetFunctionConfiguration"
- "lambda:DeleteFunction"
- "lambda:RemovePermission"
- "lambda:PutFunctionConcurrency"
- "Resource": "arn:aws:lambda:*:*:function:*"
- "s3:PutObject"
- "s3:GetObjectAcl"
- "s3:GetObject"
- "s3:CreateBucket"
- "s3:GetObjectTagging"
- "s3:GetBucketAcl"
- "s3:GetBucketPolicy"
- "Resource": "*"
- "s3:PutBucketTagging"
- "Resource": "*"
The following set of permissions are needed in a role that MarkLogic CloudFormation stack passes as an instance profile role. The permissions below are quoted because they are in JSON format.
- "dynamodb:PutItem"
- "dynamodb:DescribeTable"
- "dynamodb:GetItem"
- "dynamodb:Scan"
- "dynamodb:UpdateItem"
- "Resources": "arn:aws:dynamodb:*:*:table/*MarkLogicDDBTable*"
- "ec2:AttachVolume"
- "ec2:CreateVolume"
- "Resources":
- "arn:aws:ec2:*:*:volume/*"
- "arn:aws:ec2:*:*:instance/*"
- "ec2:DescribeInstances"
- "Resource": "*"
- "ssm:UpdateInstanceInformation"
- "ssm:ListInstanceAssociations"
- "ssm:ListAssociations"
- "ssm:PutInventory"
- "ssm:UpdateInstanceAssociationStatus"
- "Resource": "*"
- "ec2messages:GetMessages"
- "Resource": "*"
- "ssmmessages:OpenControlChannel"
- "ssmmessages:CreateControlChannel"
- "Resource": "*"
You may be able to use less privileges. For details on how to determine the least privileges to the IAM role, see https://docs.aws.amazon.com/IAM/latest/UserGuide/best-practices.html#grant-least-privilege.
Creating a Key Pair
A key pair ensures that only you have access to your instances. You can create one or more Amazon EC2 key pairs. You can use a key pair to SSH to your instance.
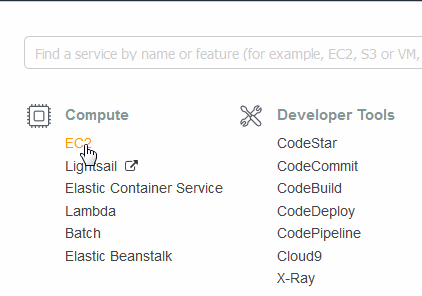
- From the AWS Services page, select EC2 to open the EC2 Dashboard:
- In the EC2 Dashboard, select Key Pairs:
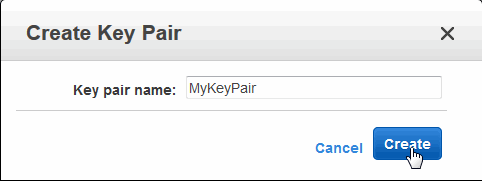
- Enter a name for your key pair and click Create:
- Your key pair will be downloaded to your local system. When the download of the key pair completes, click Save File.
You will need to remember the location of the downloaded key pair on your local system should you need to create an SSH connection to your MarkLogic Server instance, as described in Accessing an EC2 Instance.
Creating a Simple Notification Service (SNS) Topic
The Amazon Simple Queue Service (SQS) is a queue system that enables you to queue messages generated by your EC2 Instances. In order to capture messages from your Instances, you must create a Simple Notification Service (SNS) Topic and specify it as part of your User Data in the CloudFormation Template.
For details on the SQS queue system and creating an SNS topic, see http://docs.aws.amazon.com/AWSSimpleQueueService/latest/SQSDeveloperGuide/sqssubscribe.html.
There are a number of ways to create an SNS topic. One way is described below.
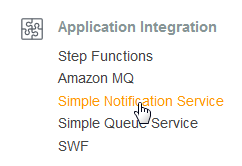
- In the Services page, click on Simple Notification Service to open the SNS Dashboard.
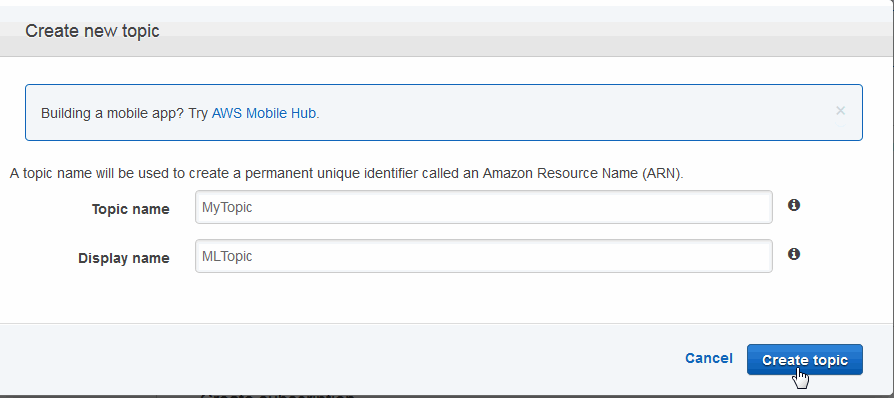
- Select Topics in the left menu and click Create Topic.
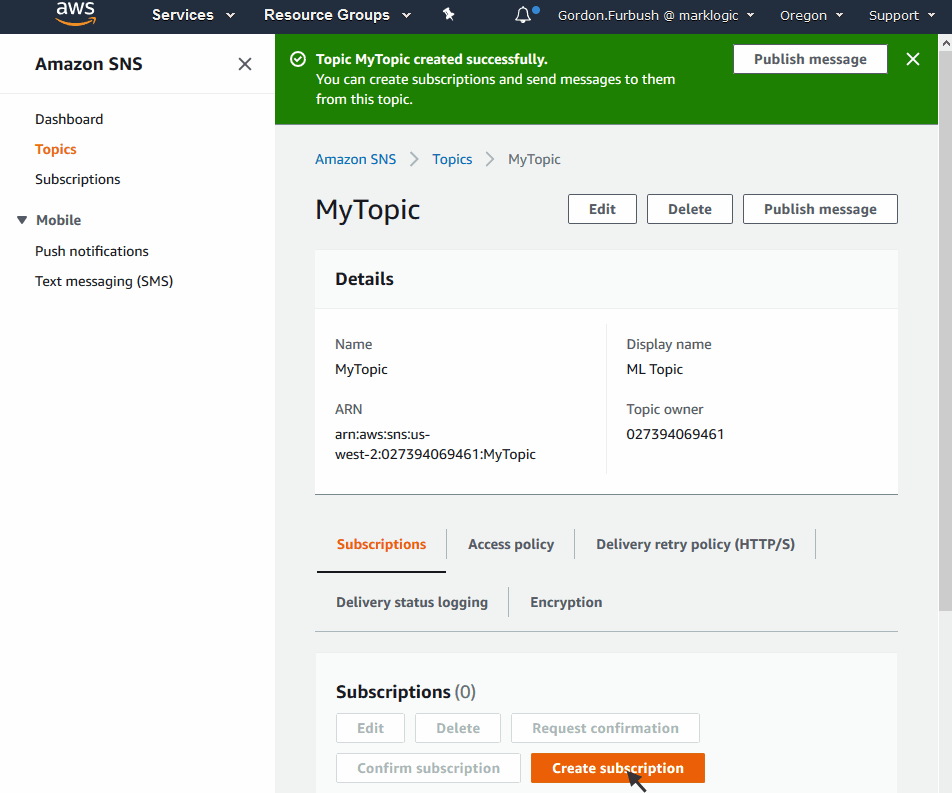
- In the Topic Details window, note the Topic ARN. This is what you will enter for the LogSNS field when you create your stack, as described in Creating a CloudFormation Stack using the AWS Console.
- You must subscribe to an SNS Topic to view the messages. To subscribe to the topic, click Create Subscription in the Topic Details page. There are a number of ways to subscribe to an SNS Topic, as described in http://docs.aws.amazon.com/sns/latest/dg/welcome.html.
AWS Configuration Variables
On startup, MarkLogic is customizable by a set of environment variables. This applies to all configurations from single nodes managed externally to large distributed clusters using the full Cluster Management features.
These variables can be specified using any method that guarantees the values are present and consistent in the environment, regardless of what method is used to start the server and when the server is started. The variables related to Managed Cluster support also need to be configured properly on a per-instance basis. A simple and reliable method that allows reuse of the same AMI for all instances and doesn't require customizing the AMI itself is to pass the values as EC2 User Data. An alternative is to place the variable assignments in /etc/marklogic.conf either during the initial boot or built into a custom AMI dedicated for each equivalent node in the cluster.
When using CloudFormation, the AWS::CloudFormation::Init resource (and the helper cfn-init commands) are recommended for deployment and configuration. For details, see
http://docs.aws.amazon.com/AWSCloudFormation/latest/UserGuide/aws-resource-init.html.
If not using CloudFormation, the lower-level cloud-init service can be used directly. For details, see http://docs.aws.amazon.com/AWSEC2/latest/UserGuide/user-data.html.
Other methods can be used to configure the environment as well, but must be carefully considered and tested due to differences in how the system configures the global root environment during boot, run-level changes and manual service operations (start/stop/restart).
Depending on the deployment tools used to initialize the system and the process and ordering of RPM installation, system configuration and startup, different methods of configuration may be needed to make sure the system is configured correctly before the first launch of MarkLogic on that instance, and that all instances in the group have consistent configuration.
The sample Cloud Formation templates implement an architecture and strategy that is well defined and tested. They are a good model to follow as a design pattern regardless of the tools used for implementation.
The following environment variables are recognized on startup of MarkLogic, or are automatically set from several configuration locations. Some values must be the same across all nodes in a cluster and some may vary for each instance. The sample templates and reference architecture use the Auto Scaling Group (ASG) Launch Configuration for initializing instance variables. One ASG per zone is used so that each zone can have different configurations, but within each zone (or ASG) the same values can be used.
- MARKLOGIC_EC2_HOST -- If set to 0 then all EC2 all of AWS related features are disabled. MarkLogic will not access instance metadata by any means and the rest of the variables below are unused. By default, this variable is set to 1 (enable).
This is useful for when you want to manage MarkLogic externally.
- MARKLOGIC_MANAGED_NODE -- Controls the managed cluster feature. If set to 0 (disabled), MarkLogic will not automatically mount volumes, report instance status to DynamoDB, or automatically join a cluster. By default, this flag is set to 1 (enable).
If you only want to use the IAM role, set MARKLOGIC_EC2_HOST=1 and MARKLOGIC_MANAGED_NODE=0.
- MARKLOGIC_BOOT_WAIT -- If set, then the value is a number in seconds (default = 30) as the maximum time to wait for the initial data volume (
$MARKLOGIC_EBS, default /dev/sdf) to come online. This is only used when MARKLOGIC_EBS_VOLUME is not specified and MarkLogic is waiting for a volume to be attached manually or from an external process.If the timeout is reached without a volume attached then startup aborts.
- MARKLOGIC_LICENSE_KEY -- A license key to use for this MarkLogic instance. This license key is only valid for a Bring Your Own License (BYOL) AMI or a user-created AMI.
- MARKLOGIC_LICENSEE -- The Licensee corresponding to MARKLOGIC_LICENSE_KEY.
- MARKLOGIC_AWS_ACCESS_KEY -- An AWS Access Key to be used when accessing the AWS Key Management Services (KWS) and the Simple Storage Service (S3). For details, see Configure AWS Credentials.
- MARKLOGIC_AWS_SECRET_KEY -- An AWS Secret Key to be used when accessing the AWS Key Management Services (KWS) and the Simple Storage Service (S3). This variable must be explicitly set by the
exportkeyword. For details, see Configure AWS Credentials. - MARKLOGIC_AWS_SESSION_TOKEN -- An optional AWS session token to be used when accessing the AWS Key Management Services (KWS) and the Simple Storage Service (S3). This variable must be explicitly set by the
exportkeyword. For details, see Configure AWS Credentials. - MARKLOGIC_CLUSTER_NAME -- The MarkLogic cluster name used to auto-configure instances and clusters. For SimpleDB this corresponds to the "Domain" used for simpleDB (V8.0.3 and prior). For DynamoDB, this corresponds to the DynamoDB table name (V8.0.4+). This cluster name is required for any of the managed cluster features, including a single node cluster.
- MARKLOGIC_CLUSTER_MASTER -- Must be set and equal to "1" for exactly one node in the cluster. The master node will create the initial databases and become the cluster bootstrap host.
Can be set to 1 for multiple nodes named the same ending in "#" (See MARKLOGIC_NODE_NAME) in which case only the resolved name that ends in "1" will take on the role of cluster master.
- MARKLOGIC_NODE_NAME -- A distinct name of a node within a cluster. Required if MARKLOGIC_CLUSTER_NAME is specified. May end in a "#". If the node name ends with a "#" such as "MyNode-#" this is taken as a variable node name. For more information see the discussion of
/sbin/servicein Deployment and Startup. - MARKLOGIC_ADMIN_USERNAME -- The MarkLogic Administrator username used for initial installations.
- MARKLOGIC_ADMIN_PASSWORD -- The MarkLogic Administrator password used for initial installations.
EC2 user data is not an AWS 'secure location' and cannot be cleared while the instance is running. Variables set in EC2 user data are evaluated as string literals, unlike values in
/etc/marklogic.conf, which are parsed as shell 'source' so are always 'plain text' (or base64 encoded).The recommended location for configuration variables is
/etc/marklogic.conf. For examples of using a secure store for MarkLogic credentials, see Configuration Security Considerations . - MARKLOGIC_EBS_VOLUME -- The volume specification for the primary EBS volume. This volume will be attached to the logical device
/dev/sdf, a filesystem is created, if needed, and mounted on/var/opt/MarkLogic. The format for this value is of the formvolspec[,volspec ...]wherevolspecis one of:- vol-xxxx Attach to an existing EBS volume
- snap-xxxx An AWS snapshot which will be used to create a volume.
- <number> An integer from 1 to 1024 which indicates the size of the volume in GB. A fresh volume will be created.
- <specification string> A volume specification string in the format compatible with the V1 EC2 CLI tools. This format is currently only supported by using EC2 user data or
/etc/marklogic.conf. - [snapshot-id]:[volume-size]:[delete-on-termination]:[volume-type[:iops]]
:20::gp2:true - a 20 GB volume with encryption and D storage type
snap-abcde:200::: - Create volume from snapshot "snap-abcde" and change the size to 200GB. Default gp2 volume type.
- only some values are valid in combination, see the EC2 EBS documentation for details.
- One of snapshot-id or volume-size is required.
- Encrypted is only allowed with snapshot-id if the snapshot is also encrypted.
- iops is only allowed for volume type "io1"
- The default volume type if not specified is "gp2"
- For the 2nd or more specs this indicates to repeat the previous volspec. E.g. "10,20,*" indicates to create a 10 GB volume for the first node, a 20 GB volume for the 2nd and further nodes of the same name.
- MARKLOGIC_EBS_VOLUME1 ... MARKLOGIC_EBS_VOLUME9 -- Up to 9 more EBS volumes in the same format as MARKLOGIC_EBS_VOLUME. These will be initialized, attached, filesystems created and mounted.
- MARKLOGIC_LOG_SNS -- The Simple Notification Service (SNS) topic to be used to capture messages from the Simple Queue Service (SQS). Enter the full ARN for the SNS log topic, such as
arn:aws:sns:us-east-1:1234567890123456:mytopic. - MARKLOGIC_EBS_KEY -- A custom key for EBS Volumes that support encryption. The key used to encrypt the volume must be in the same region. When MarkLogic clusters are created using a CloudFormation template, the same encryption key is used to encrypt all EBS volumes in the cluster. EBS Encryption is only supported by some EC2 instance types, mostly the new generation. A value of
defaultindicates the AWS default EBS key. If an empty value or no value is provided, EBS Encryption will be disabled. - MARKLOGIC_LOG_SQS -- An alternative to MARKLOGIC_LOG_SNS, The endpoint of an AWS SQS queue to post startup messages. May be used to monitor the startup progress of a cluster. If not present, empty, or set to "none" then it is not used.
- MARKLOGIC_ADMIN_AUTOCREATE -- If set and cluster management is not configured, then the value is used as an EC2 metadata key, the metadata value is used for initial password for the Auto Create feature. On MarketPlace AMI's this is pre-configured to default to "instance-id."
- MARKLOGIC_AWS_SWAP_SIZE -- The swap space size that is automatically configured under root volume during the system startup process. By default, swap space size is set to 32GB and root volume size is set to 40GB. You can change the default swap space size through the CloudFormation template. If you change the default swap space size, MarkLogic reserves at least 8GB in the root volume for OS. If the root volume size is less than 8GB, swap space will not configure.
- MARKLOGIC_FEDRAMP -- If set to "true", data encryption will be permanently set to "force" and configuration encryption will be permanently set to "on" in the
keystore.xmlfile. If set to "true", host, port, and key IDs must be provided. If set to "true" and host, port, and key IDs are not provided, a p11-driver-path must be provided. - MARKLOGIC_KMS_HOST -- The KMS hostname to provide encryption and decryption operations for MarkLogic.
- MARKLOGIC_KMS_PORT -- The port number used to communicate with KMS.
- MARKLOGIC_KMS_DATA_KEY -- Identifies the key in the KMS used to encrypt data.
- MARKLOGIC_KMS_CONFIG_KEY -- Identifies the key in the KMS used to encrypt configuration files.
- MARKLOGIC_KMS_LOGS_KEY -- Identifies the key in the KMS used to encrypt log files.
- MARKLOGIC_P11_DRIVER_PATH -- The path to a shared library supporting the PKCS #11 API.
EC2 User Data
A simple configuration method is to place all variables in the EC2 UserData. This method requires no additional software or infrastructure and can be entered using the AWS Console GUI, command line tools, AWS SDK, CloudFormation, and most third party deployment tools. However EC2 UserData is not a secure data store, so it should only be used for non-sensitive data.
Making use of the CloudInit feature in CloudFormation allows you to place a minimal 'stub' configuration in EC2 User data and the remaining data in a resource MetaData section in the template. This is significantly more secure and flexible.
In the MarkLogic startup (/sbin/service MarkLogic <command>), the EC2 UserData is read as lines of text, and if the line starts with "MARKLOGIC_" it is parsed as a name=value pair. Each of the name=value pairs is exported to the environment as <name>=<value>. For example, the MARKLOGIC_CLUSTER_NAME user data variable becomes MARKLOGIC_CLUSTER_NAME shell environment variable, but MYNAME=MYVALUE is ignored. Use of the MARKLOGIC_ prefix is a security precaution to avoid users passing in arbitrary system environment variables, such as PATH. Similarly the UserData is parsed and the environment variables explicitly created rather than the text being eval'd so that arbitrary code injection cannot occur.
Any UserData line not starting with MARKLOGIC_ is ignored so users are free to pass in additional name=value pairs in UserData, or to use it in its entirety for other purposes as long as lines do not start with MARKLOGIC_.
Configuration using the /etc/marklogic.conf File
If, for some reason, you cannot use a CloudFormation template to configure the UserData with the MarkLogic configuration variables described on AWS Configuration Variables, an alternative is to create an /etc/marklogic.conf file, which will be read by the MarkLogic on startup. This file is not provided on the AMI or in the RPM explicitly so that customizations will not be overwritten on upgrades of either the AMI or RPM. If you create and populate this file before the initial startup of MarkLogic, then it is sourced (evaluated by the shell invoking /etc/sysconfig/MarkLogic). Any of the supported configuration environment variables set as the result of sourcing /etc/marklogic.conf are exported and evaluated in the order and precedence described in Deployment and Startup.
As described in AWS Configuration Variables, by adding MARKLOGIC_EC2_HOST=0 to the /etc/marklogic.conf file, the startup and management features are disabled.
See Configuration Security Considerations for a recommended method to provide secure credentials.
The /etc/marklogic.conf file can be useful for building custom AMI's, integrating with deployment tools that make use of EC2 UserData difficult, and manual customization. The file can be created prior to installing the MarkLogic RPM and will not be deleted when you uninstall the RPM.
The following is an example /etc/marklogic.conf file. Most of the MARKLOGIC variables are exported (meaning set) by default. However, the export keyword is required for variables to be used by AWS, as shown below.
Always use export when setting environment variables in the marklogic.conf file.
export MARKLOGIC_HDFS_KERBEROS_KEYTAB=/space/jsolis/b9_0/qa/ldap/keytab/services.keytab_builder_bad
export MARKLOGIC_HDFS_KERBEROS_PRINCIPAL=HTTP/builder@MLTEST1.LOCAL_bad
export MARKLOGIC_KEYTAB=/space/jsolis/b9_0/qa/ldap/keytab/services.keytab_builder
export MARKLOGIC_PRINCIPAL=HTTP/builder@MLTEST1.LOCAL
export JAVA_HOME=/home/builder/java/jdk1.8.0_72/
export MARKLOGIC_AWS_ACCESS_KEY=HD888DJ@92KDDjdjUDUDD
export MARKLOGIC_AWS_SECRET_KEY=@kddkKidiJndk7DDD
Other Configuration Methods
Other configuration methods, such as modifying the global profile (/etc/profile), root startup scripts, or editing /etc/sysconfig/MarkLogic are possible, but are not recommended. It is not guaranteed that changes to these files will survive updates to the OS or MarkLogic or that, even if untouched, that they will function the same at a later time. OS upgrades frequently modify the configuration of the root or init environment, changing the set of exported variables in effect during startup. Scripts that invoke /sbin/service MarkLogic <command> directly need to have the same environment as the init environment.
Configuration Security Considerations
In order to provide credentials for automated creation of the initial admin user, the variables MARAKLOGIC_ADMIN_USERNAME and MARKLOGIC_ADMIN_PASSWORD need to be set during the startup process described in Deployment and Startup. This is necessary for the initial installation and for rejoining the cluster in the event of a node termination and restart. The password is only used in the initial startup process and not exported to the MarkLogic process or stored on disk.
In order to provide a known password to the system securely, a plain text password should not be stored in /etc/marklogic.conf and passed in EC2 UserData. One simple method recommended by AWS is to make use of a private S3 bucket with encrypted storage and data transmission and in combination with a AMI Role that grants read-only access to the EC2 instances in the cluster. Using the AWS CLI, the password can be securely retrieved and passed to MarkLogic on demand. This command should be placed in /etc/marklogic.conf as the MARKLOGIC_ADMIN_PASSWORD variable.
See the AWS CLI for details: https://docs.aws.amazon.com/cli/latest/userguide/cli-chap-using.html.
The following is an example of a complete /etc/marklogic.conf file that securely retrieves credentials from S3:
export MARKLOGIC_CLUSTER_NAME=JOE-CFN-JOESecure5x-MarkLogicDDBTable-164OK8LD6ARMY
export MARKLOGIC_EBS_VOLUME=vol-1111111
export MARKLOGIC_NODE_NAME=NodeA#
export MARKLOGIC_ADMIN_USERNAME=admin
##
export MARKLOGIC_ADMIN_PASSWORD=\
  $(aws s3 --region us-east-1 cp s3://marklogic.joesbucket/secret-password - )
##
export MARKLOGIC_CLUSTER_MASTER=1
export MARKLOGIC_LICENSEE=none
export MARKLOGIC_LICENSE_KEY=none
export MARKLOGIC_LOG_SNS=arn:aws:sns:us-east-1:02344343341:JOE-LOG-NOTIFY
Variables containing spaces must appear in quotes. For example: MARKLOGIC_LICENSEE="Carp Corporation".
For multiple zone clusters, since EC2 instances are created by the AutoScalingGroup, which uses a single LaunchConfiguration per ASG, the environment is identical for every EC2 instance created in that zone. The configuration variables are designed to allow for the nodes in each zone to have identical configuration values. The same concept is used to allow a variable number of nodes per zone. The configuration in the preceding example can be used for all nodes in a single zone. For each additional zone, the following three values need to be different, but the rest must be identical:
# ... Same as Zone  except for ...
export MARKLOGIC_EBS_VOLUME=vol-2222222
export MARKLOGIC_NODE_NAME=NodeB#
export MARKLOGIC_CLUSTER_MASTER=0
#....
Similar mechanisms can be used, such as connecting to a secure key manager to decrypt an encrypted password stored on disk.
The /etc/marklogic.conf file must be created before the first startup of MarkLogic for the host. If the username and password are changed externally, the password retrieved by /etc/marklogic.conf must return the current password or the node will fail to rejoin the cluster when restarted.
For an example of creating /etc/marklogic.conf with CloudFormation, see Using CloudFormation with Secure Credentials.


