Create a Virtual Machine in Azure
On the Azure Home page, click Virtual machines.
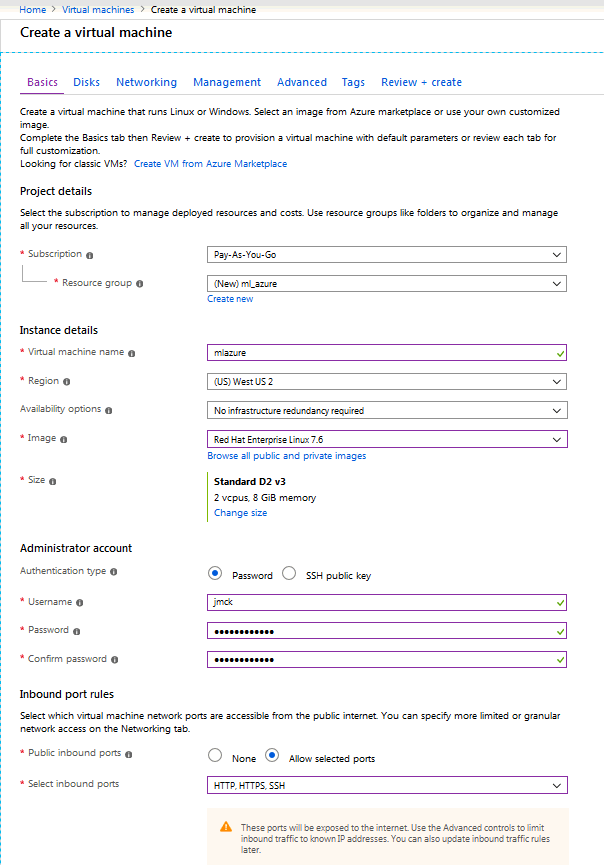
Click Add to create a new virtual machine (VM). This page appears:

Enter information into the fields for the basic setup:
In Resource group, select or create a resource.
In Virtual machine name, enter a name for the new virtual machine.
In Region, select a region to host the virtual machine (for example,
West US 2).In Image, select an image type (for example,
Red Hat).In Authentication type, choose either password (and fill in the username and password fields) or SSH public key.
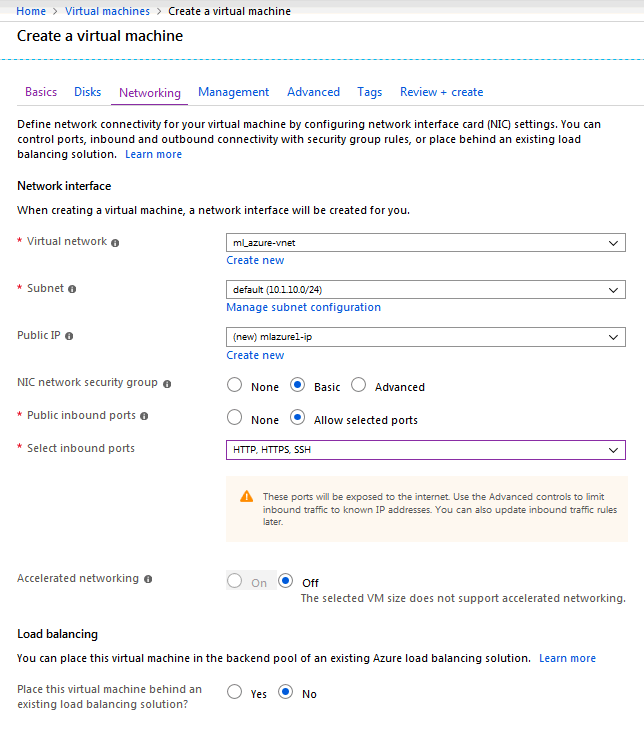
Click the Networking tab. This page appears:

In NIC network security group, select Basic.
In Select inbound ports, select (80, 443, 22).
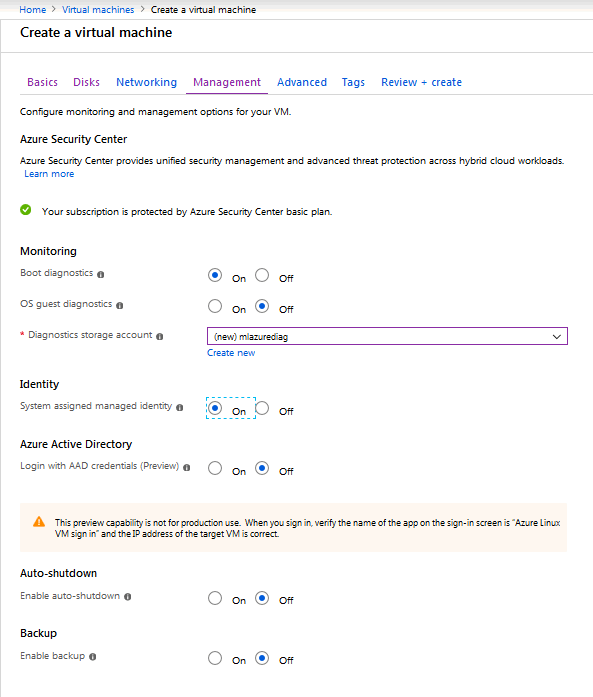
Under the Management tab, set System assigned managed identity to On.

Under the Review tab, enter your preferred email address and phone number.
Review your information and click Create. The create process may take a bit of time.
Once the virtual machine has been created, configure the Key Vault.