Importing a Self-Signed Certificate Authority into Windows
This section describes how to import the Certificate Authority into Windows for use by the Internet Explorer browser and WebDAV clients.
Open the Admin Interface.
Click Security in the left tree menu.
Click Certificate Templates in the left tree menu.
Click the certificate template name on the left tree menu. The Configure certificate template page appears.
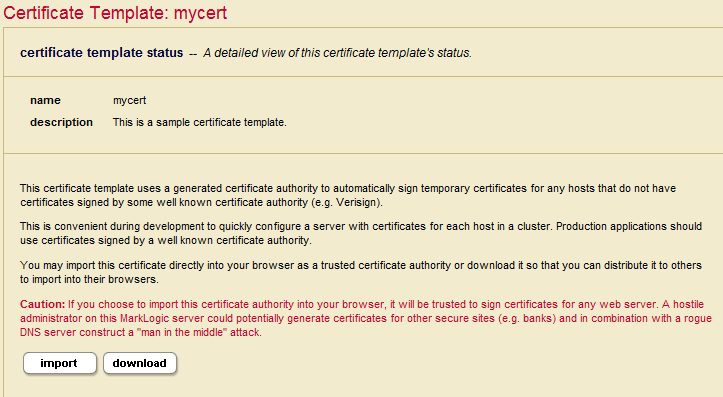
Click the Status tab to display the Certificate Template Status page:

Click Import.
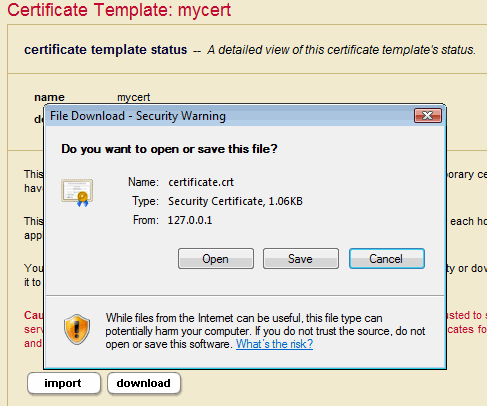
In the Do you want to open or save this file? window, click Open.

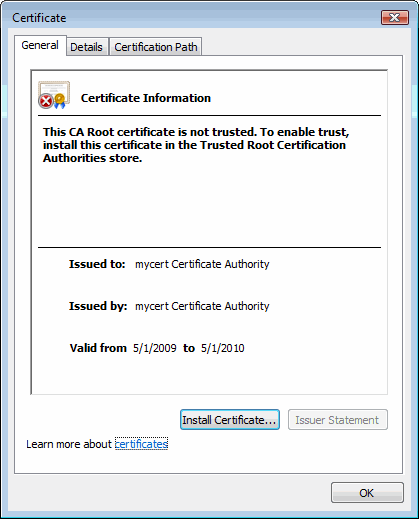
In the Certificate Information window, click Install Certificate.

In the Certificate Import Wizard window, select Place all certificates in the following store and click Browse.
![Certificate Import Wizard Screenshot showing Place all certificates in the following store selected and the location of [Browse]](../../image/1668554c4b157d.gif)
In the Select Certificate Store window, select Trusted Root Certification Authorities and click OK.
![Select Certificate Store Screenshot showing Trusted Root Certification Authorities selected and [OK] highlighted](../../image/1668554c4b8c44.gif)
In the Certificate Import Wizard window, click Next.
On the Completing the Certificate Import Wizard window, select Certificate Store Selected by User and click Finish.
![Certificate Import Wizard Screenshot showing Certificate Store Selected by User selected and [Finish] highlighted](../../image/1668554c4c02f8.gif)
In the Security Warning window, click Yes.
![Security Warning Window Screenshot showing [Yes] highlighted](../../image/1668554c4c997e.gif)
When you see The import was successful pop up, click OK.
![Certificate Import Wizard Screenshot showing The import was successful and [OK] highlighted](../../image/1668554c4d1f9a.gif)
In the Certificate Information window, click OK to exit.
You should now be able to access the SSL-enabled server from your Internet Explorer browser or WebDAV client.