Example: Using the Security Database in Different Servers
The security database typically is used for the entire system, including all of the HTTP, WebDAV, ODBC, and XDBC servers configured. You can create distinct privileges to control access to each server. If each server accesses a different document database, these privileges can effectively control access to each database (because the database is associated with the server). Users must have the appropriate login privileges to log into the server, and therefore they have no way of accessing either the applications or the content stored in the database accessed through that server without possessing the appropriate privilege. This example describes such a scenario.
Consider an example with two databases—DocumentsA and DocumentsB:
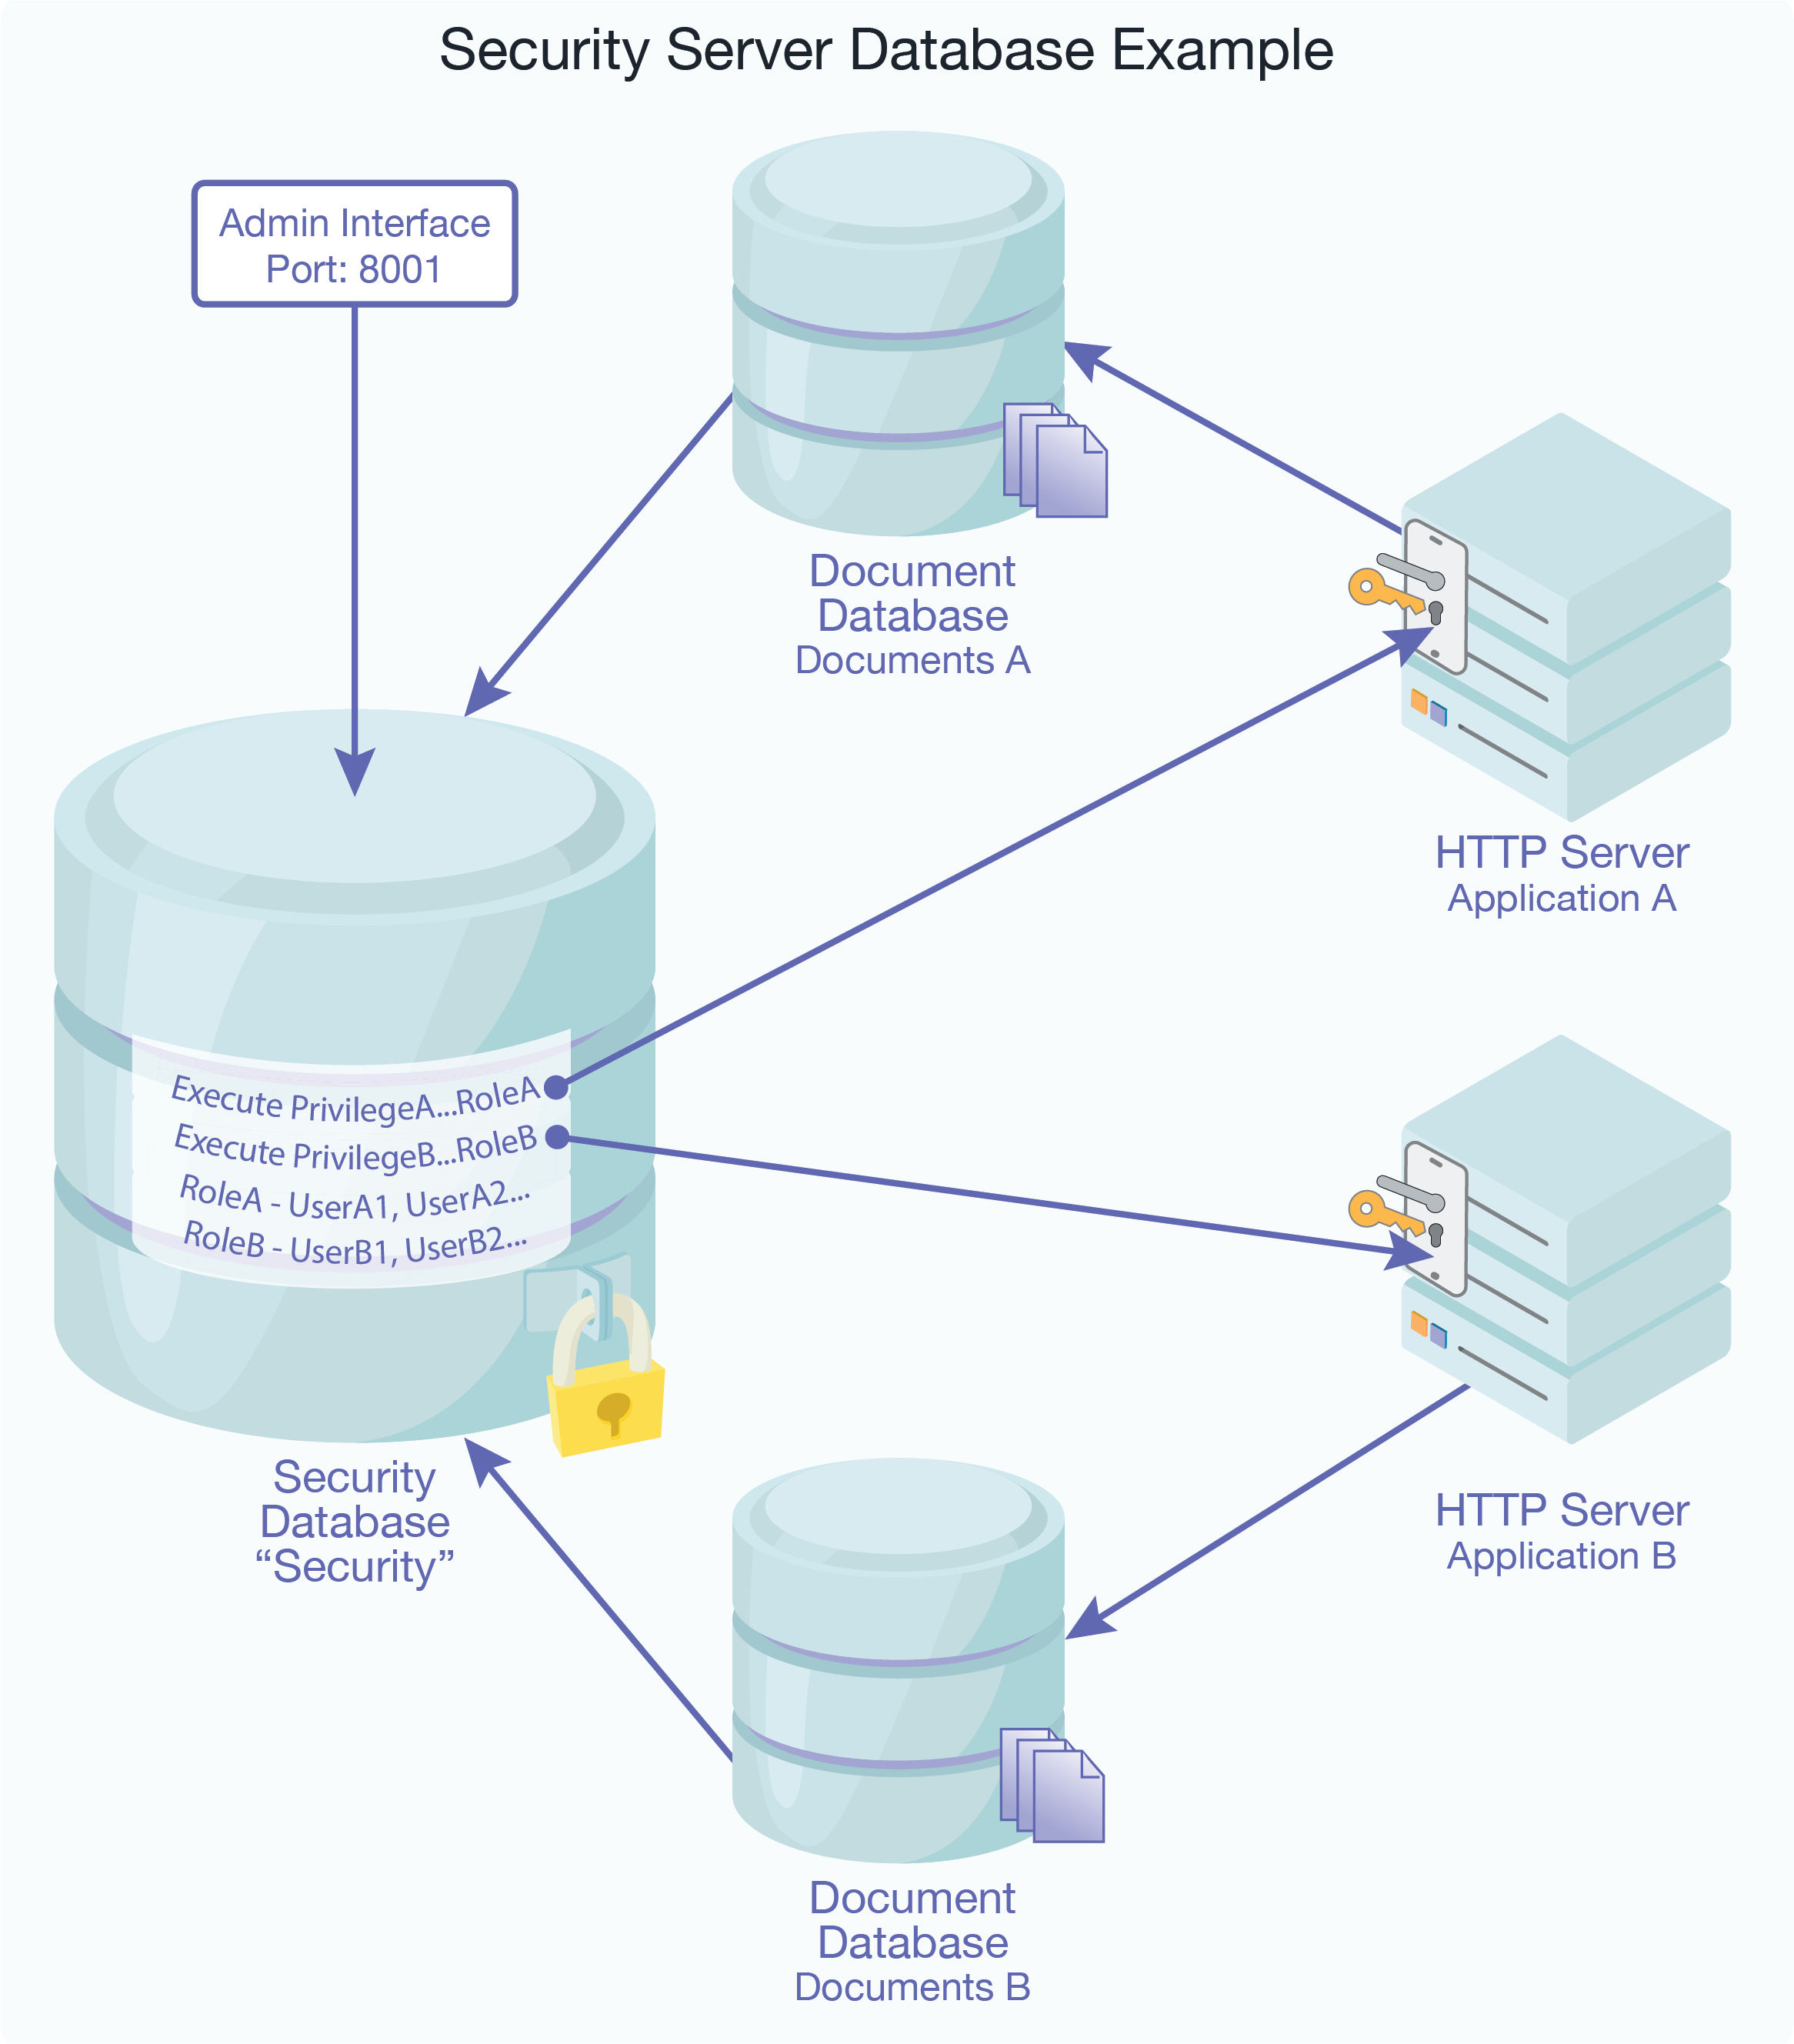
DocumentsA and DocumentsB share a single security database, Security. Security is the default security database managed by the Admin Interface on port 8001. There are two HTTP servers, ApplicationA and ApplicationB, connected to DocumentsA and DocumentsB respectively.
ExecutePrivilegeA controls login access to ApplicationA, and ExecutePrivilegeB to ApplicationB. RoleA is granted ExecutePrivilegeA and RoleB is granted ExecutePrivilegeB.
With this configuration, users who are assigned RoleA can access documents in DocumentsA and users of RoleB can access documents in DocumentsB. Assuming that ExecutePrivilegeA or ExecutePrivilegeB are appropriately configured as login privileges on every HTTP and XDBC server that accesses either DocumentsA or DocumentsB, user access to these databases can conveniently be managed by assigning users the role(s) RoleA and/or RoleB as required.
Note
The Admin Interface at port 8001 is also used to configure all databases, HTTP servers, hosts, and so on. The connection between the Admin Interface and the Security database in the diagram simply indicates that the Admin Interface is storing all security objects—users, roles, and privileges—in Security database.
The steps below outline the process to create the configuration in the above example.
Create two document databases:
DocumentsAandDocumentsB. Leave the security database for the document databases asSecurity(the default setting).Create two execute privileges:
ExecutePrivilegeAandExecutePrivilegeB. They represent the privilege to accessApplicationAandApplicationBrespectively.ApplicationAandApplicationBare two HTTP servers that are created later in this procedure.Note
The new execute privileges created using the Admin Interface are stored in the
Securitydatabase. The new roles and users created below are also stored in theSecuritydatabase.Create two new roles. These roles are used to organize users into groups and to facilitate granting access to users as a group.
Create a new role. Name it
RoleA.Scroll down to the Execute Privileges section and select
ExecutePrivilegeA. This associatesExecutePrivilegeAwithRoleA. Any user assignedRoleAis grantedExecutePrivilegeA.Repeat the steps for
RoleB, selectingExecutePrivilegeBinstead.
Create two new HTTP servers:
Create a new HTTP server. Name it
ApplicationA.Select
DocumentsAas the database.ApplicationAis now attached toDocumentsAwhich in turn usesSecurityas its security database.Select basic, digest or digest-basic authentication scheme.
Select
ExecutePrivilegeAin the privilege drop down menu. This indicates thatExecutePrivilegeAis required to accessApplicationA.Repeat the steps for
ApplicationB, selectingExecutePrivilegeBinstead.
Create new users.
Create a new user named
UserA1.Scroll down to the Roles section and select
RoleA.Repeat the steps for
UserB1, selectingRoleBin the roles section.
UserA1is grantedExecutePrivilegeAby virtue of its role (RoleA) and has login access toApplicationA. BecauseApplicationAis connected toDocumentsA,UserA1is able to access documents inDocumentsAassuming no additional security requirements are implemented inApplicationAor added to documents inDocumentsA. The corresponding is true forUserB1.
The configuration process is now complete. Additional users can be created by simply repeating step 5 and selecting the appropriate role. All users assigned RoleA have login access to ApplicationA and all users assigned RoleB have login access to ApplicationB.
This approach can also be easily extended to handle additional discrete databases and user groups by creating additional document databases, roles and execute privileges as necessary.