MarkLogic 9 Product DocumentationAdministrator's Guide — Chapter 32
Using the Configuration Manager
[DEPRECATED: the Configuration Manager tool is deprecated starting with MarkLogic release 9.0-5 and will be removed from the MarkLogic Server in the future.]
The MarkLogic Server Configuration Manager provides a read-only interface to the Admin Interface and a tool for saving and restoring configuration settings. This chapter includes the following sections:
- Configuration Manager Overview
- Security Considerations
- Accessing the Configuration Manager
- Viewing Configurations
- Searching for a Configuration Setting
- Editing Configuration Settings
- Exporting and Importing Configurations
- Applying Imported Configuration Settings
Configuration Manager Overview
The Configuration Manager allows you to view the configuration settings for MarkLogic Server resources. A resource is a MarkLogic Server object, such as a database, forest, App Server, group or host.
Use the Configuration Manager to:
- Allow non-admin users read-only access to configuration settings for databases, forests, groups, hosts, and App Servers.
- Easily search for resources and configuration settings.
- Safely review settings in read-only mode, then jump directly to the resource in the Admin Interface to modify the settings. (Administrative privileges are required to modify settings).
- Save resource configurations as XML inside a zip folder.
- Import previously saved resource configurations. Importing a configuration allows you to compare versions and update configuration settings.
- View data available through the Management REST API.
For details about the Management REST API, see Using the Management API in the Monitoring MarkLogic Guide.
The Packaging REST API has changed for MarkLogic 7. Applications written using the MarkLogic 6 Packaging REST API (v1) must be rewritten to work with the MarkLogic 7 Packaging REST API (v2).
Security Considerations
To access the Configuration Manager page, users must have the role manage-user. The role does not grant any privileges to modify configuration settings. Users with the manage-user role may:
- Access the Configuration Manager pages to view resources and settings.
- Export configurations to an ZIP file (with the exception of modules databases).
- Import previously saved configurations into the Configuration Manager to view or compare them.
The manage-user role does not grant privileges to edit configuration settings, apply configuration changes from an imported configuration, or to export modules databases. To export the content of modules databases, you must have the manage-admin role. However, you won't be able to see modules that you don't have permissions to access. To install (Apply imported) packages, you must to have the admin privilege.
The manage-internal role is for MarkLogic Server internal use only. Do not assign this role to any users. Assigning this role to users would grant them privileges on the system that you typically do not want them to have.
Accessing the Configuration Manager
To access the Configuration Manager, navigate to the URL or click on the Configuration Manager tab from any application service page.
If the application does not appear, you may not have sufficient privileges. To make full use of the Configuration Manager, you must have the manage-admin security role. See "Security Considerations".
Viewing Configurations
To view the configuration settings for your MarkLogic Server resources, click on the View tab.
The Configuration Manager provides two methods for locating the configuration settings for a particular resource:
Browsing Resource Configurations
To find a resource and view its configuration by browsing:
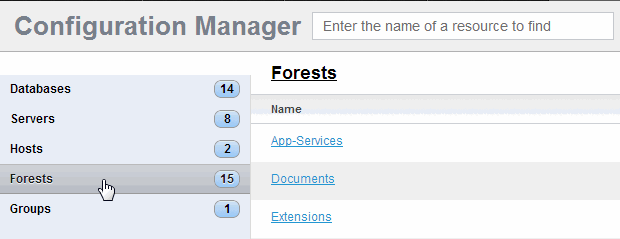
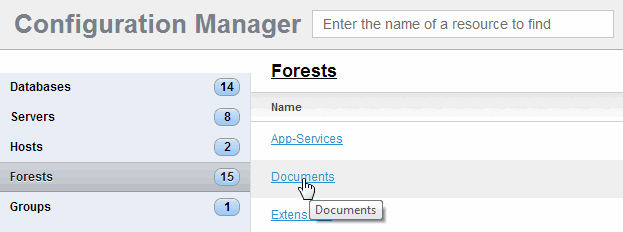
- Click on the resource category in the resource list on the left side of the Configuration Manager. The list of resources in the selected category appears. The number to the right of the resource category name indicates how many of that resource are present:
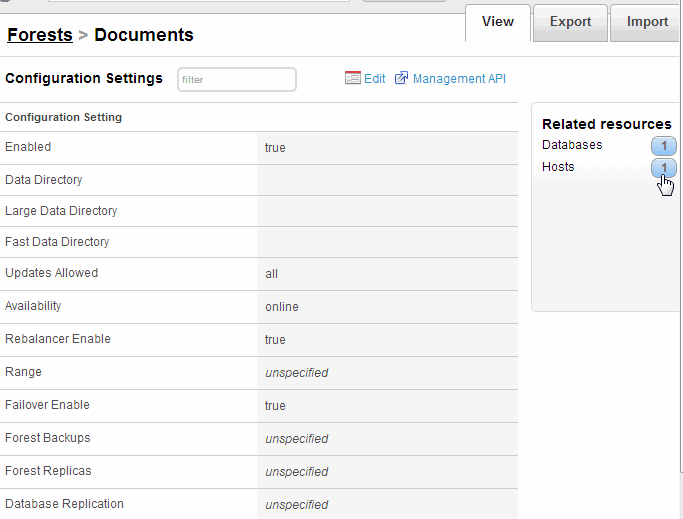
- The Configuration Settings page displays the settings for the selected resource. In the right-hand frame, the resources that are related to the resource are also listed. You can click on a related resource to view its configuration.
For forests with partitions, a Partitions link will be included under related resources.
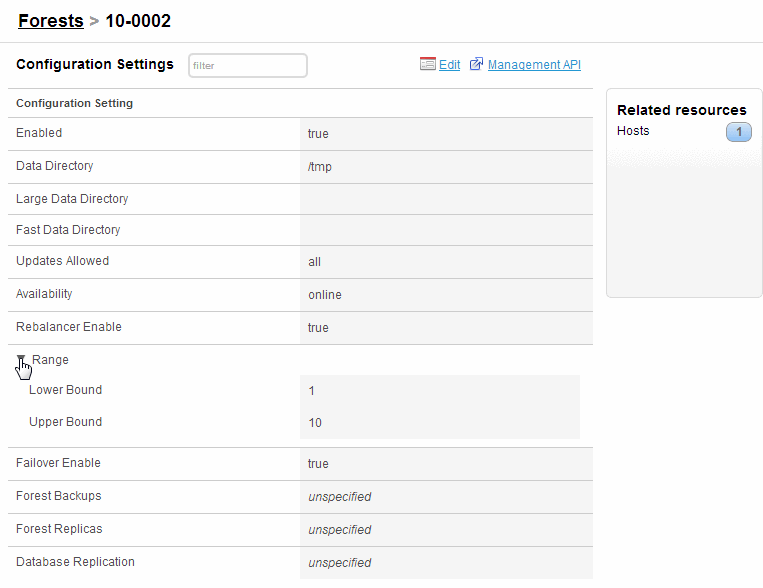
- Some of the configuration settings are collapsed into containers. These are identified by an arrow preceding the container name. You can click on the arrow to expand the container to display the details. For example, to view the forest range settings, you click on the arrow next to the Range container, as shown below:
Searching for a Resource
To search for a resource by name, use the search box at the top of the page. As you type, the Configuration Manager suggests matching resources.
Searching for a Configuration Setting
You may search within a resource configuration for a setting name or value:
- Navigate to the resource you wish to search. See "Viewing Configurations".
- Click in the filter box just above the settings.
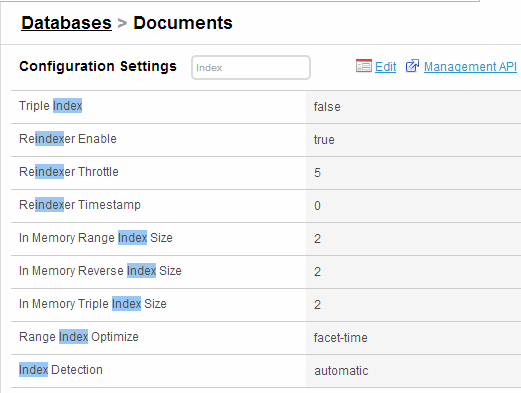
- Begin typing any part of a setting name or value. The configuration settings are filtered as you type. The matching text in each setting is highlighted.
Editing Configuration Settings
Use the Edit feature to open the Admin UI at a particular resource and modify the settings. You may edit resource settings from a resource category list page or from the settings page for a resource.
To edit configuration settings, you must have administrative privileges.
To edit configuration settings for a resource:
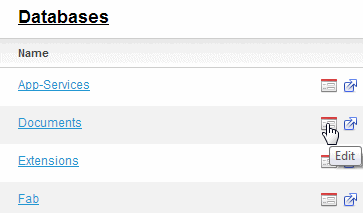
- From a resource category list, click the edit icon to the right of the resource name. The Admin Interface opens to that resource.
- MarkLogic Server includes a REST Management API for collecting resource monitoring and management data, as described in the Using the Management API chapter in the Monitoring MarkLogic Guide. Using the Configuration Manager, you can easily view the data available for a resource through the REST Management API as HTML, XML, or JSON. Though the information available in the Configuration Manager overlaps with the data available through the Management API, the Management API exposes additional data, such as status information. You can view the resource settings in the Management API by clicking on the Management API icon:
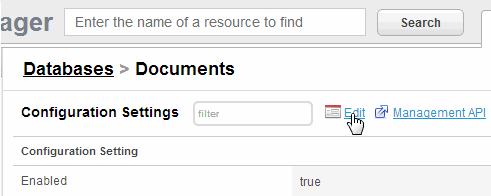
- Links to the Admin Interface and Management API are also available on the resource Configuration Settings page. For example, the Edit icon at the top of a database Configuration Settings page opens the configuration page for that database in the Admin Interface.
Exporting and Importing Configurations
The Configuration Manager allows you to save configuration settings in a zip file, and then later import them to compare configurations and apply updates.
The Configuration Manager provides the following capabilities:
- Exporting a Configuration
- Importing a Configuration
- Comparing Imported Configuration with Current Configuration
Security settings, such as SSL and External Security (LDAP and Kerberos) configurations, cannot be imported from an exported configuration file. If your exported configuration includes a server configured with SSL and/or External Security, you must reconfigure these security settings on the server after importing it to the new host.
You can import a configuration saved in MarkLogic 6 into MarkLogic 7. However, you cannot import a configuration saved in MarkLogic 7 into MarkLogic 6.
Exporting a Configuration
Exporting resource configurations saves them to a zip file.You may import these configurations back in to compare, review, and apply updates.
You can only export App Server and Database configurations. You cannot export Host, Forest, or Group configurations. In addition, you cannot export an App Server or Database that has more than 200 characters in its name.
The following procedure describes how to export a configuration.
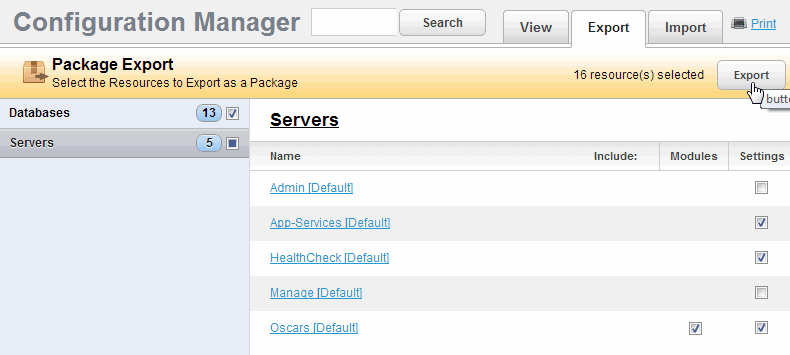
- Navigate to the Configuration Manager and select the Export tab.
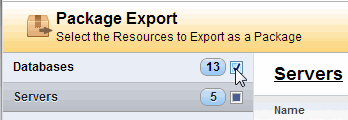
- Select the App Servers and/or Databases for which you want to export the configurations. You can select all of the Databases and or Servers by checking the category name in the left-hand frame. For example, to select all of the Databases, do the following:
A colored-in check box indicates that some, but not all, of the resources in that category have been selected. You can clear all of the selected resources by clicking on the check box until it's clear.
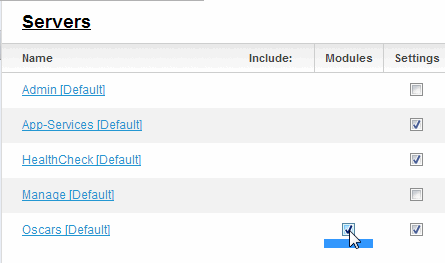
- If an App Server makes use of a modules database, an additional check box appears in the Modules column. Check this box to export the modules database along with the App Server configuration.
You must have the correct roles to export and import a modules database, as described in "Security Considerations".
- After you have selected all of the configurations to be exported, click Export.
A zip file with a name format of package{id}.zip will be downloaded to your browser's download directory. A unique id is produced and added to the name of each exported zip file.
Importing a Configuration
Use the Import feature of the Configuration Manager to upload and apply previously exported configuration packages.
Importing a configuration loads the saved settings into the Configuration Manager. No automatic configuration changes occur. Once you import a configuration (or set of configurations), you may compare the settings with existing configurations and optionally apply configuration changes, as described in "Comparing Imported Configuration with Current Configuration".
The following procedure describes how to import a configuration.
Comparing Imported Configuration with Current Configuration
This section describes how to compare the imported configuration package with your current configuration and determine how the settings are to be applied to your current configuration.
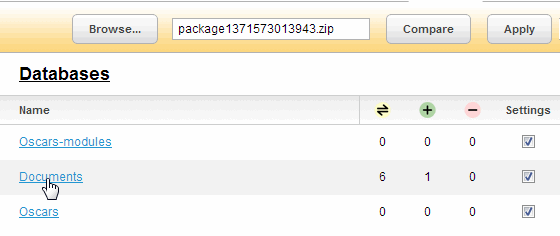
- After importing a configuration, you can click the Compare button to compare the imported configuration with you current configuration.
- You will see a summary of the differences between your current configuration and the imported configuration. To view details of the differences for a resource, click on the resource, as shown for the Documents database below.
The meaning of the Settings symbols are shown in the legend at the bottom left-hand part of the page.
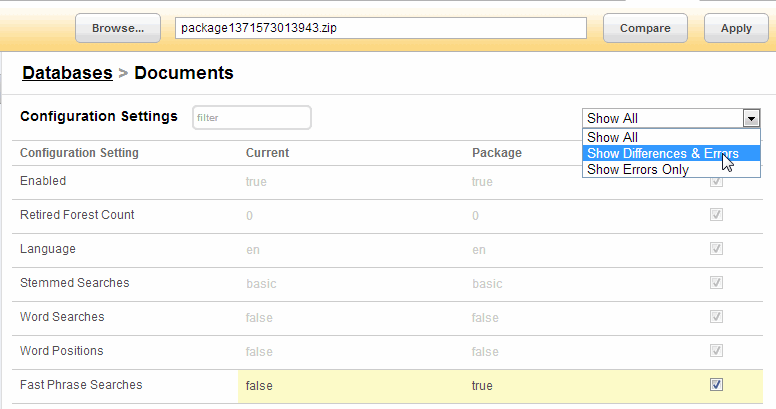
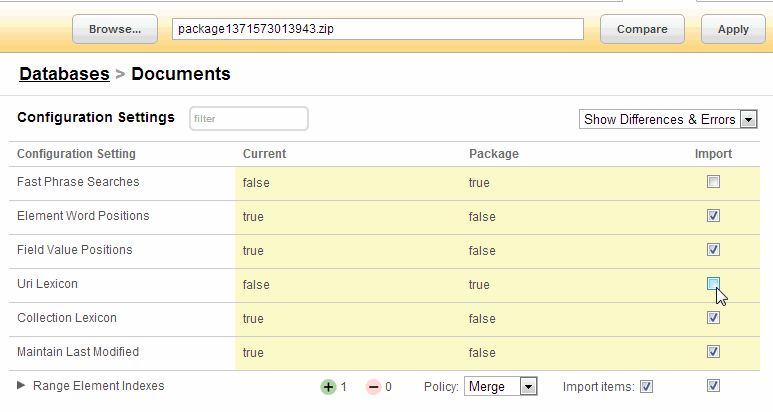
- The resource Configuration Settings page displays the settings for both the Current and Package configurations and highlights any differences and errors, if present. To view only the differences and errors, select Show Differences & Errors from the pull-down menu. To view only the errors, select Show Errors Only.
- By default, all of the packaged settings are imported to your current configuration. If you want to keep a setting in your current configuration that conflicts with the packaged configuration, click on the setting's Import box and uncheck to deselect the setting.
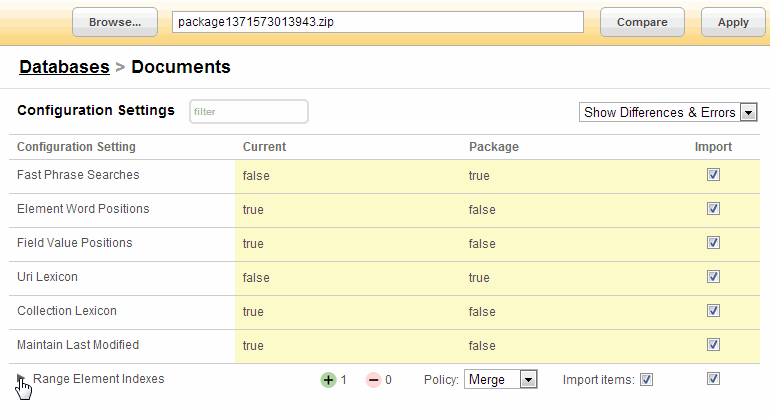
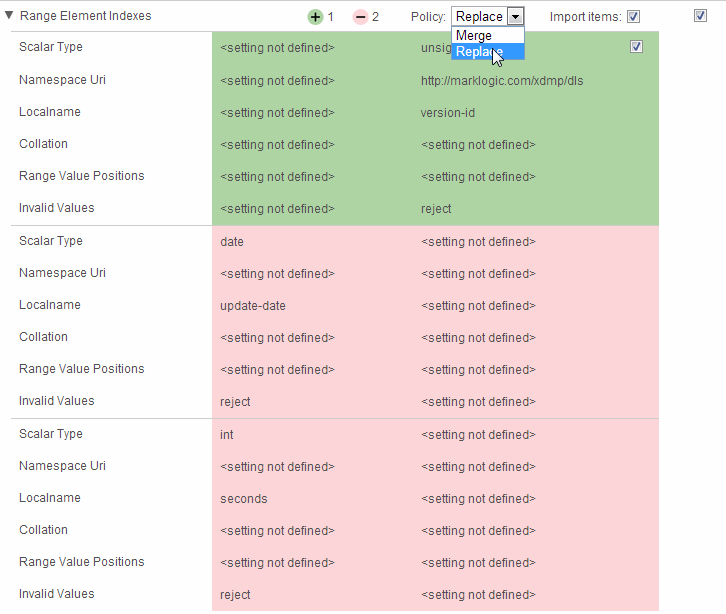
- Some of the configuration settings are collapsed into containers. These are identified by an arrow preceding the container name. You can click on the arrow to expand the container to display the details. For example, to view the differences between the range element index settings, you click on the arrow next to the Range Element Indexes container, as shown below:
- You can set how the container settings are to be imported into your current configuration. Select the Merge policy if you want to import only additional settings. This policy ensures that only new settings are imported and no settings are removed from your current configuration.
Applying Imported Configuration Settings
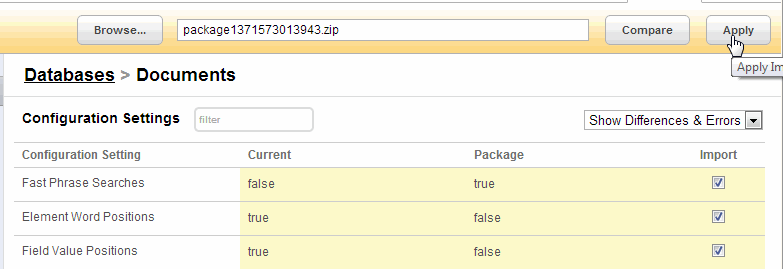
Once you have selected the settings to be used to modify your current configuration, click the Apply button:
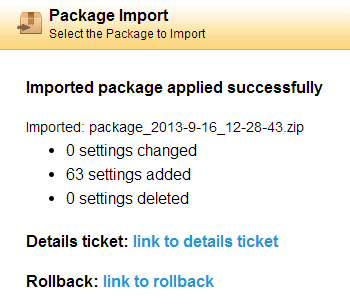
If the Apply Import operation is successful, a summary count of the imported settings is displayed. The import operation generated a ticket that provides the details of the imported resources. You can view this ticket by clicking on Link to Details Ticket. Should you wish to roll back the import operation to restore your previous configuration, click on Link to Rollback.
Rolling back an import operation does not remove the imported forests.


